Home>Home and Garden>How To Clean Night Guard
Home and Garden
How To Clean Night Guard
Published: February 28, 2024
Learn how to effectively clean your night guard at home with our simple and practical tips. Keep your night guard fresh and hygienic for better oral health. Ideal for home and garden enthusiasts.
(Many of the links in this article redirect to a specific reviewed product. Your purchase of these products through affiliate links helps to generate commission for Regretless.com, at no extra cost. Learn more)
Table of Contents
Introduction
Cleaning your night guard is an essential part of maintaining good oral hygiene and ensuring the longevity of your dental appliance. Night guards, also known as dental guards or occlusal splints, are designed to protect your teeth from grinding and clenching during sleep, but they can also harbor bacteria, plaque, and odors if not cleaned regularly. By following a simple cleaning routine, you can keep your night guard fresh, hygienic, and comfortable to wear.
Proper cleaning not only removes the buildup of bacteria and plaque but also helps to prevent discoloration and unpleasant odors. Additionally, maintaining a clean night guard can contribute to the overall health of your mouth and prevent potential oral health issues.
In this comprehensive guide, we will walk you through the step-by-step process of effectively cleaning your night guard. From rinsing with water to using a toothbrush and toothpaste, soaking in denture cleaner, and proper storage, we will cover all the necessary techniques to ensure that your night guard remains clean and well-maintained.
By incorporating these cleaning methods into your regular oral care routine, you can ensure that your night guard continues to provide the protection and comfort you need for a restful night's sleep. Let's delve into the details of each step to help you maintain a clean and hygienic night guard for optimal oral health.
Read more: How To Clean A Tie
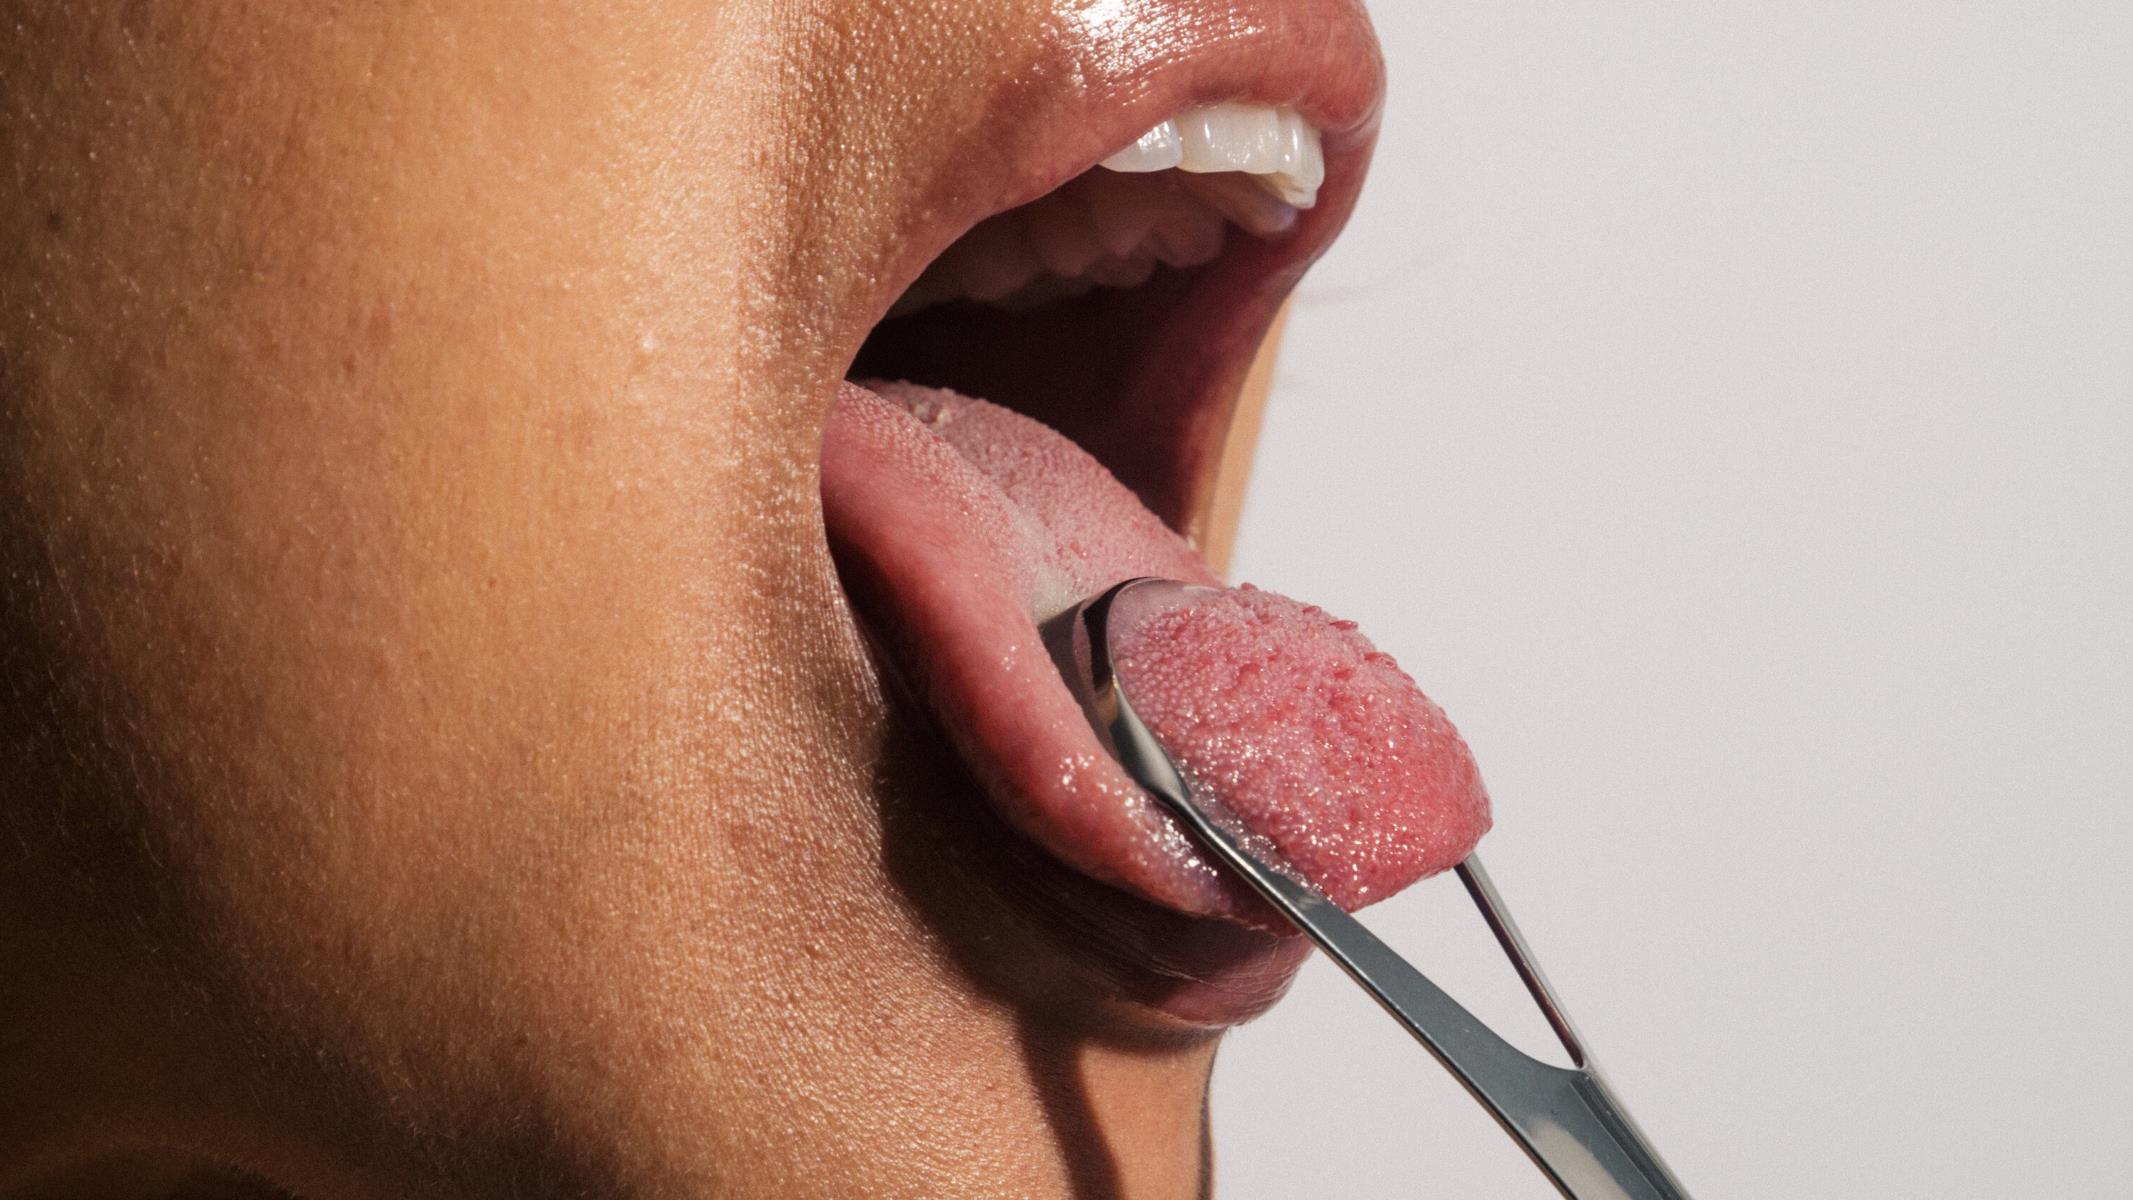
Step 1: Rinse with Water
Rinsing your night guard with water is the first and most crucial step in the cleaning process. This simple yet effective method helps to remove any loose debris, saliva, or oral bacteria that may have accumulated on the surface of the night guard during use. By thoroughly rinsing the night guard under running water, you can quickly eliminate surface impurities before proceeding with more intensive cleaning methods.
To begin, hold your night guard under a stream of lukewarm water from the tap. Gently rotate the night guard to ensure that water reaches all areas, including the crevices and grooves where bacteria and plaque can hide. The use of lukewarm water is recommended, as extreme temperatures can potentially damage the material of the night guard.
While rinsing, you can use a soft-bristled toothbrush to gently scrub the surface of the night guard. This can help dislodge any stubborn particles or residue that may be clinging to the appliance. However, it's important to exercise caution and avoid using a toothbrush with stiff bristles, as this could scratch or damage the night guard.
After thoroughly rinsing the night guard, visually inspect it to ensure that all visible debris has been removed. If necessary, repeat the rinsing process to achieve a clean and refreshed surface. Once the night guard appears free of any visible contaminants, proceed to the next step in the cleaning process.
Rinsing with water not only serves as an initial cleaning step but also prepares the night guard for subsequent cleaning methods, such as using toothpaste, denture cleaner, or specialized cleaning solutions. By incorporating this simple yet essential step into your cleaning routine, you can effectively maintain the cleanliness and hygiene of your night guard, promoting better oral health and overall well-being.
Incorporating regular rinsing with water into your night guard cleaning regimen can help prevent the accumulation of bacteria and plaque, ensuring that your dental appliance remains fresh, comfortable, and free from potential oral health concerns. This foundational cleaning step sets the stage for a thorough and effective cleaning process, ultimately contributing to the longevity and performance of your night guard.
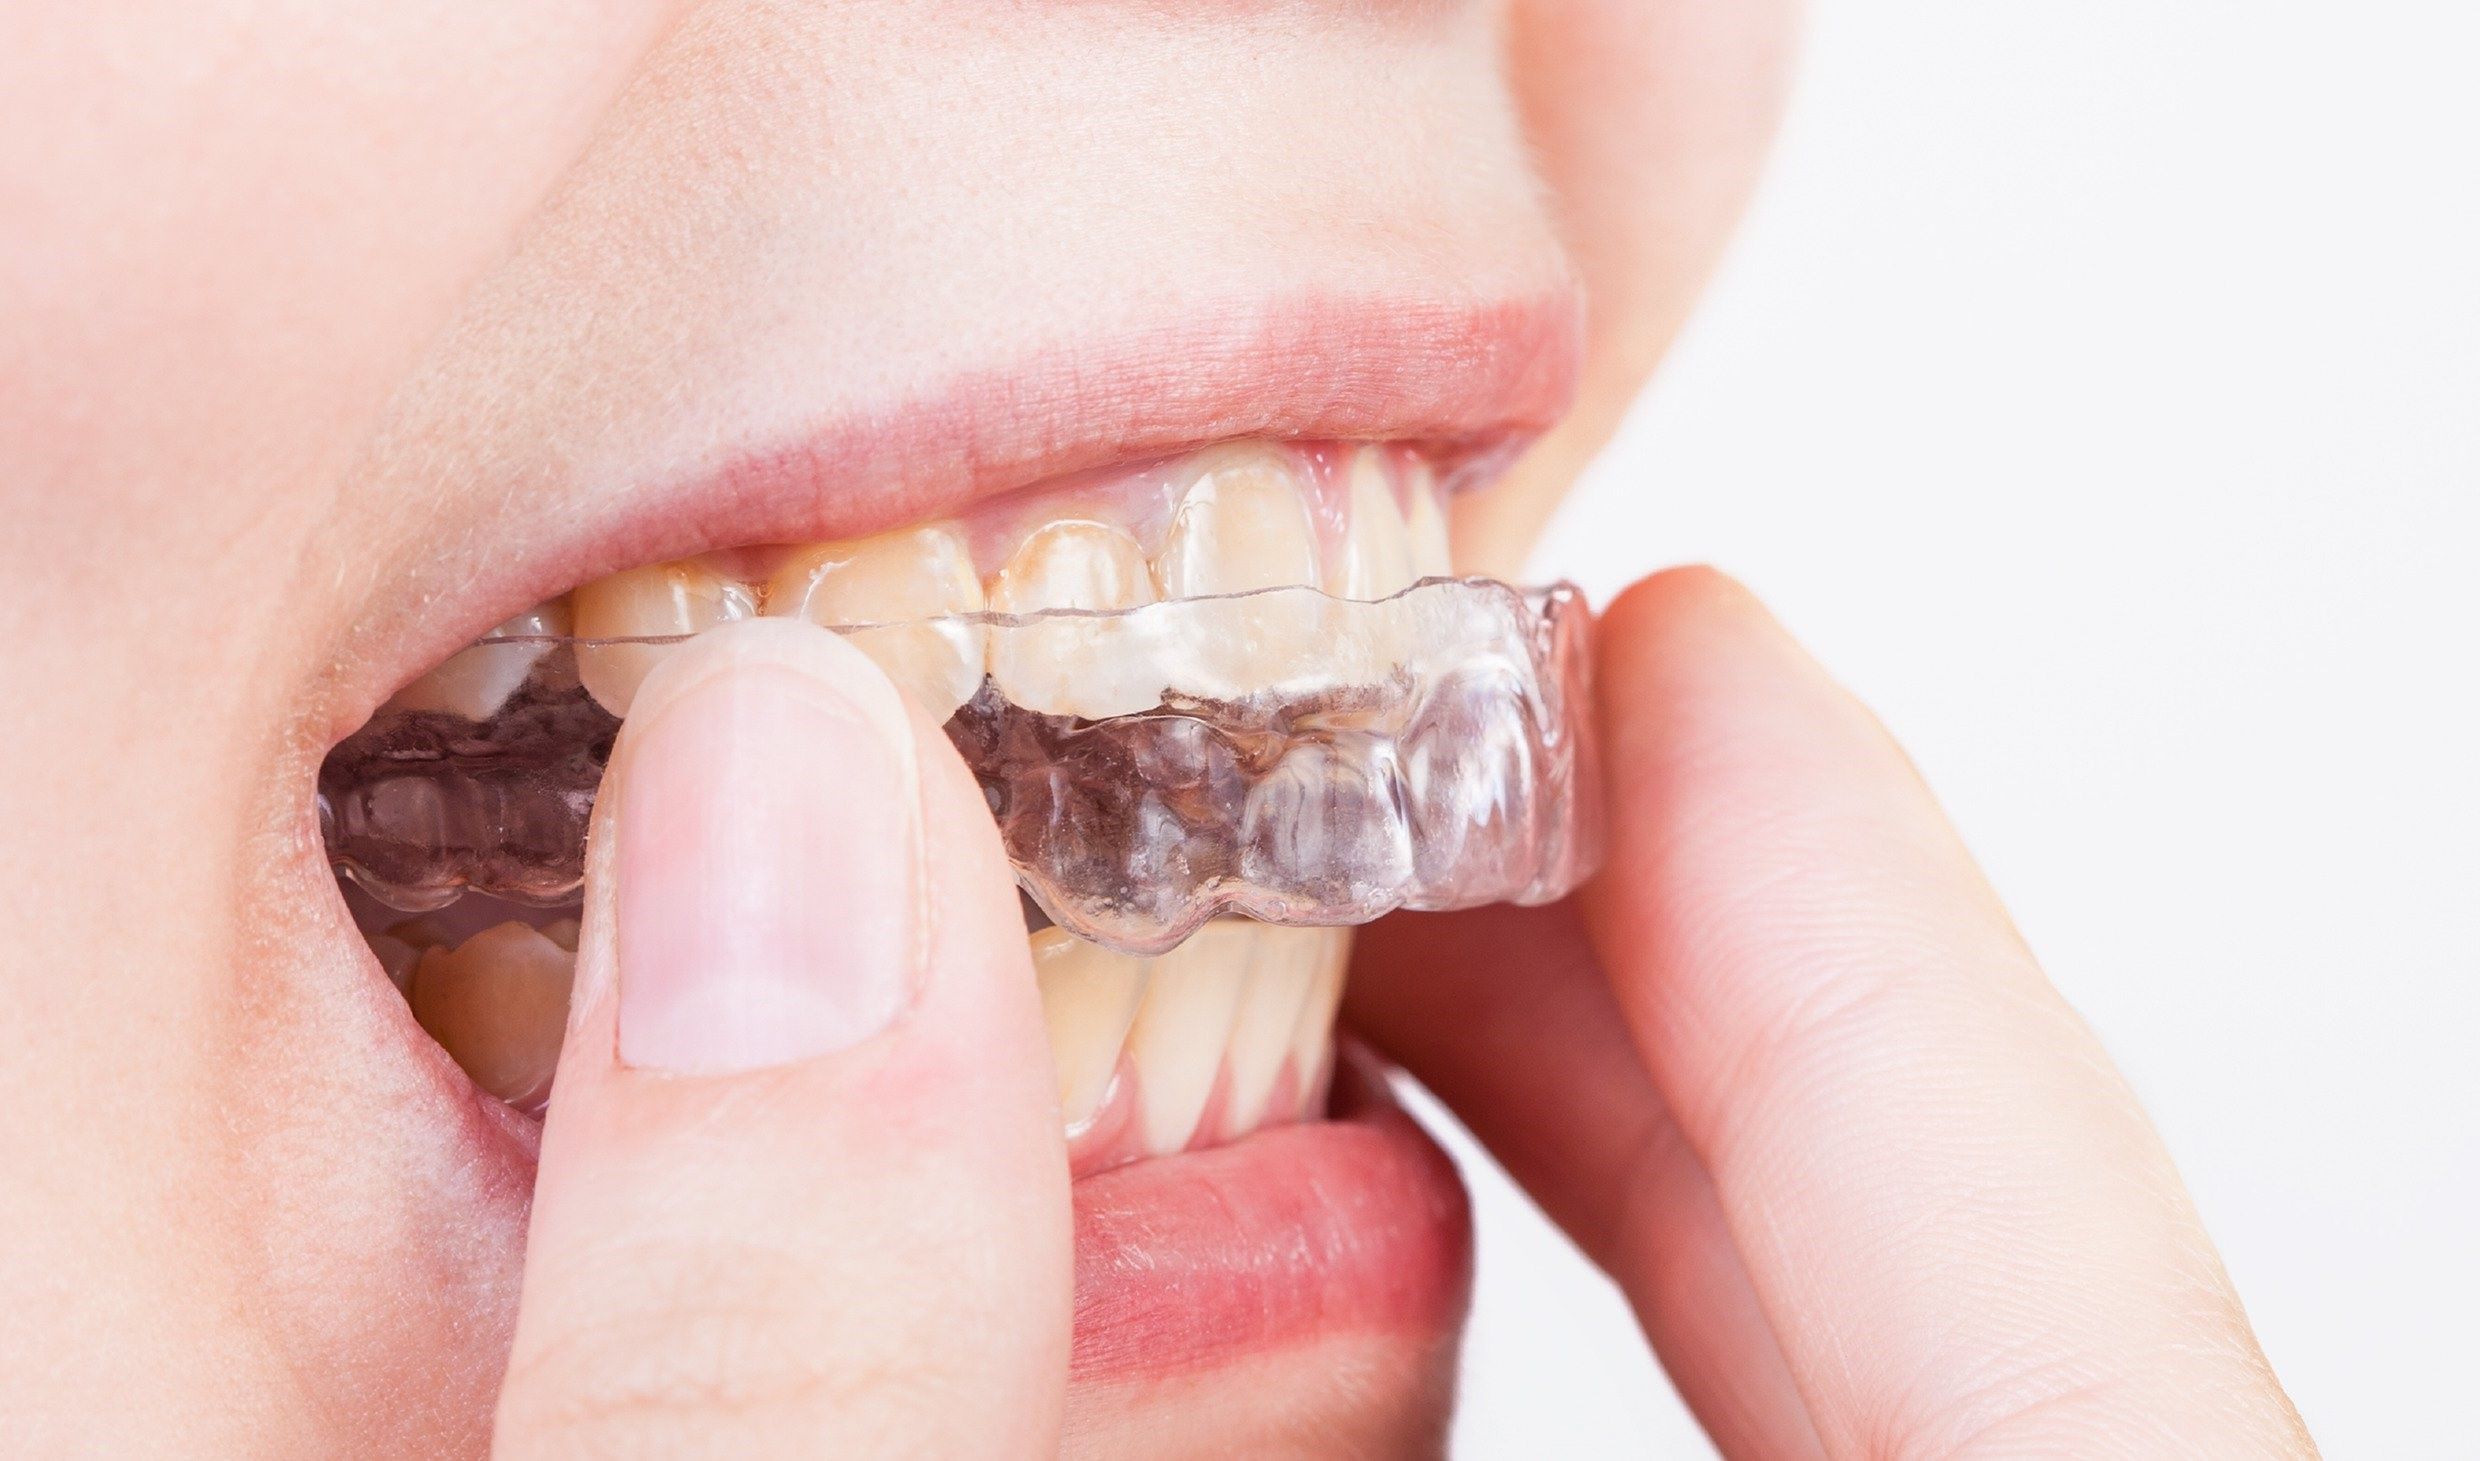
Step 2: Use a Toothbrush and Toothpaste
After rinsing your night guard with water, the next step involves using a toothbrush and toothpaste to achieve a deeper level of cleanliness. This method helps to remove residual plaque, bacteria, and odor-causing agents that may still be clinging to the surface of the night guard. By incorporating toothpaste, which contains mild abrasives and antibacterial properties, you can effectively combat the buildup of impurities and maintain the hygiene of your dental appliance.
To begin, apply a small amount of non-abrasive toothpaste to a soft-bristled toothbrush. It's important to use a toothpaste that is free from harsh abrasives or whitening agents, as these can potentially damage the material of the night guard. Opt for a gentle, non-abrasive toothpaste that is suitable for everyday use, as this will help to ensure the safety and integrity of your night guard.
Next, gently brush the entire surface of the night guard using the toothbrush and toothpaste. Pay close attention to the nooks, crannies, and textured areas of the appliance, as these areas are prone to harboring bacteria and plaque. Use gentle, circular motions to effectively dislodge any remaining impurities and to distribute the toothpaste evenly across the surface of the night guard.
As you brush, take care to avoid using excessive force, as this could potentially cause damage to the night guard. Instead, focus on thorough yet gentle brushing to achieve a clean and refreshed surface. Additionally, be mindful of the inside of the night guard, as this area also requires attention to ensure comprehensive cleaning.
Once you have thoroughly brushed the night guard with toothpaste, rinse it once again under lukewarm water to remove the toothpaste residue. Inspect the appliance to ensure that it appears clean and free from any remaining impurities. If necessary, repeat the brushing process to achieve the desired level of cleanliness.
By incorporating the use of a toothbrush and toothpaste into your night guard cleaning routine, you can effectively combat the accumulation of bacteria, plaque, and odors, promoting optimal oral hygiene and comfort. This method serves as a crucial step in maintaining the cleanliness and freshness of your night guard, ultimately contributing to your overall oral health and well-being.
Incorporating regular cleaning with a toothbrush and toothpaste into your night guard maintenance routine can help ensure that your dental appliance remains hygienic, comfortable, and free from potential oral health concerns. This simple yet effective method can contribute to the longevity and performance of your night guard, allowing you to enjoy the benefits of a clean and well-maintained dental appliance.
Step 3: Soak in Denture Cleaner
Soaking your night guard in denture cleaner is a highly effective method for achieving a deep and thorough clean. Denture cleaner solutions are specifically formulated to target and eliminate bacteria, stains, and odors, making them ideal for maintaining the hygiene and freshness of dental appliances, including night guards.
To begin, prepare a container or glass filled with lukewarm water. Ensure that the water level is sufficient to completely submerge the night guard without overflowing. Next, add the recommended amount of denture cleaner to the water, following the instructions provided on the product packaging. It's important to use a denture cleaner that is safe for night guards and dental appliances, as certain formulations may be too harsh and could potentially damage the material of the night guard.
Once the denture cleaner solution is prepared, carefully place the night guard into the container, ensuring that it is fully immersed in the solution. Allow the night guard to soak for the recommended duration, as specified by the denture cleaner manufacturer. Typically, soaking times may vary, ranging from a few minutes to several hours, depending on the specific product and its cleaning properties.
During the soaking process, the denture cleaner works to penetrate the surface of the night guard, effectively targeting and breaking down any remaining bacteria, plaque, and stains. This thorough cleaning action helps to eliminate odor-causing agents and ensures that the night guard is left clean, fresh, and free from impurities.
After the recommended soaking time has elapsed, carefully remove the night guard from the denture cleaner solution. Rinse it thoroughly under running water to remove any residual cleaner and to ensure that the appliance is free from any lingering cleaning solution. Inspect the night guard to confirm that it appears clean, refreshed, and free from any remaining impurities.
Incorporating the use of denture cleaner into your night guard cleaning routine can significantly enhance the hygiene and cleanliness of your dental appliance. This method provides a deep and comprehensive clean, targeting bacteria, stains, and odors to ensure that your night guard remains fresh, comfortable, and conducive to optimal oral health.
By regularly soaking your night guard in denture cleaner, you can effectively maintain its cleanliness and extend its longevity. This simple yet powerful cleaning method contributes to the overall hygiene and performance of your night guard, allowing you to enjoy the benefits of a clean and well-maintained dental appliance.
Step 4: Rinse and Dry
After completing the previous cleaning steps, the final stage involves rinsing and drying your night guard to ensure that it is thoroughly clean and ready for use. This critical step not only removes any residual cleaning agents but also helps to prevent the growth of bacteria and mold while ensuring that the night guard is comfortable and hygienic.
To begin, carefully rinse the night guard under running water, ensuring that all traces of toothpaste and denture cleaner are completely removed. Thorough rinsing is essential to eliminate any lingering cleaning agents that may cause irritation or discomfort when the night guard is worn. Additionally, visually inspect the night guard to confirm that it appears clean and free from any remaining residue.
Once the night guard has been thoroughly rinsed, it's important to ensure that it is completely dry before storing it. Excess moisture can create an environment conducive to bacterial growth, potentially compromising the cleanliness and hygiene of the night guard. To facilitate drying, gently pat the night guard with a clean, lint-free cloth to absorb any remaining water. Avoid using towels or cloths that may leave behind lint or fibers, as these can adhere to the night guard's surface.
After patting the night guard dry, allow it to air-dry completely before placing it in its storage case. Choose a well-ventilated area with minimal humidity to expedite the drying process. Avoid using heat sources such as hairdryers or direct sunlight, as excessive heat can potentially damage the material of the night guard.
Once the night guard is thoroughly dry, carefully inspect it to ensure that it is clean, comfortable, and free from moisture. Confirm that the appliance is in optimal condition before storing it in its designated case. Properly storing the night guard in its case helps to protect it from dust, debris, and potential damage, ensuring that it remains clean and ready for use.
Incorporating thorough rinsing and proper drying into your night guard cleaning routine is essential for maintaining the hygiene, comfort, and longevity of your dental appliance. By following these steps, you can ensure that your night guard remains clean, fresh, and conducive to optimal oral health, providing you with the protection and comfort you need for a restful night's sleep.
Read more: How To Clean Diva Cup
Step 5: Store Properly
Proper storage of your night guard is crucial for maintaining its cleanliness, integrity, and effectiveness. After completing the cleaning process, it's essential to store your night guard in a designated case to protect it from environmental contaminants and potential damage. By following proper storage practices, you can ensure that your night guard remains hygienic, comfortable, and ready for use.
To begin, carefully inspect the night guard to confirm that it is completely dry before storing it. Excess moisture can create an environment conducive to bacterial growth, potentially compromising the cleanliness and hygiene of the night guard. Additionally, ensure that the night guard is free from any residual cleaning agents, as these can cause discomfort or irritation if left in contact with the skin.
Once the night guard is dry and free from any remaining residue, place it in its designated storage case. Choose a case that provides ample protection and ventilation for the night guard, allowing air to circulate while safeguarding it from dust and debris. Avoid storing the night guard in airtight containers or plastic bags, as these can trap moisture and promote bacterial growth.
When selecting a storage location for your night guard, opt for a clean, dry area away from direct sunlight and extreme temperatures. Excessive heat can potentially distort the shape of the night guard, while prolonged exposure to sunlight may cause discoloration or damage to the material. Additionally, avoid placing the night guard near sources of moisture or in areas prone to humidity, as this can compromise its cleanliness and hygiene.
Regularly clean the storage case to prevent the accumulation of dust, bacteria, or odors that could transfer to the night guard. Use a mild soap and water to gently clean the case, ensuring that it is thoroughly dried before placing the night guard inside. By maintaining a clean and hygienic storage environment, you can further safeguard the cleanliness and integrity of your night guard.
By following these proper storage practices, you can ensure that your night guard remains clean, fresh, and conducive to optimal oral health. Proper storage not only protects the night guard from environmental contaminants but also helps to maintain its shape, comfort, and effectiveness. Incorporating these storage guidelines into your night guard maintenance routine can contribute to the longevity and performance of your dental appliance, allowing you to enjoy the benefits of a clean and well-maintained night guard.
Conclusion
In conclusion, maintaining a clean night guard is essential for promoting optimal oral hygiene, preventing oral health issues, and ensuring the longevity of the dental appliance. By following a comprehensive cleaning routine that includes rinsing with water, using a toothbrush and toothpaste, soaking in denture cleaner, and proper storage, individuals can effectively preserve the cleanliness and hygiene of their night guards.
Regular rinsing with water serves as a foundational step, helping to remove surface impurities and prepare the night guard for subsequent cleaning methods. The use of a toothbrush and toothpaste allows for a deeper level of cleanliness, targeting residual plaque, bacteria, and odors to ensure a refreshed and hygienic surface. Soaking the night guard in denture cleaner provides a thorough and comprehensive clean, effectively eliminating bacteria, stains, and odors to maintain the freshness and hygiene of the appliance.
The final steps of rinsing and drying, followed by proper storage, are crucial for safeguarding the cleanliness, integrity, and effectiveness of the night guard. Thorough rinsing removes any residual cleaning agents, while proper drying prevents the growth of bacteria and mold. Additionally, storing the night guard in a designated case protects it from environmental contaminants and potential damage, ensuring that it remains clean, fresh, and ready for use.
By incorporating these cleaning and maintenance practices into their regular oral care routine, individuals can enjoy the benefits of a clean and well-maintained night guard. Not only does a clean night guard contribute to better oral health and overall well-being, but it also provides comfort and protection against teeth grinding and clenching during sleep.
In essence, the process of cleaning a night guard is not only about removing impurities but also about promoting oral health, comfort, and peace of mind. By dedicating time and attention to the cleanliness and maintenance of their night guards, individuals can ensure that these essential dental appliances continue to serve their intended purpose effectively, allowing for restful and rejuvenating sleep without compromising oral health.