Home>Food and Cooking>How To Fillet A Trout
Food and Cooking
How To Fillet A Trout
Published: March 6, 2024
Learn the step-by-step process of filleting a trout with expert tips and techniques. Enhance your food and cooking skills with this comprehensive guide.
(Many of the links in this article redirect to a specific reviewed product. Your purchase of these products through affiliate links helps to generate commission for Regretless.com, at no extra cost. Learn more)
Table of Contents
Introduction
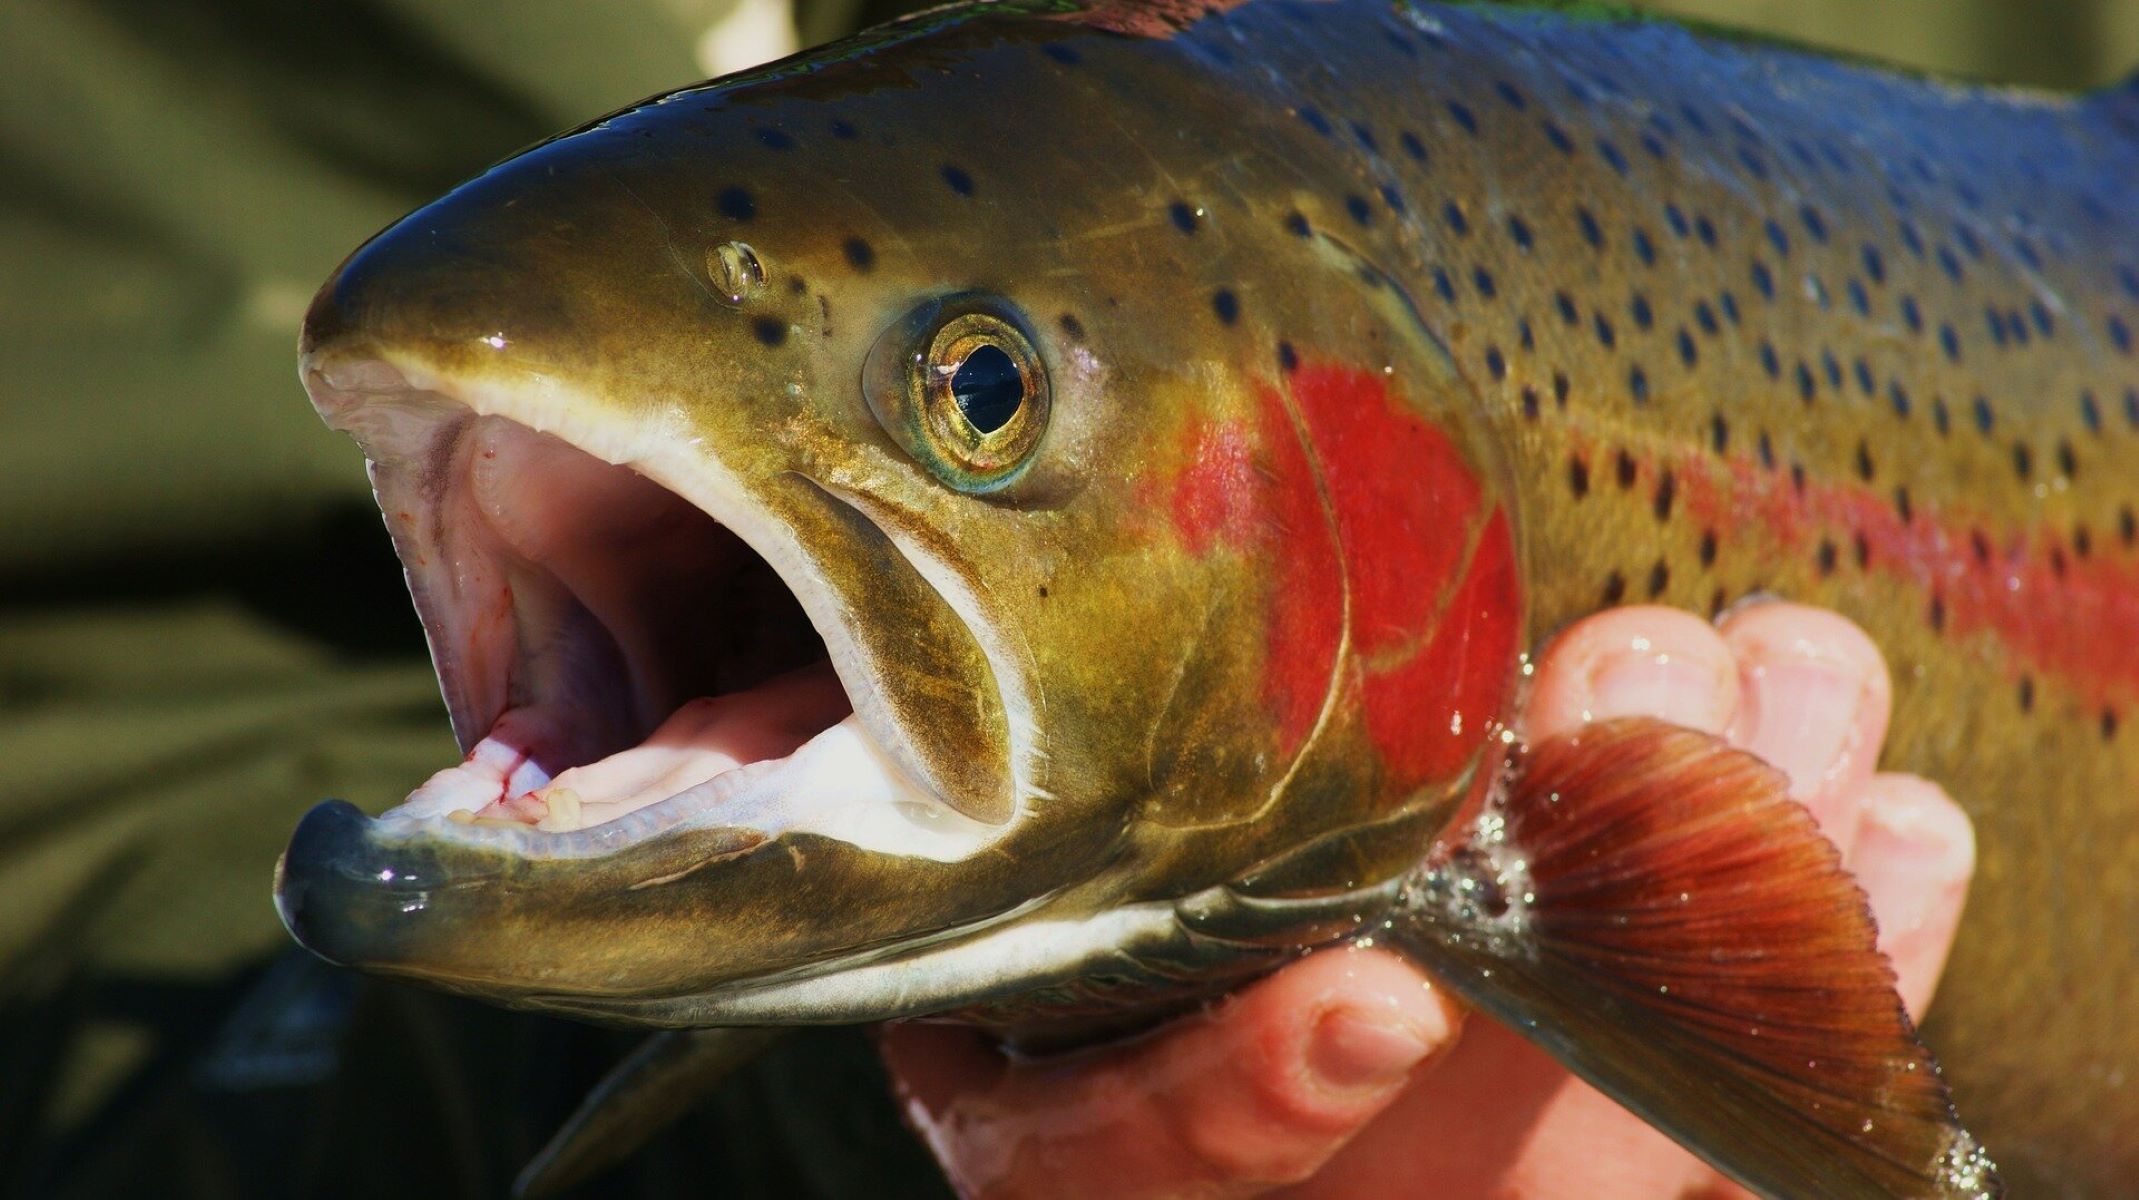
Filletting a trout is a fundamental skill for any angler or cooking enthusiast. This process involves delicately removing the flesh from the bones, resulting in boneless fillets that are perfect for grilling, pan-searing, or baking. While it may seem daunting at first, with the right tools, techniques, and a bit of practice, anyone can master the art of filletting a trout.
In this comprehensive guide, we will walk you through the step-by-step process of filletting a trout, from preparing the fish to obtaining pristine fillets ready for cooking. Whether you're a seasoned angler looking to prepare your fresh catch or a home cook eager to explore the world of seafood, mastering the art of filletting a trout will open up a world of culinary possibilities.
So, grab your fillet knife, sharpen your skills, and let's dive into the intricacies of filletting a trout. By the end of this guide, you'll be equipped with the knowledge and confidence to expertly fillet a trout and elevate your culinary repertoire.
Read more: How To Fillet A Catfish
Tools and Equipment Needed
Before embarking on the journey of filleting a trout, it's essential to gather the necessary tools and equipment. Having the right gear at your disposal will not only streamline the filleting process but also ensure precision and safety. Here's a comprehensive list of the tools and equipment you'll need:
-
Fillet Knife: A sharp, flexible fillet knife is the cornerstone of trout filleting. Look for a knife specifically designed for filleting fish, featuring a thin, flexible blade that allows for precise cuts along the fish's contours.
-
Cutting Board: Choose a sturdy, non-slip cutting board with ample space to comfortably maneuver the trout. Opt for a board with a groove around the edges to catch any juices or scales, keeping your workspace clean.
-
Kitchen Shears or Scissors: These will come in handy for trimming fins and removing any remaining small bones.
-
Fish Tweezers or Pliers: These specialized tools are designed to remove pin bones from the fillets with ease, ensuring a smooth and boneless final product.
-
Gloves: While not mandatory, wearing a cut-resistant glove on the hand holding the fish can provide added safety and grip, especially for beginners.
-
Paper Towels: Keep a stack of paper towels nearby to pat the trout dry and maintain a clean work surface.
-
Container for Discards: Have a designated container or plastic bag for the fish scraps, including the head, innards, and scales, to keep your workspace organized.
-
Sharpening Stone or Honing Steel: Ensure your fillet knife is razor-sharp before starting. A dull knife can make the process more challenging and compromise the quality of the fillets.
By assembling these essential tools and equipment, you'll be well-prepared to tackle the filleting process with confidence and precision. With the right gear at your disposal, you're one step closer to mastering the art of filletting a trout and unlocking a world of culinary possibilities.
Step 1: Prepare the Trout
Before diving into the filleting process, it's crucial to properly prepare the trout to ensure a seamless and efficient experience. Preparation sets the stage for a successful filleting endeavor and contributes to the overall quality of the fillets. Here's a detailed breakdown of the essential steps to prepare the trout for filleting:
-
Chill the Trout: If the trout is freshly caught, ensure it is properly chilled to maintain its freshness and firm texture. Ideally, place the trout on a bed of ice or in the refrigerator until you're ready to begin the filleting process.
-
Rinse the Trout: Before handling the trout, give it a thorough rinse under cold water to remove any residual slime, blood, or loose scales. Gently pat the trout dry with paper towels to ensure a clean and manageable surface for filleting.
-
Secure the Trout: Lay the trout on a clean, non-slip cutting board, positioning it horizontally with the head to your non-dominant side if you're right-handed (or vice versa if left-handed). This orientation provides optimal access for the filleting process.
-
Remove Excess Moisture: Using paper towels, gently blot the trout to absorb any remaining moisture. Dry skin facilitates a better grip and prevents the fish from slipping during filleting.
-
Positioning: Ensure the trout is positioned with its belly facing up and the dorsal (back) side facing down. This orientation allows for easier access to the belly and ensures a stable cutting surface.
By meticulously preparing the trout, you set the stage for a smooth and efficient filleting process. These preparatory steps not only contribute to the overall quality of the fillets but also establish a foundation for a successful filleting experience. With the trout properly chilled, cleaned, and positioned, you're now ready to embark on the next steps of the filleting journey.
Step 2: Remove the Head
With the trout securely positioned on the cutting board, it's time to tackle the initial step of the filleting process: removing the head. This step requires precision and a steady hand to cleanly separate the head from the body, setting the stage for the subsequent filleting maneuvers. Here's a detailed breakdown of the process:
-
Positioning the Knife: Hold the fillet knife with your dominant hand, ensuring a firm grip and steady control. Position the knife at a slight angle behind the trout's pectoral fin, just below the gills. This angle allows for a smooth and precise cut, minimizing any unnecessary damage to the flesh.
-
Make the Incision: With a confident and controlled motion, make a diagonal incision behind the pectoral fin, angling the knife towards the trout's head. Apply gentle pressure to penetrate through the flesh and reach the spine, ensuring a clean and decisive cut.
-
Continue the Cut: Once the initial incision is made, smoothly guide the knife along the trout's body towards the head, maintaining a consistent angle to facilitate a seamless separation. Exercise caution to avoid excessive sawing motions, aiming for a swift and fluid cut to minimize any unnecessary trauma to the flesh.
-
Complete the Removal: As the knife reaches the base of the head, apply a final decisive motion to completely detach the head from the body. Ensure a clean and precise cut to leave behind a neatly filleted body, ready for the subsequent steps of the filleting process.
By deftly executing the process of removing the head, you set the stage for the subsequent stages of filleting, paving the way for the extraction of pristine fillets from the trout's body. With the head successfully removed, you're now poised to delve into the intricacies of extracting the delectable fillets, unlocking a world of culinary possibilities with your freshly prepared trout.
Step 3: Remove the Innards
With the trout's head successfully removed, the next crucial step in the filleting process involves delicately removing the innards to prepare the fish for the subsequent filleting maneuvers. This step requires precision and a methodical approach to ensure the thorough extraction of the innards while preserving the integrity of the fish's flesh. Here's a detailed breakdown of the process:
-
Create an Incision: Lay the trout on the cutting board with the belly facing up, exposing the abdominal cavity. Using the tip of the fillet knife, make a shallow incision along the belly, starting from the anal vent near the tail and extending towards the gills. Exercise caution to avoid piercing the internal organs, aiming for a clean and controlled incision.
-
Gently Open the Cavity: With the initial incision made, carefully use your fingers to gently pry open the abdominal cavity, revealing the innards nestled within. Exercise patience and finesse to avoid damaging the surrounding flesh, ensuring a gradual and controlled approach to opening the cavity.
-
Extract the Innards: Using the tip of the fillet knife or kitchen shears, delicately separate the innards from the surrounding tissues, taking care to avoid puncturing the organs. With a steady hand, gently lift the innards from the cavity and place them in the designated discard container, maintaining a clean and organized workspace.
-
Thorough Cleaning: After the innards are removed, thoroughly rinse the abdominal cavity under cold water to eliminate any residual traces. Use your fingers to gently scrape away any remaining blood or membranes, ensuring the cavity is impeccably clean and ready for the subsequent filleting steps.
-
Pat Dry and Inspect: Once the innards are extracted and the cavity is cleaned, use paper towels to pat the interior dry, removing any excess moisture. Take a moment to inspect the cavity, ensuring no remnants are left behind, and the trout is impeccably prepared for the next phase of the filleting process.
By meticulously executing the process of removing the innards, you pave the way for the seamless extraction of pristine fillets from the trout's body. With the innards delicately removed and the abdominal cavity impeccably cleaned, you're now poised to proceed to the subsequent stages of filleting, unlocking a world of culinary possibilities with your expertly prepared trout.
Step 4: Remove the Scales
With the trout's innards successfully removed and the abdominal cavity impeccably cleaned, the next pivotal step in the filleting process involves the meticulous removal of the scales. While trout scales are edible and can be left on for certain cooking methods, such as grilling or broiling, many prefer to remove them to achieve a smoother texture and enhance the overall presentation of the fillets. Here's a detailed breakdown of the process:
-
Secure the Trout: Position the trout on the cutting board with the skin side facing up, ensuring a stable and secure placement. This orientation provides optimal access to the scales and facilitates a controlled scaling process.
-
Begin Scaling: Using a fish scaler or the back of a knife, gently scrape against the grain of the scales, starting from the tail and working towards the head. Apply moderate pressure to effectively dislodge the scales while minimizing damage to the skin.
-
Work Methodically: Approach the scaling process methodically, ensuring thorough coverage of the entire skin surface. Pay close attention to areas near the dorsal fin and lateral line, as scales tend to be more prominent in these regions.
-
Rinse and Inspect: Once the scaling is complete, rinse the trout under cold water to remove any loose scales and residue. Take a moment to inspect the skin, ensuring all scales have been effectively removed and the surface is smooth and pristine.
-
Pat Dry: Gently pat the scaled skin dry with paper towels, removing any excess moisture. A dry surface facilitates better grip and ensures a seamless transition to the subsequent filleting steps.
By meticulously executing the process of removing the scales, you prepare the trout for the final stages of filleting, setting the stage for the extraction of pristine fillets. With the scales delicately removed and the skin impeccably prepped, you're now poised to proceed to the subsequent stages of filleting, unlocking a world of culinary possibilities with your expertly prepared trout.
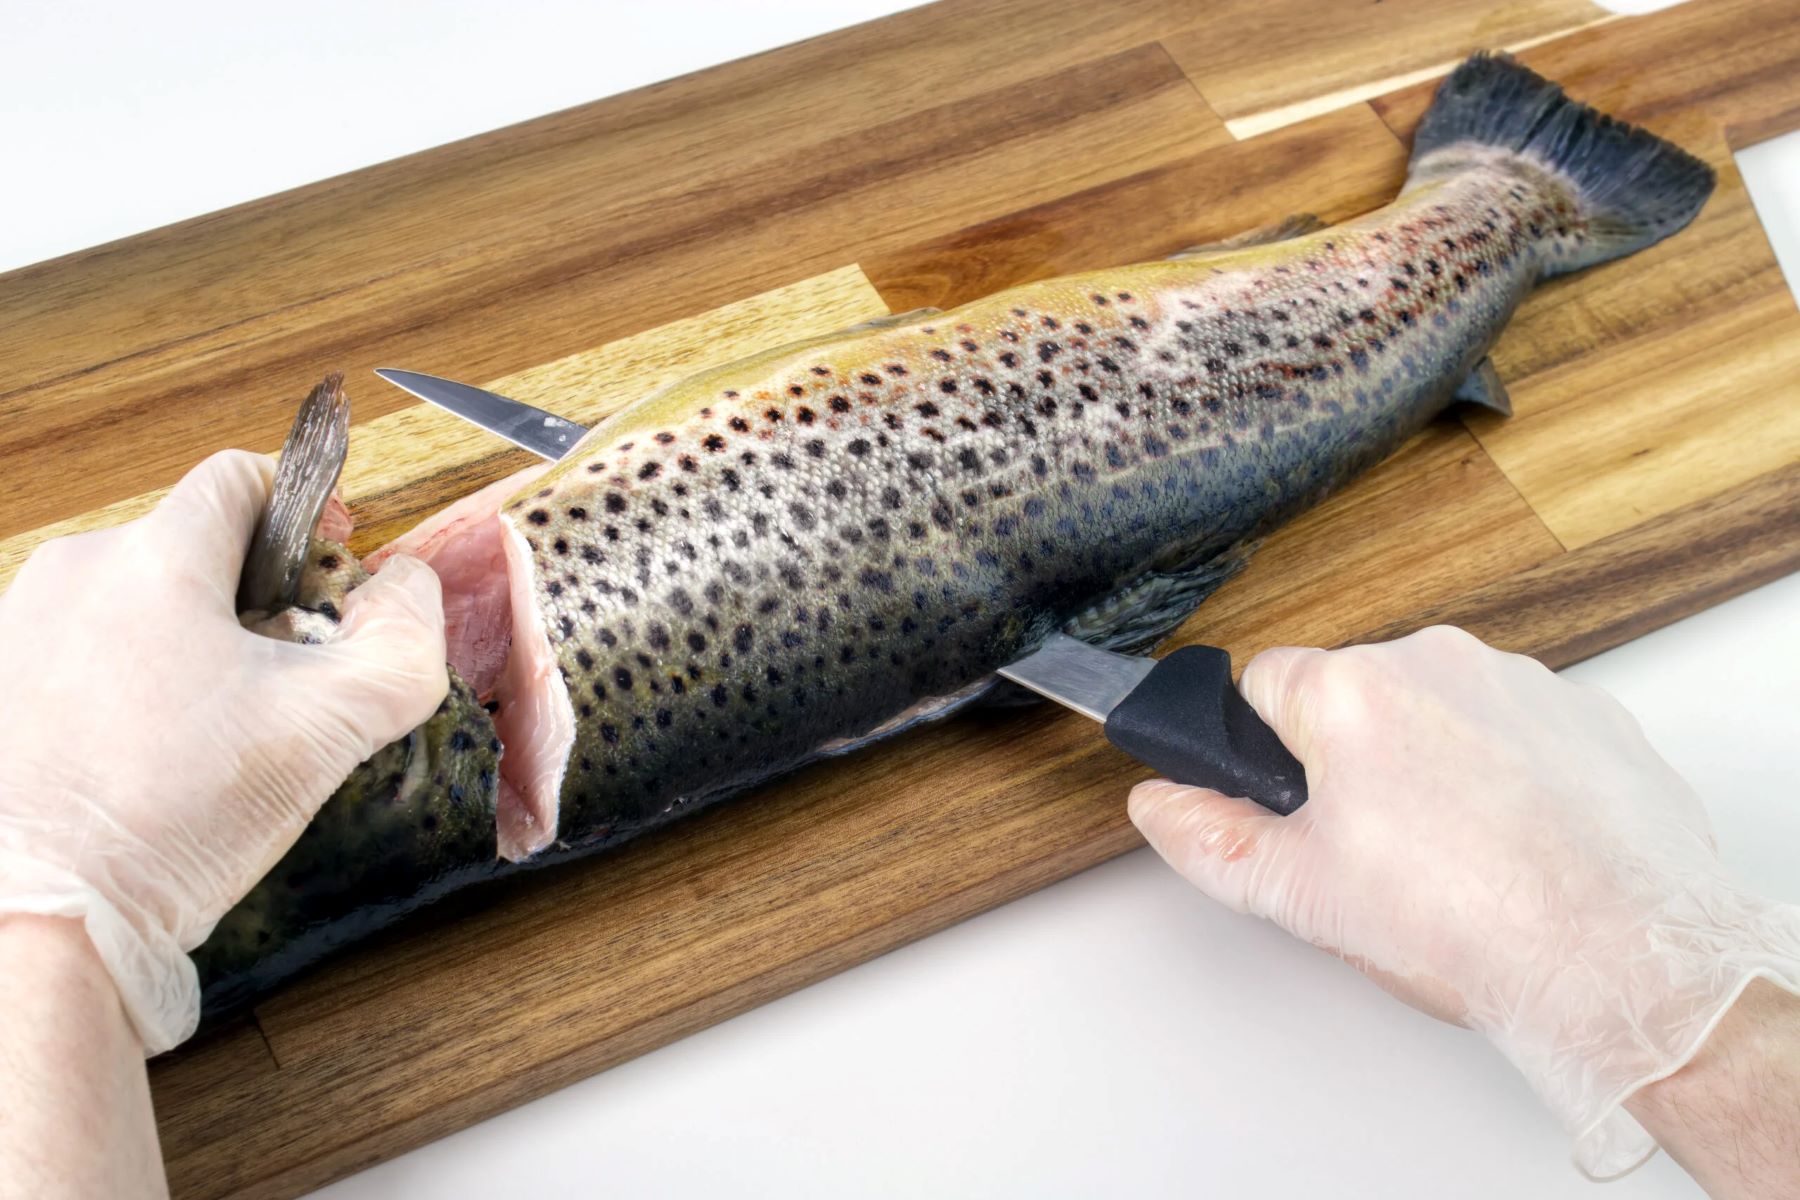
Step 5: Make the Initial Cut
With the trout meticulously prepared, including the removal of the head, innards, and scales, the next critical step in the filleting process involves making the initial incision to begin extracting the fillets. This step sets the stage for delicately separating the flesh from the bones, ultimately yielding boneless fillets ready for culinary exploration. Here's a detailed breakdown of the process:
-
Positioning the Knife: Hold the fillet knife with a steady grip, ensuring it is razor-sharp and poised for precision. Position the knife at a slight angle behind the trout's pectoral fin, just above the lateral line. This angle allows for a smooth and controlled incision, minimizing any unnecessary damage to the flesh.
-
Initiating the Incision: With a confident and deliberate motion, gently pierce the skin with the tip of the knife, just behind the pectoral fin. Apply steady pressure to penetrate through the skin and reach the flesh, ensuring a clean and decisive entry point for the subsequent cut.
-
Guiding the Knife: Once the initial incision is made, smoothly guide the knife along the trout's body, following the natural contours and maintaining a consistent angle. Exercise patience and finesse, allowing the blade to effortlessly glide through the flesh while adhering to the curvature of the fish.
-
Maintaining Control: As the knife progresses towards the tail, ensure a steady and controlled motion, maintaining a firm grip to facilitate a seamless and precise incision. Avoid hurried movements and prioritize accuracy, aiming for a clean and uniform cut that maximizes the yield of the fillet.
-
Completing the Initial Cut: As the knife reaches the tail, apply a final decisive motion to complete the initial incision, ensuring the fillet remains attached near the tail. Exercise caution to avoid separating the fillet from the body, as this initial cut serves as the foundation for the subsequent filleting maneuvers.
By deftly executing the process of making the initial cut, you establish the groundwork for extracting pristine fillets from the trout's body. With the initial incision meticulously crafted, you're now poised to delve into the intricacies of delicately separating the fillets from the bones, unlocking a world of culinary possibilities with your expertly prepared trout.
Step 6: Remove the Fillet
With the initial incision successfully made, the next pivotal step in the filleting process involves delicately separating the fillet from the trout's body. This intricate maneuver requires precision, finesse, and a keen understanding of the fish's anatomy to ensure the extraction of pristine, boneless fillets. Here's a detailed breakdown of the process:
-
Stabilize the Fillet: With the initial incision in place, gently lift the fillet with your non-dominant hand, exerting minimal pressure to avoid damaging the flesh. Maintain a firm yet delicate grip, ensuring control and stability as you proceed with the extraction.
-
Guide the Knife: With the fillet lifted, hold the fillet knife with your dominant hand, ensuring a razor-sharp blade and a steady grip. Position the knife at the base of the fillet, near the tail, and initiate a smooth, controlled motion to separate the flesh from the bones.
-
Follow the Contours: As the knife glides along the fish's spine, follow the natural contours of the trout, allowing the blade to effortlessly navigate the intricate pathways of the skeletal structure. Exercise patience and precision, ensuring the blade maintains close contact with the bones to maximize the yield of the fillet.
-
Maintain Uniform Thickness: As the knife progresses towards the head, maintain a consistent thickness for the fillet, aiming for a uniform cut that showcases the pristine quality of the flesh. Adhere to the natural curvature of the fish, ensuring the fillet retains its integrity and visual appeal.
-
Complete the Separation: As the knife reaches the head, execute a final, decisive cut to completely separate the fillet from the body. Exercise caution to avoid unnecessary sawing motions, prioritizing a swift and precise maneuver that leaves behind a pristine, boneless fillet ready for culinary exploration.
By deftly executing the process of removing the fillet, you unlock a world of culinary possibilities with your expertly prepared trout. With the fillet delicately extracted, you're now poised to proceed to the subsequent stages of filleting, setting the stage for a seamless transition to the final preparations of the fillets for cooking.
Step 7: Remove the Rib Bones
With the fillet delicately extracted, the next crucial step in the filleting process involves removing the rib bones to ensure the pristine quality and bonelessness of the fillet. This meticulous maneuver requires precision, attention to detail, and a thorough understanding of the fish's skeletal structure to achieve flawless fillets ready for culinary exploration.
Here's a detailed breakdown of the process:
-
Inspect the Fillet: Begin by carefully inspecting the fillet to identify the location of the rib bones. Run your fingers along the surface of the fillet, feeling for the fine bones that extend from the fish's spine towards the belly. This tactile examination provides valuable insight into the positioning of the rib bones and guides the subsequent removal process.
-
Stabilize the Fillet: Place the fillet on the cutting board with the skin side down, ensuring a stable and secure position for the delicate operation. Gently press the fillet to ensure it remains in place, allowing for precise maneuvering during the rib bone removal.
-
Make an Incision: Using the tip of the fillet knife, make a shallow incision along the top edge of the fillet, just above the line of rib bones. Exercise caution to avoid cutting through the flesh, aiming for a controlled and deliberate incision that exposes the rib bones without compromising the integrity of the fillet.
-
Lift and Separate: With the incision made, delicately lift the edge of the exposed rib bones using your fingers or the tip of the fillet knife. Apply gentle pressure to separate the bones from the flesh, ensuring a gradual and meticulous approach to avoid tearing or damaging the fillet.
-
Trimming the Bones: Once the rib bones are exposed and lifted, use the fillet knife to carefully trim and remove them from the fillet. Employ precise and controlled motions, guiding the knife along the length of the bones to cleanly separate them from the flesh. Exercise patience and finesse, ensuring the fillet remains intact and pristine throughout the bone removal process.
-
Inspect and Refine: After the rib bones are removed, take a moment to inspect the fillet, ensuring no remnants of bones or cartilage remain. Run your fingers along the flesh to detect any residual bones, addressing any lingering fragments to guarantee a flawless, boneless fillet.
By meticulously executing the process of removing the rib bones, you elevate the quality of the fillet and prepare it for the final culinary preparations. With the rib bones delicately removed, you're now poised to proceed to the subsequent stages of filleting, unlocking a world of culinary possibilities with your expertly prepared trout fillets.
Step 8: Trim the Fillet
With the rib bones delicately removed, the final step in the filleting process involves trimming the fillet to refine its shape and ensure uniformity, setting the stage for a flawless presentation and optimal cooking outcomes. This meticulous maneuver requires precision, attention to detail, and a keen eye for enhancing the fillet's visual appeal and culinary versatility.
Here's a detailed breakdown of the process:
-
Inspect the Fillet: Begin by carefully examining the fillet to identify any irregularities or excess portions that may detract from its pristine quality. Look for any lingering bones, cartilage, or uneven edges that warrant refinement to achieve a uniform and visually appealing fillet.
-
Refine the Edges: Using the fillet knife, gently trim any uneven or jagged edges along the fillet, ensuring a smooth and uniform perimeter. Employ controlled motions to delicately refine the contours of the fillet, aiming for a consistent thickness and an aesthetically pleasing shape.
-
Remove Pin Bones: Run your fingers along the surface of the fillet to detect any pin bones that may have been overlooked during the initial bone removal process. Utilize fish tweezers or kitchen pliers to delicately extract any remaining pin bones, ensuring the fillet is pristine and free of any undesirable elements.
-
Tail Trimming: If the fillet includes the tail section, consider trimming it to achieve a uniform shape and size. Employ the fillet knife to carefully remove any excess tail portion, ensuring the fillet maintains a consistent width and length for even cooking and presentation.
-
Final Inspection: After the trimming process is complete, take a moment to thoroughly inspect the fillet, ensuring it embodies the desired shape, uniformity, and pristine quality. Run your fingers along the surface to detect any remaining imperfections, addressing them with precision to refine the fillet to perfection.
By meticulously executing the process of trimming the fillet, you elevate its visual appeal and culinary potential, setting the stage for a seamless transition to the final preparations for cooking. With the fillet delicately trimmed and refined, you're now poised to explore a myriad of culinary possibilities with your expertly prepared trout fillets.
Conclusion
Congratulations! You've successfully navigated the intricate art of filleting a trout, transforming a whole fish into pristine, boneless fillets ready for culinary exploration. As you reflect on the journey from preparing the trout to delicately extracting the fillets, it's evident that filleting a trout is not merely a culinary task but a testament to precision, skill, and a deep appreciation for the bounty of the waters.
Through meticulous preparation, including chilling the trout, removing the head, innards, and scales, you set the stage for the delicate filleting maneuvers that followed. Each step, from making the initial incision to refining the fillets, required a harmonious blend of technique, patience, and a keen understanding of the fish's anatomy.
As you wielded the fillet knife with precision, guided by a steady hand and a discerning eye, you transformed the trout into boneless fillets, each a testament to your dedication and mastery of the filleting process. The removal of the rib bones and the meticulous trimming of the fillets further exemplified your commitment to achieving culinary excellence.
Now, as you gaze upon the pristine fillets before you, envision the myriad culinary possibilities that await. Whether you choose to pan-sear them to golden perfection, grill them to impart a smoky char, or bake them with aromatic herbs and citrus, your expertly prepared trout fillets are poised to elevate your culinary creations.
Beyond the culinary realm, the journey of filleting a trout is a celebration of the connection between nature's bounty and the artistry of the kitchen. It's a testament to the time-honored traditions of angling, the joy of bringing a fresh catch to the table, and the transformative power of culinary expertise.
So, as you embark on your culinary adventures with your freshly prepared trout fillets, savor the knowledge and skill you've acquired. Embrace the art of filleting as a timeless craft, a bridge between the waters and the dining table, and a testament to the culinary journey that continues to unfold with each fillet and every dish you create.