Home>Arts and Culture>How To Draw A Turtle

Arts and Culture
How To Draw A Turtle
Published: March 5, 2024
Learn how to draw a turtle with easy step-by-step instructions. Explore your creativity and improve your artistic skills with this fun arts and culture tutorial.
(Many of the links in this article redirect to a specific reviewed product. Your purchase of these products through affiliate links helps to generate commission for Regretless.com, at no extra cost. Learn more)
Table of Contents
Introduction
Drawing is a wonderful way to express creativity and bring imagination to life. Whether you're an aspiring artist or simply looking for a fun activity, learning how to draw a turtle can be an enjoyable and rewarding experience. Turtles are fascinating creatures, known for their distinctive shells and gentle movements. By following a few simple steps and using basic drawing materials, you can create a charming turtle illustration that captures the essence of these remarkable reptiles.
In this guide, we will explore the step-by-step process of drawing a turtle, from outlining the shell to adding intricate details and vibrant colors. Whether you're a novice artist or a seasoned sketcher, this tutorial will provide clear and easy-to-follow instructions, allowing you to unleash your artistic flair and bring a delightful turtle to life on paper.
So, grab your pencils, paper, and colors, and let's embark on a creative journey to master the art of drawing a turtle. With a touch of patience and a sprinkle of imagination, you'll soon be crafting your very own turtle masterpiece that showcases your artistic prowess. Let's dive in and discover the joy of creating a captivating turtle drawing that will surely make a splash!
Read more: How To Draw Ninja Turtles
Materials Needed
To begin your turtle drawing adventure, you'll need a few essential materials to bring your artistic vision to life. Here's a list of items that will help you embark on this creative journey:
-
Drawing Paper: Select a smooth, sturdy paper that is suitable for sketching and coloring. A standard sketch pad or drawing paper will work well for this project.
-
Pencils: Gather a range of pencils, including a 2H or 4H for light sketching, an HB for general outlining, and a 2B or 4B for adding depth and shading.
-
Eraser: A good quality eraser will come in handy for correcting mistakes and refining your turtle sketch as you progress.
-
Sharpener: Keep a sharp pencil point for precise lines and details by having a reliable pencil sharpener within reach.
-
Ruler: While not mandatory, a ruler can assist in creating straight lines and maintaining proportion in your turtle drawing.
-
Coloring Tools: If you plan to add color to your turtle illustration, gather colored pencils, markers, or watercolor paints, depending on your preference.
-
Reference Images: Consider having reference images of turtles on hand to inspire and guide your drawing process. Observing real-life turtles or high-quality photographs can provide valuable insights into their unique features and characteristics.
By assembling these materials, you'll be well-equipped to embark on your turtle drawing endeavor with confidence and creativity. With these tools at your disposal, you can unleash your artistic potential and bring a captivating turtle illustration to life on paper. Now that you're prepared with the necessary materials, let's dive into the step-by-step process of drawing a delightful turtle that embodies charm and character.
Step 1: Draw the Shell
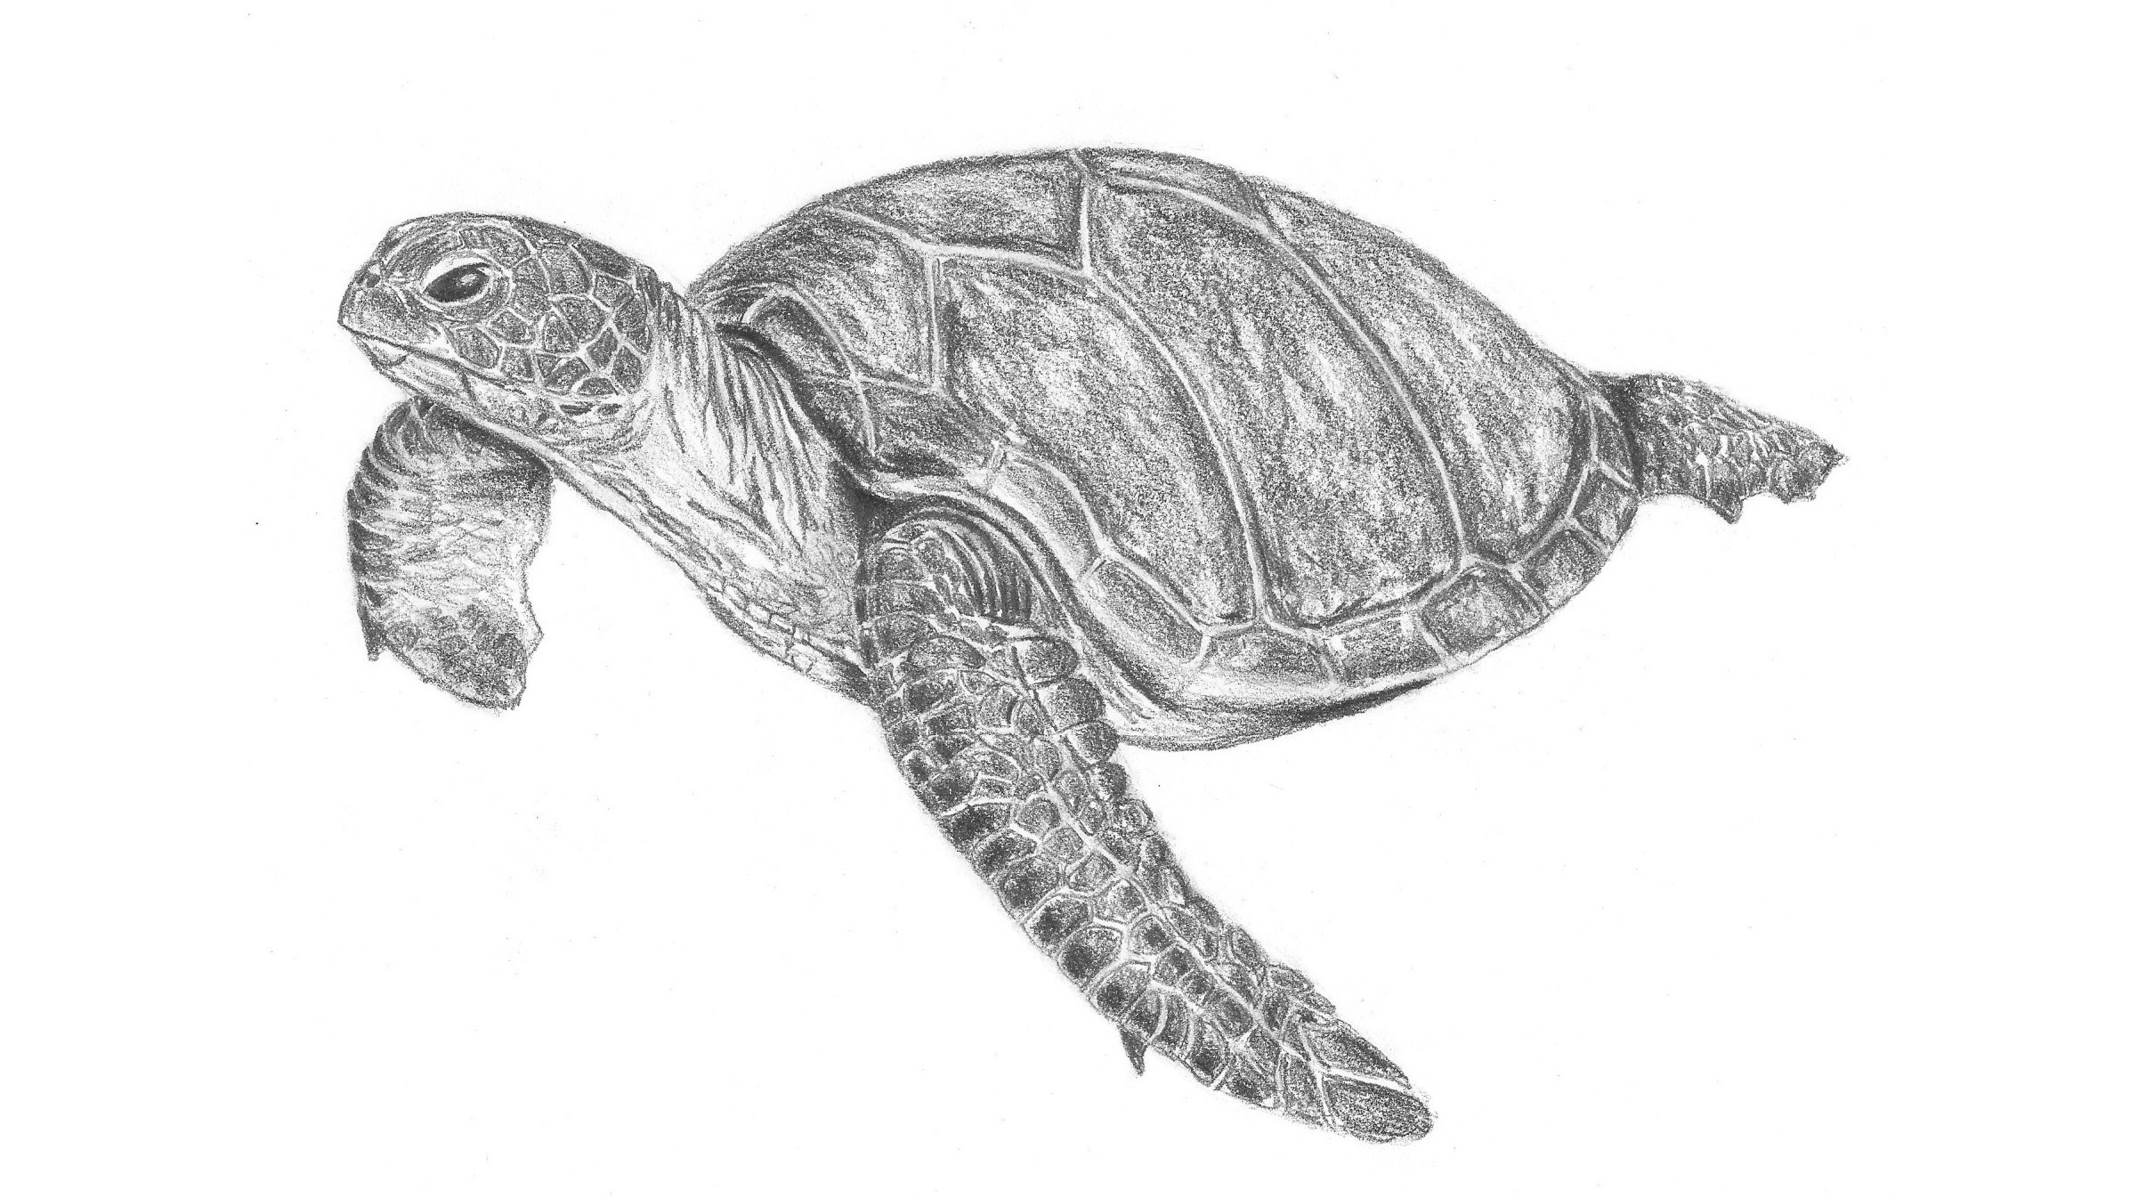
The shell is the defining feature of a turtle, serving as its protective armor and a symbol of resilience. To begin drawing the shell, start by sketching a large oval or rounded rectangle in the center of your paper. This will form the main body of the shell. Next, add a slightly curved line across the width of the shape to represent the division between the upper and lower parts of the shell.
Now, it's time to create the individual segments of the shell. Draw a series of curved lines radiating outward from the center of the shell, resembling the growth rings of a tree. These lines should extend from the top to the bottom of the shell, with gentle curves to convey the natural contours of the turtle's protective covering.
To add depth and dimension to the shell, lightly shade the spaces between the curved lines, creating a subtle gradient effect that mimics the texture of the shell. This shading technique will give the shell a three-dimensional appearance, making it appear rounded and lifelike.
As you refine the shell, pay attention to the proportions and overall shape. Turtles come in various species, each with distinct shell designs. Some have smooth, streamlined shells, while others have more pronounced patterns and textures. Consider referencing images of different turtle species to inspire the unique characteristics of your turtle's shell.
Once you are satisfied with the shape and texture of the shell, use your eraser to gently remove any unnecessary guidelines and refine the outlines. This will help the shell stand out prominently and give your turtle drawing a polished look.
Drawing the shell is a crucial first step in capturing the essence of a turtle. By focusing on the intricate details and natural curvature of the shell, you can create a visually captivating representation of this remarkable reptile. With the shell taking shape, it's time to move on to the next step and bring the head, legs, and other features of the turtle to life on paper.
Step 2: Draw the Head and Legs
With the shell taking form, it's time to focus on the intricate details of the turtle's head and legs, which infuse character and charm into the illustration. Begin by positioning the turtle's head at the front of the shell, considering the direction in which the turtle is facing. Sketch a rounded shape for the head, ensuring that it complements the overall size and proportion of the shell. Turtles have endearing facial features, including gentle eyes and a distinctive beak-like mouth. Capture these details by drawing small, expressive eyes and a curved beak that extends slightly beyond the head.
Moving on to the legs, turtles are equipped with sturdy, webbed limbs that enable them to navigate both land and water with grace. Position the front legs on either side of the head, extending outward from the bottom of the shell. Each front leg consists of a curved upper section and distinct webbing, which facilitates swimming and movement. Depict the hind legs in a similar fashion, placing them toward the rear of the shell and ensuring that they align with the overall posture of the turtle. The hind legs are slightly longer than the front legs and also feature webbing for efficient propulsion in water.
As you sketch the head and legs, pay attention to the subtle details that define the turtle's anatomy. Turtles exhibit a range of species-specific characteristics, such as the presence of distinct patterns on their skin and the shape of their limbs. Consider referencing images of different turtle species to incorporate these unique traits into your drawing, adding a touch of authenticity and individuality to your turtle illustration.
Once the head and legs are outlined to your satisfaction, use your eraser to refine any overlapping lines and ensure that the proportions are harmonious. This step is crucial in achieving a well-balanced and lifelike portrayal of the turtle's anatomy. By infusing the head and legs with personality and precision, you'll bring a delightful sense of vitality to your turtle drawing, capturing the endearing essence of these captivating creatures.
With the head and legs taking shape, your turtle illustration is evolving into a charming and expressive portrayal of these remarkable reptiles. Now, let's proceed to the next step and add intricate details that will further enhance the visual appeal of your turtle drawing.
Step 3: Add Details
As your turtle drawing begins to take form, adding intricate details will infuse character and depth, elevating your illustration to a new level of visual appeal. Turtles boast a myriad of distinctive features, from the patterns on their shells to the texture of their skin, each contributing to their unique charm. By focusing on these details, you can breathe life into your turtle drawing, capturing the essence of these remarkable reptiles with precision and artistry.
One of the defining characteristics of turtles is the intricate patterns and textures that adorn their shells. Take a moment to observe reference images of various turtle species, noting the diverse array of shell designs and markings. Whether it's the bold, geometric patterns of a painted turtle or the earthy, mottled textures of a box turtle, each species offers a wealth of inspiration for adding captivating details to your drawing. Carefully study the arrangement of scales, the curvature of lines, and the interplay of light and shadow on the shell's surface. By incorporating these elements into your illustration, you can create a visually engaging representation that celebrates the natural beauty of turtles.
Moving on to the turtle's skin, consider the subtle nuances that define its texture and coloration. Turtles exhibit a range of skin variations, from smooth and glossy to rough and weathered, reflecting their diverse habitats and lifestyles. Capture these details by adding gentle lines and shading to convey the texture of the skin, paying attention to the areas where light and shadow interact to create depth and dimension. Additionally, consider the color palette that best represents the species of turtle you are portraying. Whether it's the vibrant hues of a red-eared slider or the earthy tones of a snapping turtle, selecting the right colors will enhance the authenticity of your drawing and evoke a sense of connection to these fascinating creatures.
Furthermore, don't overlook the smaller details that contribute to the overall charm of the turtle. From the subtle ridges on the turtle's beak to the delicate webbing between its toes, these intricacies add a touch of realism and personality to your illustration. By refining these finer points with precision and care, you can create a captivating portrayal that resonates with the endearing nature of turtles.
As you add these details to your turtle drawing, allow your creativity to flourish, infusing each stroke with a sense of admiration for these extraordinary creatures. With a keen eye for detail and a gentle touch, you'll bring your turtle illustration to life, capturing the timeless allure of these beloved reptiles with grace and artistry.
Read more: How To Draw A Dress
Step 4: Color the Turtle
Coloring the turtle is an exhilarating phase that breathes vibrancy and life into your drawing, transforming it into a captivating masterpiece. Selecting the right colors and applying them with precision will enhance the visual appeal of your turtle illustration, evoking a sense of wonder and admiration for these remarkable creatures.
Begin by considering the species of turtle you aim to depict. Turtles exhibit a diverse range of colors and patterns, each reflecting their unique habitats and characteristics. Whether it's the striking red markings of a red-eared slider or the earthy tones of a box turtle, understanding the distinct coloration of your chosen species will guide your coloring process. Reference images of real turtles can provide valuable insights into their color patterns, enabling you to select hues that authentically represent the species you are portraying.
When applying color to the shell, consider the interplay of light and shadow to create depth and dimension. Start with a base color that aligns with the natural hues of the turtle's shell, then gradually layer darker shades along the curved segments to simulate the play of light. This technique will infuse the shell with a lifelike appearance, accentuating its rounded contours and intricate textures.
Moving on to the turtle's skin, select colors that complement the shell and convey the unique characteristics of the species. Whether it's the smooth, olive-green skin of a sea turtle or the mottled, earth-toned skin of a tortoise, blending colors with finesse will bring the turtle to life on paper. Pay attention to the transitions between colors, ensuring a seamless blend that captures the natural beauty of the turtle's skin.
As you add color to the turtle's head, legs, and other features, focus on creating a harmonious palette that accentuates the overall charm of the illustration. Consider the subtle variations in color and texture, infusing each element with a sense of authenticity and allure. Whether you opt for vibrant, eye-catching hues or subtle, earthy tones, let your color choices reflect the captivating nature of these extraordinary reptiles.
By approaching the coloring process with care and creativity, you'll elevate your turtle drawing to a new level of visual splendor, capturing the timeless allure of these beloved creatures with grace and artistry. With the final strokes of color, your turtle illustration will radiate charm and vitality, inviting viewers to marvel at the captivating beauty of these remarkable reptiles.
Conclusion
In conclusion, mastering the art of drawing a turtle is a delightful journey that allows artists of all levels to express their creativity and admiration for these remarkable reptiles. Through the step-by-step process outlined in this guide, you've embarked on a captivating exploration of capturing the essence of turtles on paper, from outlining the distinctive shell to infusing intricate details and vibrant colors. As you conclude your turtle drawing endeavor, reflect on the joy and fulfillment that comes with bringing a charming turtle illustration to life.
Drawing a turtle serves as a testament to the beauty of nature and the artistry of the animal kingdom. Turtles, with their enduring symbolism of wisdom, longevity, and resilience, inspire a sense of wonder and reverence. By immersing yourself in the process of drawing a turtle, you've not only honed your artistic skills but also cultivated a deeper appreciation for the natural world and its diverse inhabitants.
As you admire your completed turtle drawing, take pride in the dedication and patience you've invested in each stroke and detail. Your illustration captures the timeless allure of turtles, celebrating their captivating features and endearing charm. Whether you've chosen to depict a sea turtle gliding gracefully through azure waters or a land-dwelling tortoise adorned with earthy hues, your drawing embodies the unique essence of these extraordinary creatures.
Furthermore, the act of drawing a turtle fosters a sense of connection with the animal kingdom, fostering empathy and understanding for the delicate balance of ecosystems. Turtles, as ancient and revered creatures, remind us of the importance of conservation and stewardship of the environment. Through your artistic portrayal of turtles, you've contributed to the celebration of these magnificent beings, inspiring others to cherish and protect the natural world.
In essence, drawing a turtle transcends the realm of art, serving as a testament to the profound connection between creativity, nature, and the human spirit. Your turtle illustration is a testament to your artistic prowess and your ability to capture the essence of these beloved reptiles with grace and authenticity. As you continue your artistic journey, may the spirit of the turtle inspire you to embrace creativity, cherish the wonders of the natural world, and continue to express your admiration for the beauty that surrounds us.
With your turtle drawing as a testament to your artistic journey, may it serve as a reminder of the joy, wonder, and inspiration that art brings into our lives. Embrace the creativity that flows within you, and let it guide you on future artistic endeavors, allowing you to continue capturing the timeless allure of the world around us with grace and passion.

