Home>Automotive>How To Repair An Alternator
Automotive
How To Repair An Alternator
Published: March 4, 2024
Learn how to repair an alternator with our comprehensive guide. Get expert tips and step-by-step instructions for automotive alternator repair.
(Many of the links in this article redirect to a specific reviewed product. Your purchase of these products through affiliate links helps to generate commission for Regretless.com, at no extra cost. Learn more)
Table of Contents
Introduction
The alternator is a vital component of a vehicle's charging system, responsible for converting mechanical energy into electrical power. When the alternator malfunctions, it can lead to a host of issues, including a dead battery and electrical system failures. Understanding how to repair an alternator is a valuable skill that can save both time and money. Whether you're a seasoned DIY enthusiast or a novice looking to expand your automotive repair knowledge, this comprehensive guide will walk you through the process of diagnosing and repairing an alternator.
A malfunctioning alternator can manifest in various ways, such as dimming headlights, a warning light on the dashboard, or difficulty starting the vehicle. By gaining insight into the inner workings of the alternator and learning the necessary steps to repair it, you can effectively address these issues and ensure the optimal performance of your vehicle.
In this guide, we will delve into the fundamental principles of alternator operation, the tools and materials required for the repair process, and a step-by-step breakdown of the repair procedure. By the end of this article, you will have a comprehensive understanding of how to diagnose and repair common alternator issues, empowering you to tackle this essential repair with confidence.
Whether you're aiming to troubleshoot and repair the alternator in your own vehicle or seeking to expand your automotive repair expertise, this guide will equip you with the knowledge and skills needed to effectively address alternator-related issues. Let's embark on this journey to demystify the alternator repair process and empower ourselves with the ability to keep our vehicles running smoothly.
Understanding the Alternator
The alternator serves as a crucial component within a vehicle's electrical system, playing a pivotal role in generating electrical power to recharge the battery and supply electricity to various vehicle components. Unlike the battery, which provides electrical energy to start the engine and power electrical systems when the vehicle is not running, the alternator is responsible for replenishing the battery's charge and sustaining the electrical needs of the vehicle while it is in operation.
How Does the Alternator Work?
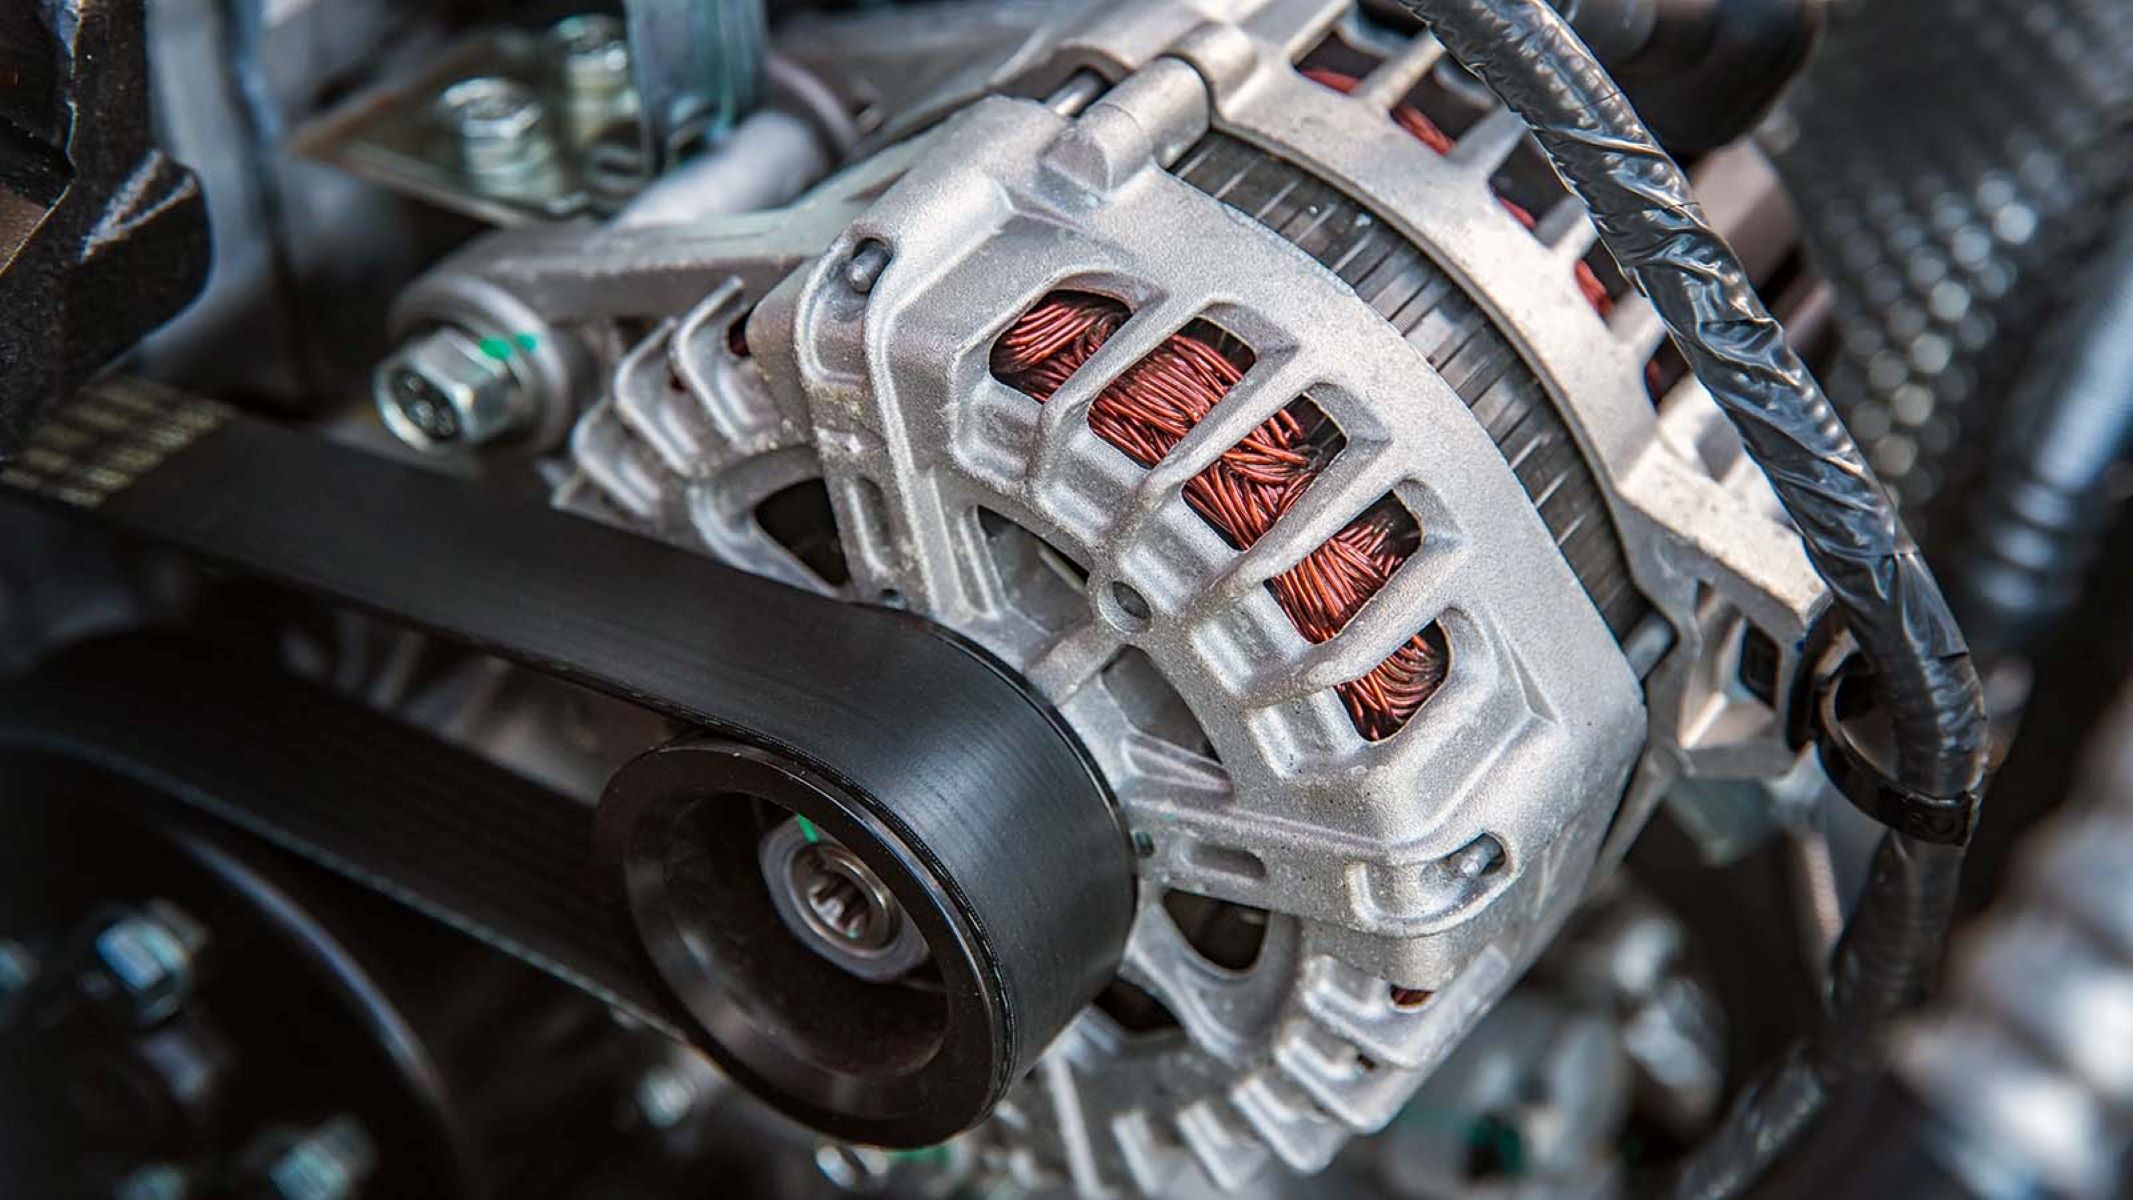
The alternator operates on the principle of electromagnetic induction, utilizing a magnetic field and a conductor to convert mechanical energy into electrical power. When the engine is running, the alternator is spun by a belt connected to the engine's crankshaft. This rotational motion induces an alternating current (AC) within the alternator's stator windings, which are stationary coils of wire. The AC is then converted into direct current (DC) by the rectifier diodes within the alternator, resulting in the production of the electrical power required to charge the battery and power the vehicle's electrical systems.
Components of the Alternator
The alternator comprises several key components, including the rotor, stator, rectifier assembly, voltage regulator, and pulley. The rotor, also known as the armature, consists of a coil of wire wrapped around an iron core and is responsible for generating the magnetic field essential for inducing electrical current in the stator windings. The stator, on the other hand, houses the stationary wire coils that produce the electrical current when subjected to the magnetic field generated by the rotor.
The rectifier assembly is tasked with converting the AC produced by the stator into DC, ensuring a consistent flow of electrical power. Meanwhile, the voltage regulator monitors and controls the output of the alternator to maintain a steady voltage supply to the vehicle's electrical systems and battery. Finally, the pulley, connected to the engine via a belt, facilitates the rotation of the alternator, enabling the generation of electrical power.
Importance of the Alternator
The alternator's role in the vehicle's operation cannot be overstated. It not only sustains the electrical needs of the vehicle while in motion but also ensures that the battery remains charged, allowing for reliable engine starts and continuous operation of electrical components such as lights, air conditioning, and audio systems. Without a functional alternator, the battery would eventually be depleted, leading to a loss of electrical power and eventual stalling of the vehicle.
Understanding the fundamental principles and components of the alternator provides a solid foundation for diagnosing and repairing common issues that may arise. By grasping the intricacies of this essential component, individuals can effectively troubleshoot and address alternator-related problems, ensuring the continued reliability and performance of their vehicles.
Read more: 5 Fun Alternatives To Chuck E. Cheese
Tools and Materials Needed
Before embarking on the alternator repair process, it is essential to gather the necessary tools and materials to ensure a smooth and efficient repair experience. Equipping yourself with the right resources will not only streamline the repair procedure but also contribute to the overall success of the task at hand. Here's a comprehensive list of tools and materials required for repairing an alternator:
Tools:
- Socket Set: A versatile socket set with various metric and standard socket sizes will be indispensable for removing and installing bolts and fasteners associated with the alternator and its mounting brackets.
- Wrench Set: A set of combination wrenches, including both open-end and box-end wrenches, will enable you to access and manipulate fasteners in confined spaces.
- Screwdriver Set: An assortment of flathead and Phillips screwdrivers will be necessary for removing electrical connections, fasteners, and other components during the repair process.
- Pry Bar or Large Screwdriver: This tool will aid in levering the alternator away from its mounting bracket and adjusting the tension of the drive belt.
- Multimeter: A multimeter is essential for diagnosing electrical issues, testing the output of the alternator, and ensuring proper electrical connections.
- Torque Wrench: To ensure accurate and consistent tightening of bolts and fasteners, a torque wrench is indispensable for reassembling the alternator and its associated components.
- Pulley Removal Tool: Depending on the alternator design, a pulley removal tool may be required to detach the pulley from the alternator shaft for replacement or repair.
- Safety Equipment: Safety goggles, gloves, and other personal protective equipment are crucial for ensuring personal safety during the repair process.
Materials:
- Replacement Alternator: If the alternator is irreparable or the internal components are damaged beyond repair, a replacement alternator specific to the vehicle's make and model will be necessary.
- Drive Belt: In some cases, it may be prudent to replace the drive belt while the alternator is removed, especially if signs of wear or damage are present.
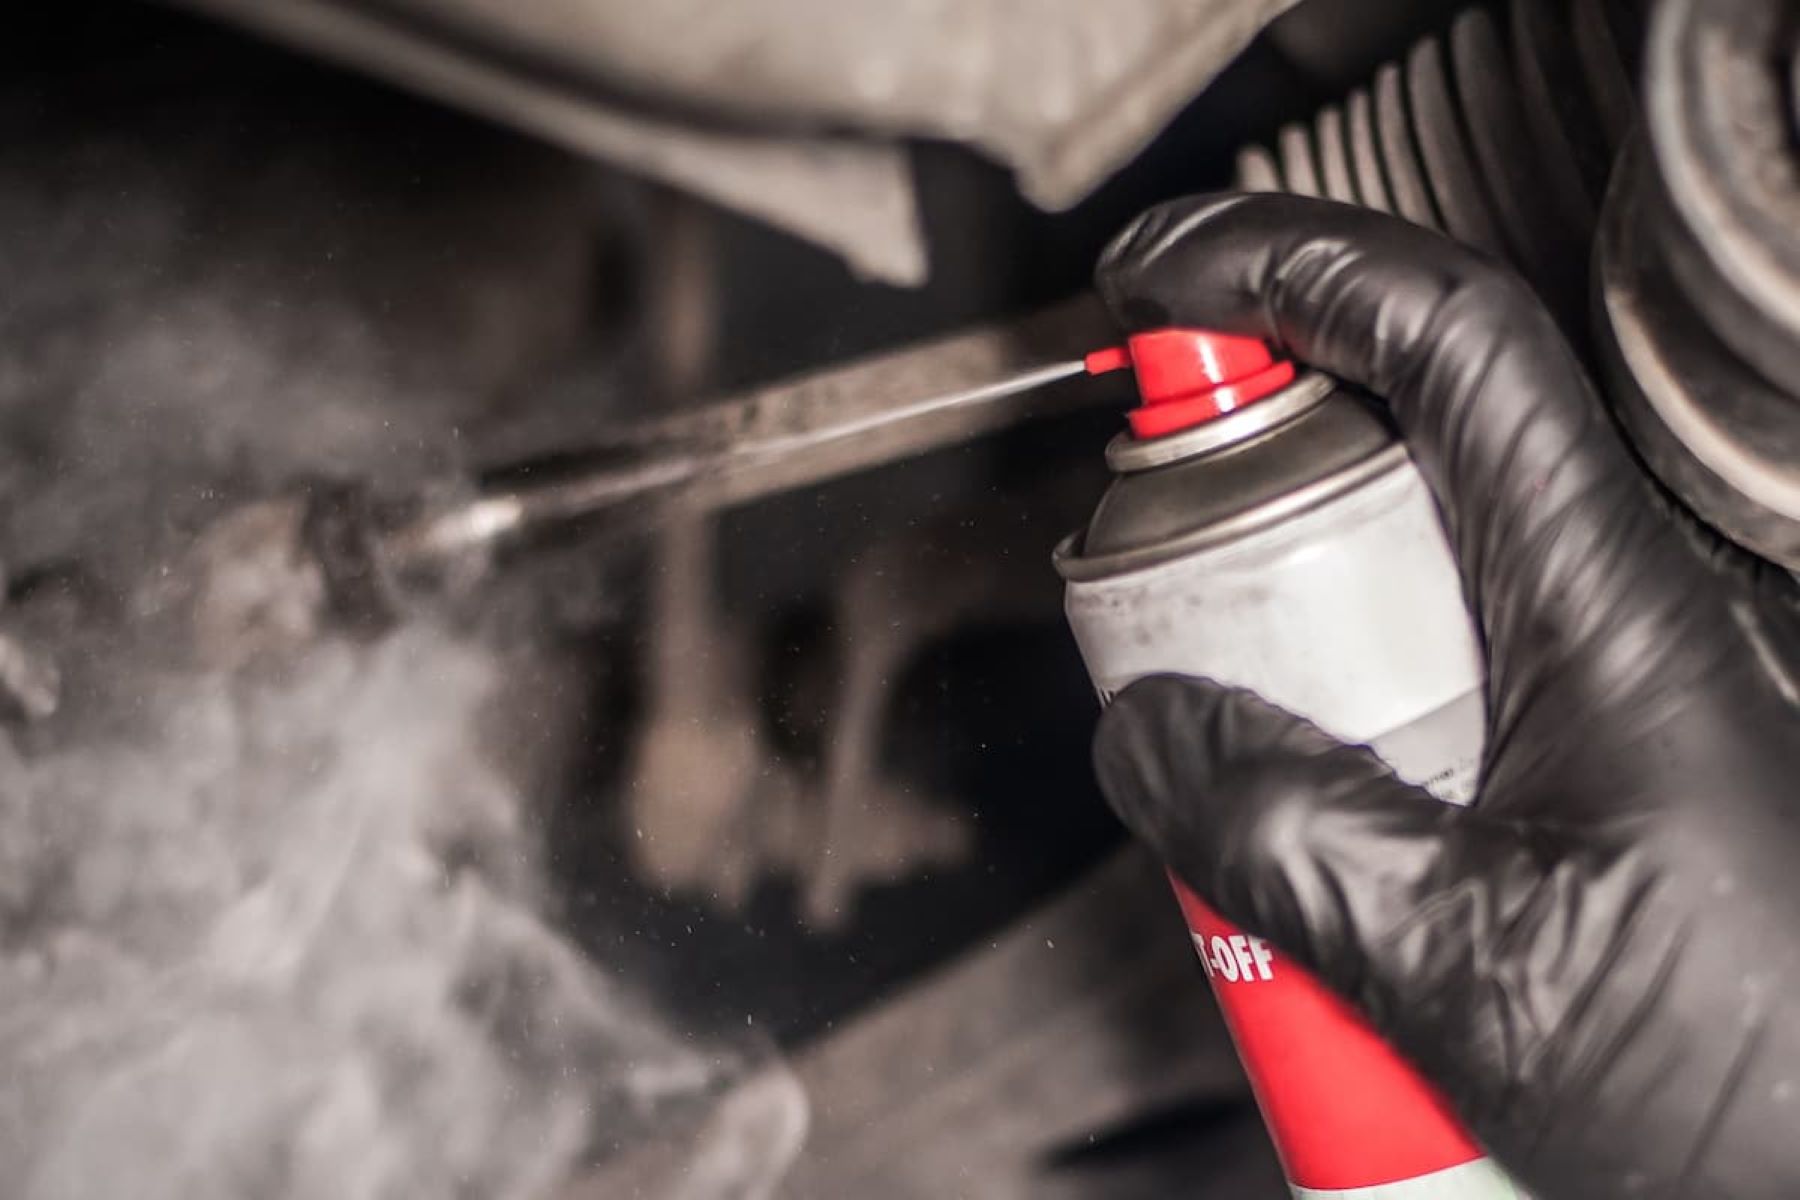
- Electrical Contact Cleaner: This cleaner will aid in removing dirt, debris, and oxidation from electrical connections, ensuring optimal electrical conductivity.
- Dielectric Grease: Applying dielectric grease to electrical connections after cleaning can help prevent corrosion and enhance electrical conductivity.
- Threadlocker: To secure critical fasteners and prevent them from loosening due to vibration, a medium-strength threadlocker is recommended.
- Anti-Seize Compound: Applying anti-seize compound to bolts and fasteners during reassembly will facilitate future disassembly and prevent seizing due to corrosion.
By assembling these tools and materials, you will be well-prepared to tackle the alternator repair process with confidence and efficiency, setting the stage for a successful repair outcome.
Step 1: Disconnect the Battery
The initial step in repairing an alternator is to disconnect the vehicle's battery to ensure safety and prevent electrical mishaps during the repair process. The battery serves as a primary source of electrical power for the vehicle, and disconnecting it is crucial to avoid potential electrical shocks and short circuits while working on the alternator.
To begin, park the vehicle in a well-ventilated and adequately lit area, engaging the parking brake and turning off the engine. Before proceeding, it's essential to don safety goggles and gloves to protect against accidental contact with electrical components and corrosive battery acid. Additionally, ensure that any electronic devices or accessories, such as radios and GPS units, are turned off to prevent potential damage during the battery disconnection process.
Next, locate the vehicle's battery within the engine compartment or trunk, depending on the vehicle's make and model. Most batteries are secured with a hold-down bracket or strap to prevent movement during vehicle operation. Using the appropriate tools, such as a socket and ratchet or a wrench, loosen and remove the fasteners securing the hold-down bracket, allowing for the safe removal of the battery.
Before disconnecting the battery terminals, it's crucial to identify the positive (+) and negative (-) terminals to avoid accidental short circuits. The positive terminal is typically marked with a red cover or a plus sign, while the negative terminal is marked with a black cover or a minus sign. Starting with the negative terminal, use the appropriate wrench or socket to loosen the terminal nut, ensuring that the terminal does not come into contact with any metal surfaces to prevent accidental electrical contact.
Once the negative terminal is disconnected, proceed to loosen and remove the nut securing the positive terminal, exercising caution to prevent contact with any metal components. After removing both terminals, carefully lift the battery out of its compartment and place it in a safe and secure location, away from the work area.
By disconnecting the battery, the risk of electrical accidents and damage to sensitive electronic components is mitigated, creating a safe environment for the subsequent steps in the alternator repair process. This essential precaution sets the stage for a systematic and secure repair procedure, ensuring the safety of both the vehicle and the individual performing the repair.
Read more: 5 Delicious Alternatives To Lima Beans
Step 2: Remove the Alternator
Removing the alternator is a critical step in the repair process, requiring careful disassembly of surrounding components to access and extract the faulty alternator. Before initiating this step, it is essential to ensure that the vehicle's engine has cooled down to prevent accidental burns and that all necessary tools and safety equipment are readily available.
-
Locate the Alternator: The alternator is typically situated near the front of the engine and is connected to various components, including the drive belt, electrical wiring, and mounting brackets. Identify the alternator's precise location within the engine compartment, taking note of any obstructions or components that may impede its removal.
-
Disconnect Electrical Connections: Begin by disconnecting the electrical connections attached to the alternator, including the main power output wire and any additional wiring harnesses or connectors. Exercise caution and use appropriate tools to remove any retaining clips or fasteners securing the electrical connections, ensuring that the wiring is free from entanglement.
-
Loosen the Drive Belt: The alternator is typically driven by a serpentine or V-belt connected to the engine's crankshaft pulley. To remove the alternator, it is necessary to relieve tension on the drive belt by adjusting the tensioner pulley or loosening the adjustment bolt, depending on the vehicle's specific design. Use a suitable tool, such as a pry bar or large screwdriver, to carefully release tension on the drive belt, allowing for its removal from the alternator pulley.
-
Remove Mounting Bolts and Brackets: With the electrical connections and drive belt disengaged, proceed to locate and remove the mounting bolts and brackets securing the alternator to the engine block or mounting bracket. Depending on the vehicle's configuration, there may be multiple bolts and fasteners holding the alternator in place. Utilize the appropriate socket and wrench sizes to loosen and remove these fasteners, taking care to support the alternator as the final bolts are removed to prevent it from falling.
-
Extract the Alternator: Once all mounting bolts and brackets have been removed, carefully maneuver the alternator out of its mounting position, ensuring that no surrounding components or wiring are snagged or damaged during the extraction process. Exercise patience and precision to navigate the alternator out of the confined space, taking note of its orientation for reinstallation.
By meticulously following these steps, the alternator can be safely and methodically removed from the vehicle, setting the stage for the subsequent diagnosis and repair of any identified issues. This systematic approach ensures that the alternator removal process is executed with precision and care, laying the groundwork for a successful repair outcome.
Step 3: Diagnose the Problem
Upon removing the alternator from the vehicle, the next crucial step in the repair process is to methodically diagnose the underlying issues affecting its functionality. Diagnosing the problem involves a systematic assessment of the alternator's components and electrical output to pinpoint any faults or malfunctions that may be impeding its operation. By conducting a comprehensive diagnosis, it becomes possible to identify the specific areas requiring repair or replacement, ultimately restoring the alternator to optimal working condition.
The following diagnostic procedures are integral to effectively identifying and addressing alternator issues:
-
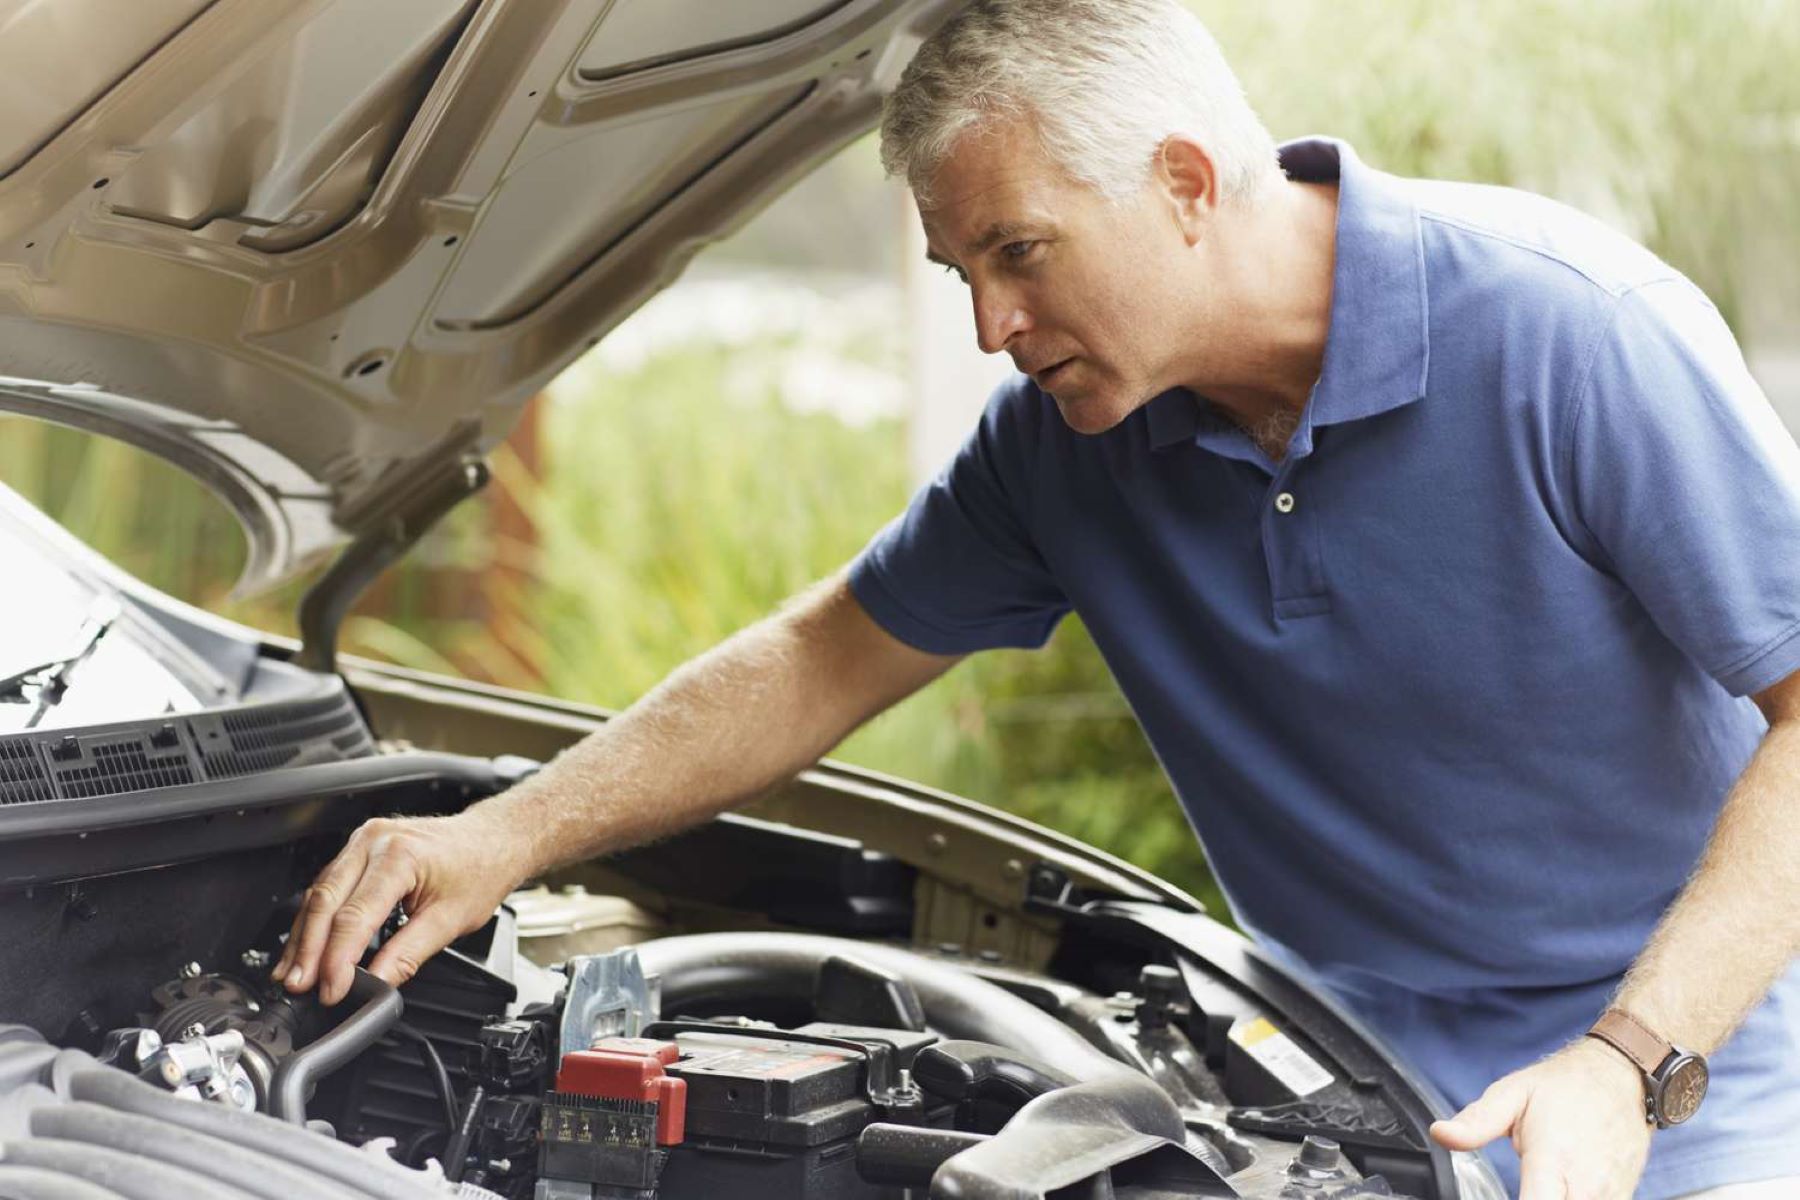
Visual Inspection: Begin by visually examining the alternator for any visible signs of damage, wear, or corrosion. Inspect the housing, pulley, and electrical connections for physical damage, loose components, or signs of overheating. Additionally, check the drive belt for wear, cracks, or improper tension, as these issues can impact the alternator's performance.
-
Electrical Testing: Utilize a multimeter to measure the alternator's electrical output, including voltage and current. With the engine running, connect the multimeter to the alternator's output terminal to assess the voltage being generated. A healthy alternator should produce a consistent voltage within the specified range for the vehicle's make and model. Additionally, test the alternator's diodes to ensure they are functioning correctly, as faulty diodes can lead to irregular electrical output.
-
Battery Voltage: Measure the voltage of the vehicle's battery to determine its charge level. A fully charged battery should register a voltage of approximately 12.6 volts. If the battery voltage is significantly lower, it may indicate that the alternator is not effectively replenishing the battery's charge, pointing to potential alternator issues.
-
Load Testing: Subject the alternator to a load test to evaluate its performance under varying electrical loads. This can be accomplished by activating multiple electrical components, such as headlights, air conditioning, and audio systems, while monitoring the alternator's output. A healthy alternator should maintain a stable electrical output even under increased loads, ensuring consistent power supply to the vehicle's systems.
By meticulously conducting these diagnostic procedures, any underlying issues affecting the alternator's functionality can be accurately identified, laying the groundwork for targeted repairs or component replacements. This comprehensive diagnosis is instrumental in ensuring that the subsequent repair efforts effectively address the root causes of the alternator's malfunction, ultimately restoring its reliability and performance within the vehicle's electrical system.
Step 4: Repair or Replace Faulty Parts
After diagnosing the issues affecting the alternator, the next pivotal step involves addressing the identified faults through targeted repairs or component replacements. This phase of the repair process is instrumental in restoring the alternator to optimal functionality, ensuring its ability to generate and supply electrical power to the vehicle's systems. Depending on the nature and severity of the identified faults, the following repair or replacement actions may be undertaken:
Voltage Regulator Replacement
If the voltage regulator is determined to be the source of the alternator's malfunction, replacing this critical component is essential. The voltage regulator plays a pivotal role in maintaining a steady output voltage from the alternator, ensuring consistent electrical supply to the vehicle's systems and battery. A faulty voltage regulator can lead to erratic electrical output, overcharging, or undercharging of the battery, and potential damage to electrical components. By replacing the voltage regulator with a compatible and high-quality replacement unit, the alternator's regulation capabilities can be restored, contributing to the overall reliability of the vehicle's electrical system.
Diode Replacement
In instances where the alternator's diodes are found to be defective, replacing these essential semiconductor components is imperative. Diodes are responsible for converting the alternator's AC output into DC, facilitating the consistent flow of electrical power to the vehicle's systems and battery. Faulty diodes can result in irregular electrical output, leading to charging inefficiencies and potential damage to the vehicle's electrical components. By replacing the defective diodes with suitable replacements, the alternator's rectification process can be restored, ensuring a stable and reliable electrical supply.
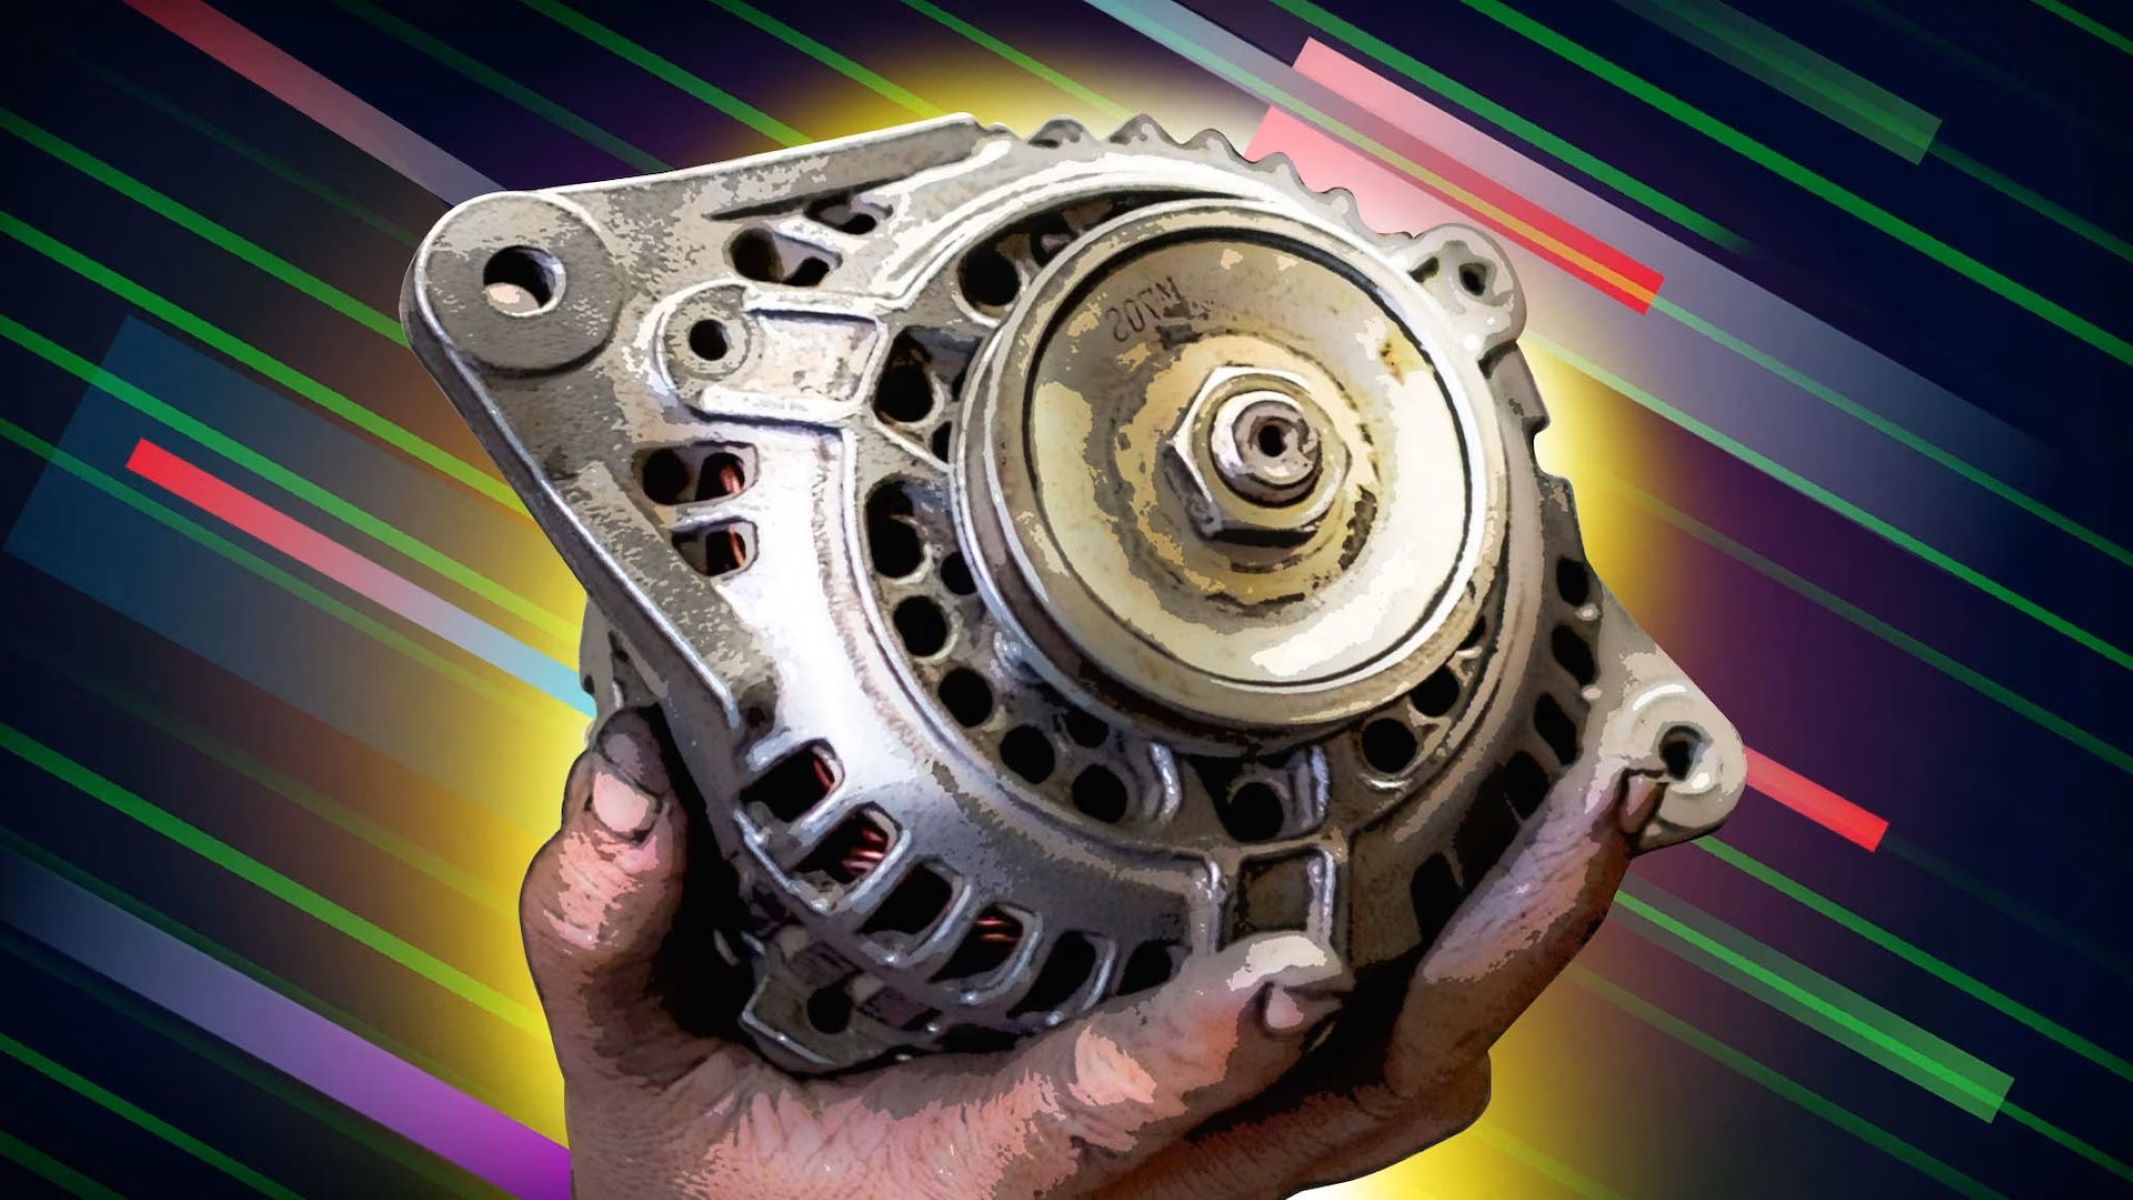
Bearing and Pulley Maintenance
The alternator's bearing and pulley assembly are critical components that facilitate the rotational motion necessary for electrical power generation. Over time, these components may experience wear, leading to noise, vibration, or inefficient power transmission. Conducting maintenance on the bearing and pulley assembly, including lubrication and potential replacement if significant wear is observed, can enhance the alternator's operational smoothness and longevity. By addressing issues related to bearing wear or pulley misalignment, the alternator's overall performance and reliability can be significantly improved.
Internal Component Repair
In cases where internal components such as the rotor, stator, or brushes exhibit signs of wear, damage, or malfunction, targeted repairs may be undertaken to restore their functionality. This may involve rewinding the stator coils, refurbishing the rotor assembly, or replacing worn brushes with compatible replacements. By addressing internal component issues through meticulous repairs, the alternator's efficiency and electrical output can be effectively restored, ensuring its sustained reliability within the vehicle's electrical system.
By undertaking these targeted repair or replacement actions based on the diagnosed issues, the alternator can be effectively restored to optimal functionality, ensuring a consistent and reliable electrical supply to the vehicle's systems. This proactive approach to addressing specific faults within the alternator contributes to the overall performance and longevity of the vehicle's electrical system, ultimately enhancing its reliability and operational efficiency.
Step 5: Reinstall the Alternator
Reinstalling the alternator is a critical phase of the repair process, marking the transition from diagnosis and repair to the restoration of the alternator within the vehicle's engine compartment. This step involves carefully positioning the alternator, reattaching electrical connections, securing mounting brackets, and ensuring proper tension on the drive belt. By methodically executing the reinstallation process, the alternator can be securely integrated into the vehicle's electrical system, setting the stage for subsequent testing and validation of its restored functionality.
The following steps outline the systematic approach to reinstalling the alternator:
-
Positioning the Alternator: Carefully maneuver the alternator back into its designated mounting position within the engine compartment, ensuring that it aligns with the mounting brackets and surrounding components. Exercise caution to prevent damage to electrical connections and components during the reinstallation process.
-
Securing Mounting Brackets and Bolts: Once the alternator is positioned correctly, reattach the mounting brackets and secure them with the appropriate bolts and fasteners. Ensure that the alternator is firmly supported and aligned with the surrounding components, maintaining proper clearance and alignment for the drive belt and electrical connections.
-
Reconnecting Electrical Connections: Begin by reattaching the electrical connections to the alternator, including the main power output wire and any additional wiring harnesses or connectors. Exercise care to align and secure the electrical connections, ensuring proper engagement and insulation to prevent electrical mishaps.
-
Tensioning the Drive Belt: With the alternator in place and the electrical connections secured, proceed to tension the drive belt by adjusting the tensioner pulley or tightening the adjustment bolt, depending on the vehicle's specific design. Ensure that the drive belt is properly aligned and tensioned to facilitate efficient power transmission from the engine to the alternator.
-
Final Checks and Adjustments: Conduct a thorough visual inspection of the alternator and surrounding components to verify proper alignment, secure mounting, and correctly routed wiring. Double-check the tightness of mounting bolts and fasteners, ensuring that the alternator is securely positioned and free from any obstructions.
By meticulously following these steps, the alternator can be successfully reinstalled within the vehicle's engine compartment, setting the stage for the subsequent testing and validation of its restored functionality. This systematic approach ensures that the alternator is securely integrated into the vehicle's electrical system, laying the groundwork for its reliable operation and contribution to the vehicle's overall performance.
Step 6: Test the Alternator
Testing the alternator is a crucial final step in the repair process, serving as a comprehensive validation of its functionality and performance within the vehicle's electrical system. By subjecting the alternator to rigorous testing procedures, any residual issues or malfunctions can be identified and addressed, ensuring its optimal operation and contribution to the vehicle's overall reliability. The following testing methods and procedures are integral to validating the alternator's restored functionality:
Voltage Output Test
Utilizing a multimeter, measure the alternator's output voltage with the engine running at idle and at increased RPM. A healthy alternator should produce a consistent voltage within the specified range for the vehicle's make and model. This test verifies the alternator's ability to generate and sustain the electrical power required to recharge the battery and supply the vehicle's systems.
Load Testing
Subject the alternator to a load test by activating multiple electrical components, such as headlights, air conditioning, and audio systems, while monitoring its output voltage. A reliable alternator should maintain a stable electrical output even under increased loads, ensuring consistent power supply to the vehicle's systems. This test validates the alternator's capacity to meet the vehicle's electrical demands under varying conditions.
Drive Belt Tension and Alignment
Inspect the drive belt tension and alignment to ensure that it is properly tensioned and aligned with the alternator pulley and engine components. A correctly tensioned drive belt facilitates efficient power transmission from the engine to the alternator, contributing to its operational smoothness and longevity.
Visual and Auditory Inspection
Conduct a visual and auditory inspection of the alternator and surrounding components to verify proper installation, secure mounting, and absence of abnormal noise or vibration. Additionally, check for any signs of overheating, loose connections, or irregular operation. This comprehensive inspection ensures that the alternator is free from visible defects and is securely integrated into the vehicle's engine compartment.
By meticulously conducting these testing procedures, any residual issues affecting the alternator's functionality can be accurately identified and addressed, ensuring its reliable operation within the vehicle's electrical system. This rigorous testing phase serves as a critical validation of the alternator's restored functionality, ultimately contributing to the vehicle's overall performance and reliability.
Conclusion
In conclusion, the process of repairing an alternator encompasses a comprehensive journey of diagnosis, targeted repairs, and meticulous reinstallation, culminating in rigorous testing to validate its restored functionality. By embarking on this journey, individuals gain valuable insights into the inner workings of the alternator, equipping themselves with the knowledge and skills necessary to address common issues and ensure the optimal performance of their vehicles.
The alternator, as a vital component of the vehicle's electrical system, plays a pivotal role in generating electrical power to recharge the battery and supply electricity to various vehicle components. Understanding its fundamental principles, components, and operational significance provides a solid foundation for diagnosing and repairing common issues that may arise.
The repair process involves a systematic approach, beginning with the careful disconnection of the vehicle's battery to ensure safety and prevent electrical mishaps. Subsequent steps include the removal of the alternator, thorough diagnosis of identified issues, targeted repairs or component replacements, and the methodical reinstallation of the alternator within the vehicle's engine compartment.
By meticulously following these steps and conducting rigorous testing procedures, individuals can effectively restore the alternator to optimal functionality, ensuring its reliable operation within the vehicle's electrical system. This proactive approach not only contributes to the vehicle's overall performance and reliability but also empowers individuals to take charge of essential maintenance and repair tasks, fostering a deeper connection with their vehicles.
Ultimately, the ability to repair an alternator represents a valuable skill that transcends mere mechanical proficiency, embodying a sense of empowerment and self-reliance. Whether it's troubleshooting and repairing the alternator in one's own vehicle or expanding automotive repair expertise, the knowledge gained from this process serves as a testament to the resilience and resourcefulness of individuals in maintaining and enhancing the performance of their vehicles.
In essence, the journey of repairing an alternator is a testament to the fusion of knowledge, skill, and determination, culminating in the restoration of a critical vehicle component and the empowerment of individuals to navigate the intricacies of automotive repair with confidence and proficiency.