Lifestyle
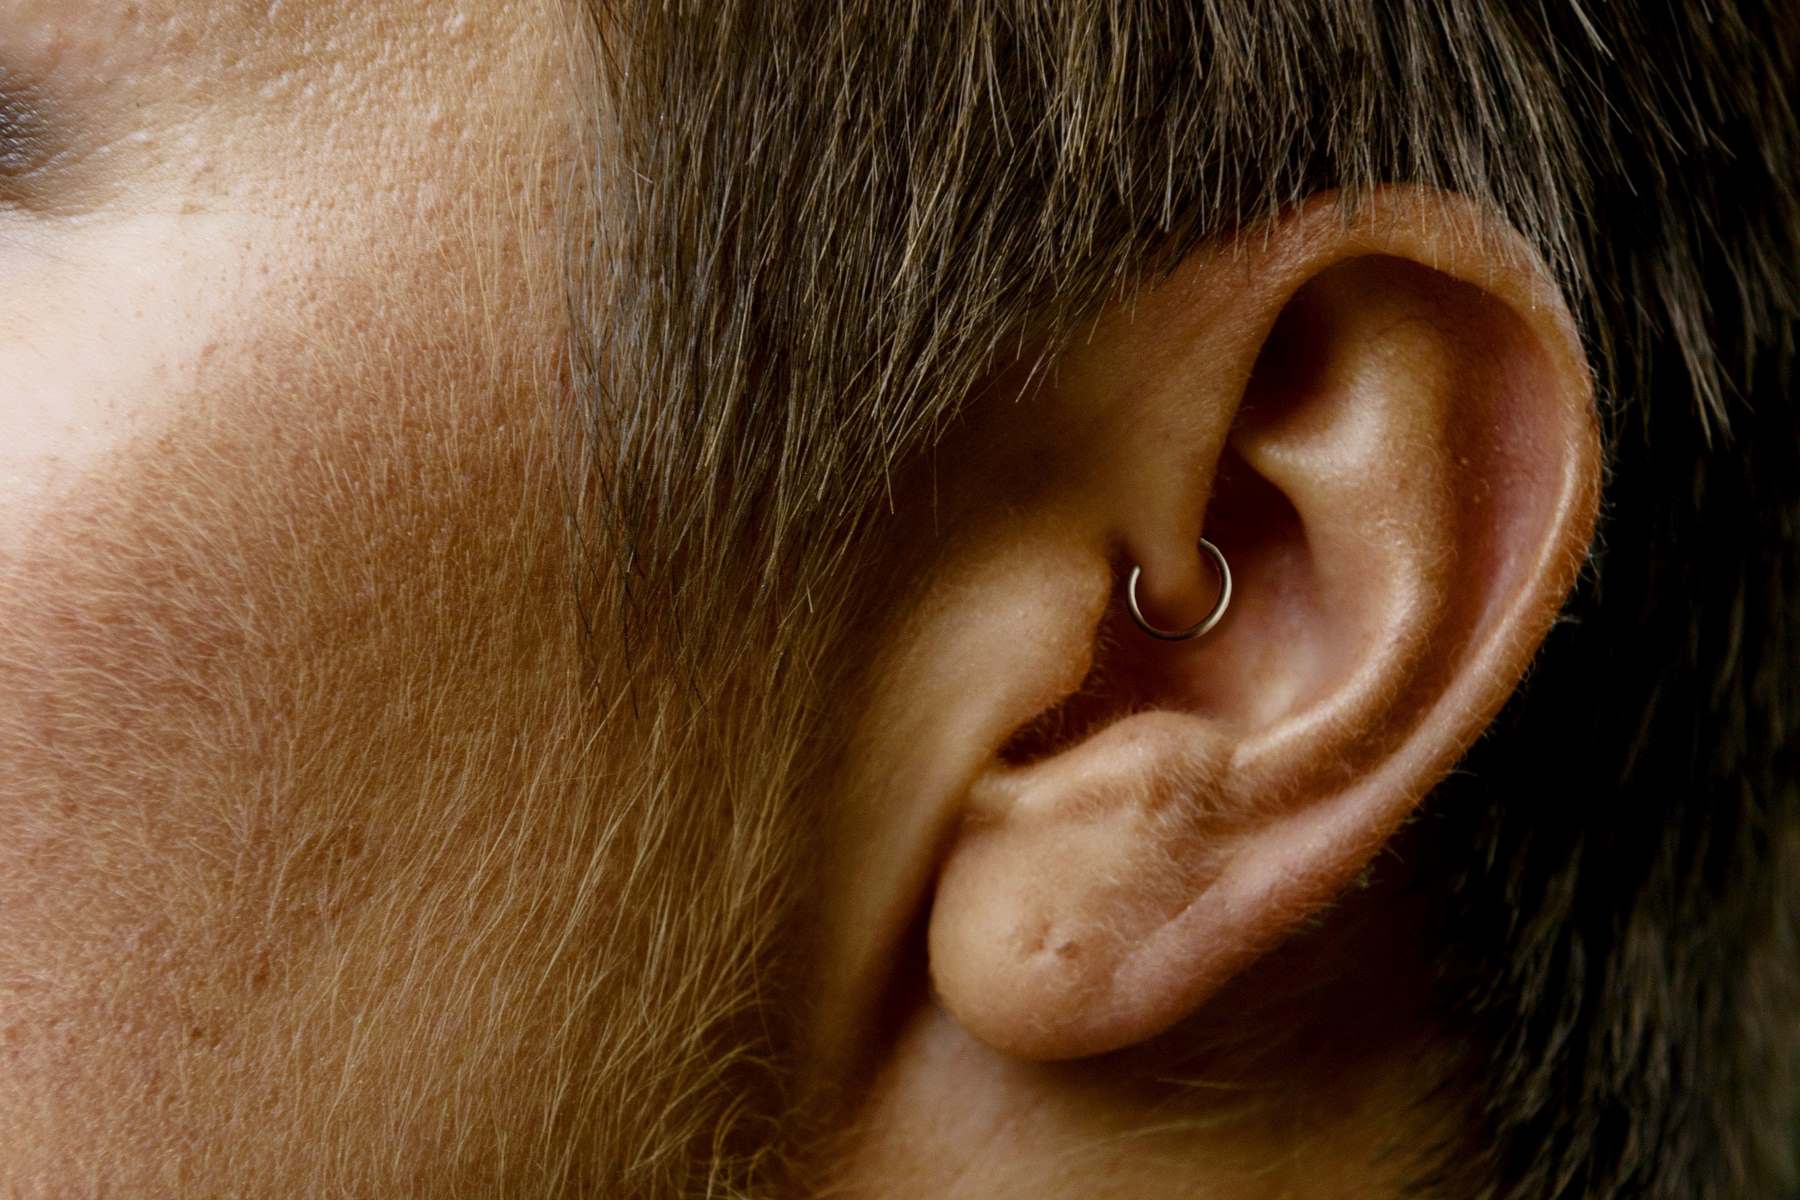
How To Remove Tragus Piercing
Published: February 26, 2024
Learn the best methods for removing a tragus piercing and caring for the area to prevent infection and promote healing. Discover essential tips for maintaining a healthy lifestyle during the healing process.
(Many of the links in this article redirect to a specific reviewed product. Your purchase of these products through affiliate links helps to generate commission for Regretless.com, at no extra cost. Learn more)
Table of Contents
Introduction
Removing a tragus piercing is a straightforward process that requires careful attention to hygiene and aftercare. Whether you're looking to change your piercing or have decided to part ways with it, understanding the proper removal technique is essential to prevent infection and promote healing. In this guide, we'll walk you through the step-by-step process of safely removing your tragus piercing at home. By following these instructions, you can ensure a smooth and comfortable experience while minimizing the risk of complications.
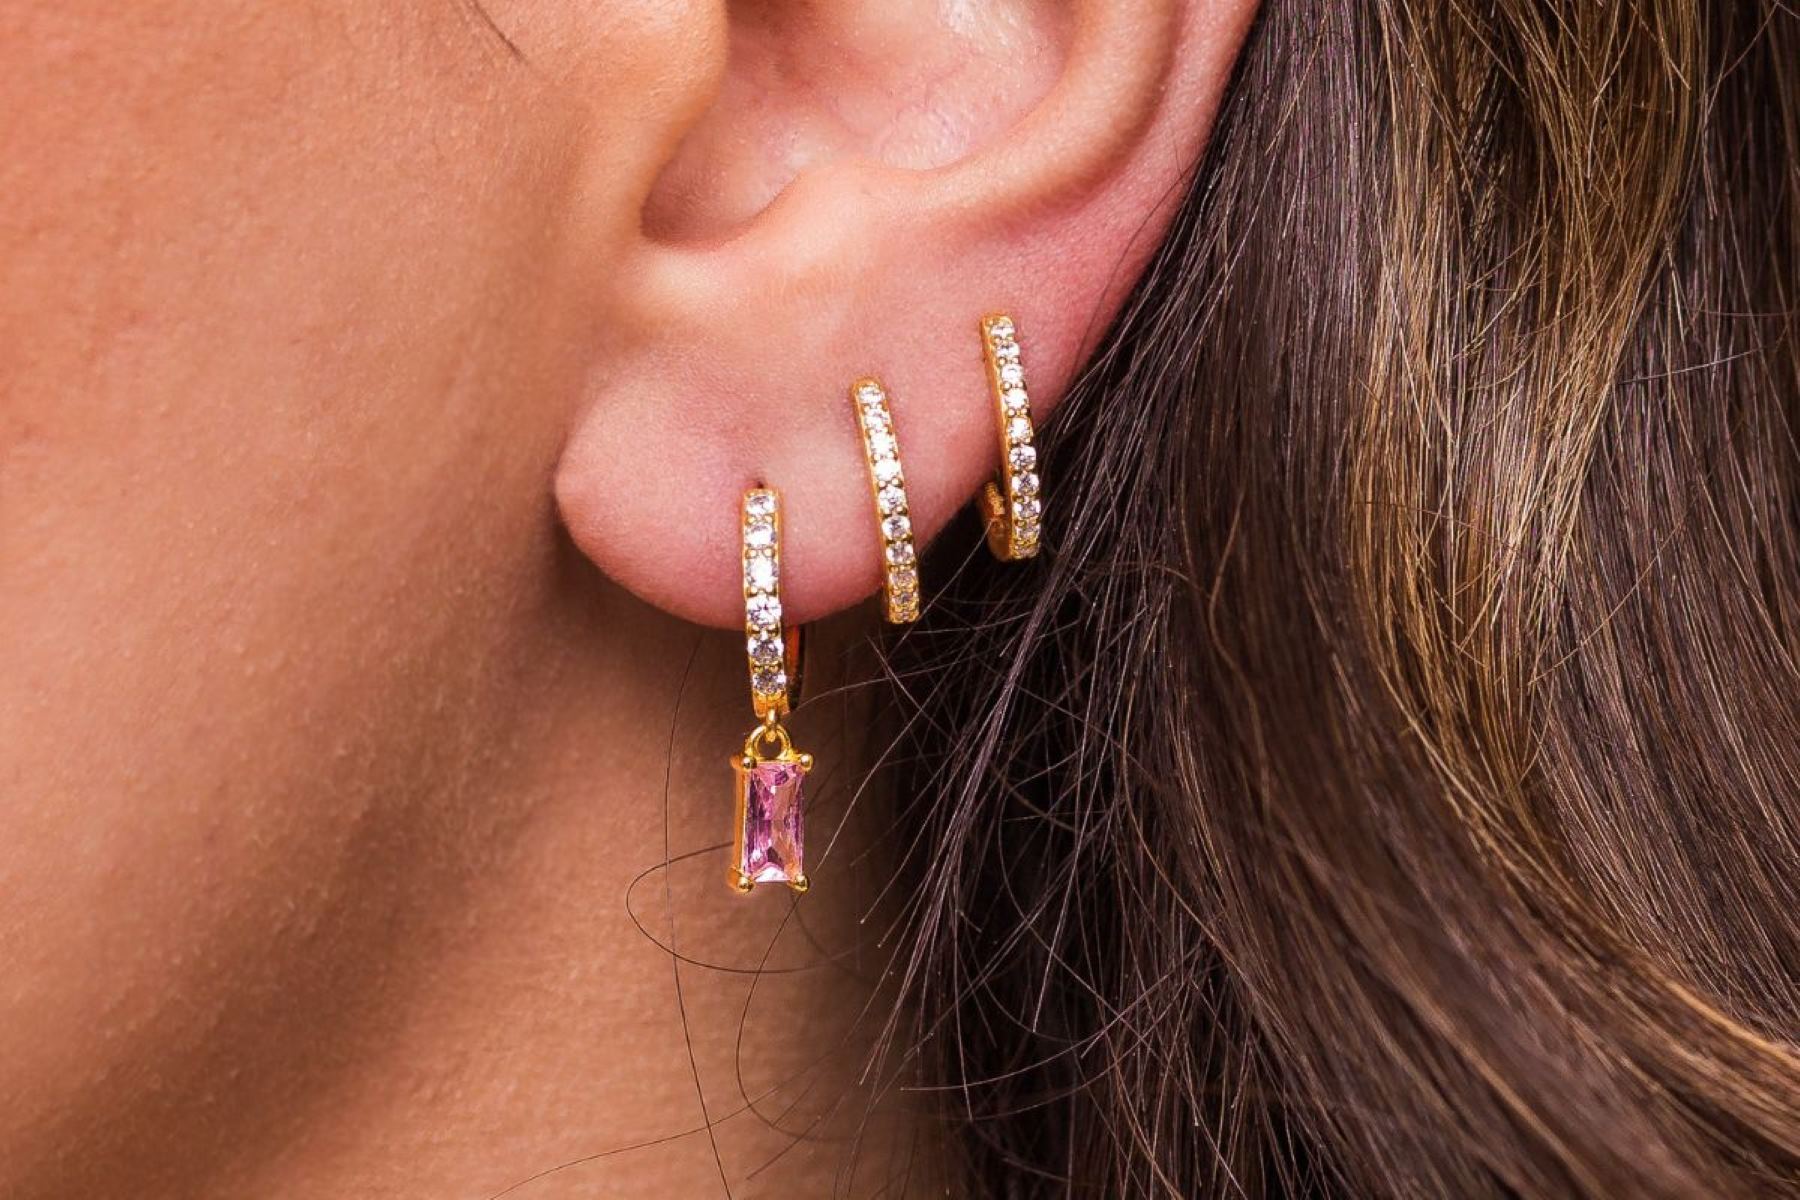
A tragus piercing, located on the small piece of cartilage that partially covers the ear canal, has gained popularity as a trendy and stylish form of self-expression. However, there may come a time when you wish to remove the jewelry, whether for personal preference or due to specific circumstances. It's important to approach the removal process with caution and patience to avoid causing any damage to the surrounding tissue.
By taking the time to gather the necessary supplies and understanding the proper cleaning and removal techniques, you can effectively remove your tragus piercing without unnecessary discomfort or complications. Additionally, we'll provide aftercare instructions to guide you through the crucial steps following the removal, ensuring that your ear heals properly and remains healthy.
Whether you're a piercing enthusiast or someone considering a tragus piercing for the first time, knowing how to safely remove the jewelry is an essential aspect of piercing care. With the right knowledge and preparation, you can navigate the process with confidence and ensure that your tragus piercing removal is a smooth and successful experience. Let's delve into the step-by-step process to safely remove your tragus piercing and maintain optimal ear health.
Read more: How To Take Out A Cartilage Piercing
Step 1: Gather necessary supplies
Before embarking on the process of removing your tragus piercing, it's crucial to gather the necessary supplies to ensure a smooth and hygienic procedure. Having the right tools at hand will not only facilitate the removal process but also contribute to maintaining a sterile environment, minimizing the risk of infection. Here's a comprehensive list of supplies you'll need:
-
Sterile saline solution: This is essential for cleaning the piercing site before and after the removal process. Opt for a sterile saline solution specifically formulated for wound care, as it helps to cleanse the area without causing irritation.
-
Clean paper towels or sterile gauze pads: These will be used to dry the area after cleaning and to handle the jewelry during the removal process. Ensure that the paper towels or gauze pads are lint-free to prevent any particles from getting into the piercing site.
-
Rubber gloves: Wearing disposable rubber gloves is important to maintain a hygienic environment and prevent the transfer of bacteria from your hands to the piercing site. This step is crucial for minimizing the risk of infection during the removal process.
-
Piercing-specific jewelry pliers or forceps: Having the right tools for removing the jewelry is essential. Ensure that the pliers or forceps are specifically designed for use with body jewelry to avoid causing damage to the piercing or surrounding tissue.
-
Antibacterial soap: Prior to the removal process, it's important to wash your hands thoroughly with antibacterial soap to minimize the risk of introducing bacteria to the piercing site.
-
A clean, well-lit workspace: Choose a well-lit and clean area where you can comfortably perform the removal process. Having a clear and organized workspace will contribute to a smooth and stress-free experience.
By ensuring that you have all the necessary supplies on hand, you can approach the tragus piercing removal process with confidence and peace of mind. This proactive approach not only facilitates the procedure but also contributes to maintaining a hygienic environment, promoting optimal healing post-removal. With the supplies gathered, you're now ready to proceed to the next step of cleaning the area in preparation for the removal process.
Step 2: Clean the area
Before initiating the tragus piercing removal process, it is imperative to ensure that the surrounding area is thoroughly cleaned to minimize the risk of infection and promote a hygienic environment for the procedure. Proper cleaning not only reduces the likelihood of complications but also sets the stage for a smooth and comfortable removal experience.
To begin, wash your hands meticulously with antibacterial soap, ensuring that all surfaces of your hands and fingers are thoroughly cleansed. This crucial step minimizes the risk of introducing bacteria to the piercing site during the removal process. Once your hands are impeccably clean, dry them with a clean paper towel or sterile gauze pad to maintain a hygienic environment.
Next, prepare the sterile saline solution by following the instructions provided on the packaging. It is essential to use a sterile saline solution specifically formulated for wound care, as it is gentle on the skin and effectively cleanses the area without causing irritation. Soak a clean paper towel or sterile gauze pad in the saline solution, ensuring that it is sufficiently damp but not dripping.
Gently clean the area around the tragus piercing, carefully removing any crusted discharge or debris that may have accumulated. It is important to exercise caution and avoid applying excessive pressure to the piercing site, as this can cause discomfort and potential damage to the surrounding tissue. Ensure that the entire area is thoroughly cleansed, including the front and back of the tragus where the jewelry is inserted.
Once the area has been meticulously cleaned with the saline solution, pat it dry with a clean paper towel or sterile gauze pad. It is crucial to use lint-free materials to prevent any particles from getting into the piercing site, which could potentially lead to irritation or infection.
By diligently cleaning the area surrounding the tragus piercing, you create an optimal environment for the subsequent removal process. This meticulous approach not only minimizes the risk of complications but also sets the stage for a smooth and comfortable removal experience. With the area thoroughly cleansed, you are now prepared to proceed to the next step of removing the jewelry from your tragus piercing.
Step 3: Remove the jewelry
Removing the jewelry from your tragus piercing requires precision and care to ensure a smooth and comfortable experience. With the area thoroughly cleaned and the necessary supplies at hand, you are now ready to proceed with the jewelry removal process.
-
Prepare the Workspace: Begin by ensuring that your workspace is well-lit and organized, providing a comfortable and conducive environment for the removal process. Lay out a clean paper towel or sterile gauze pad to place the jewelry on once it has been removed.
-
Put on Rubber Gloves: Prior to handling the jewelry, it is essential to wear disposable rubber gloves to maintain a hygienic environment and minimize the risk of introducing bacteria to the piercing site.
-
Gently Grasp the Jewelry: Using piercing-specific jewelry pliers or forceps, carefully grasp the jewelry at the point where it enters the piercing. Exercise caution and avoid applying excessive pressure to prevent discomfort or potential damage to the surrounding tissue.
-
Slow and Steady Removal: With a firm yet gentle grip on the jewelry, slowly and steadily maneuver it out of the piercing. It is important to proceed with patience and avoid rushing the process to minimize any potential discomfort.
-
Handle with Care: Once the jewelry has been removed, place it on the clean paper towel or sterile gauze pad. Handle it with care to prevent any accidental dropping or contamination.
-
Inspect the Jewelry and Piercing Site: Take a moment to inspect both the jewelry and the piercing site. Look for any signs of irritation, redness, or discharge, as these may indicate the need for further attention or care.
-
Dispose or Store the Jewelry: Depending on your intentions, you can choose to either dispose of the jewelry if you no longer plan to use it or carefully store it for future use. If storing the jewelry, ensure that it is kept in a clean and secure container to maintain its hygiene.
By following these step-by-step instructions, you can effectively remove the jewelry from your tragus piercing with precision and care. This meticulous approach not only minimizes the risk of discomfort or complications but also sets the stage for a smooth and successful removal process. With the jewelry safely removed, you can now proceed to the next step of cleaning the piercing site to promote optimal healing and aftercare.
Step 4: Clean the piercing site
After successfully removing the jewelry from your tragus piercing, the next crucial step is to thoroughly clean the piercing site to promote optimal healing and minimize the risk of infection. This meticulous cleaning process is essential for maintaining a hygienic environment and ensuring that the area remains free from debris and bacteria. By following these detailed instructions, you can effectively clean the piercing site with precision and care.
-
Prepare the Sterile Saline Solution: Begin by preparing a fresh batch of sterile saline solution according to the instructions provided on the packaging. It is important to use a sterile saline solution specifically formulated for wound care, as it is gentle on the skin and effectively cleanses the area without causing irritation.
-
Soak a Clean Gauze Pad: Take a sterile gauze pad and soak it in the prepared saline solution, ensuring that it is sufficiently damp but not dripping. The gentle nature of the saline solution makes it ideal for cleansing the piercing site without causing discomfort or irritation.
-
Gently Clean the Piercing Site: With the damp gauze pad, gently clean the area around the tragus piercing, ensuring that you cover both the front and back of the piercing. Carefully remove any residual discharge or debris, exercising caution to avoid applying excessive pressure that may cause discomfort.
-
Pat the Area Dry: Once the piercing site has been thoroughly cleansed, pat it dry with a clean paper towel or sterile gauze pad. It is crucial to use lint-free materials to prevent any particles from getting into the piercing site, which could potentially lead to irritation or infection.
-
Inspect the Piercing Site: Take a moment to inspect the piercing site for any signs of redness, swelling, or discharge. These may indicate the need for further attention or care, and it is important to monitor the area closely to ensure optimal healing.
By diligently following these detailed cleaning instructions, you can effectively cleanse the tragus piercing site, creating an optimal environment for healing and aftercare. This meticulous approach not only minimizes the risk of complications but also sets the stage for a smooth and comfortable healing process. With the piercing site thoroughly cleansed, you are now prepared to proceed to the final step of aftercare instructions to promote optimal healing and maintain ear health.
Read more: How To Remove Tattoos At Home
Step 5: Aftercare instructions
After successfully removing the jewelry from your tragus piercing and thoroughly cleansing the piercing site, it is essential to prioritize aftercare to promote optimal healing and minimize the risk of complications. The following aftercare instructions are crucial for maintaining the health of the piercing site and ensuring a smooth and comfortable healing process.
-
Regular Cleaning: Clean the tragus piercing site twice a day using a sterile saline solution. Gently soak a clean gauze pad in the saline solution and carefully cleanse the area, ensuring that both the front and back of the piercing are thoroughly attended to. This regular cleaning routine helps to prevent the accumulation of debris and promotes a hygienic environment for healing.
-
Avoiding Irritants: During the healing process, it is important to avoid exposing the piercing site to potential irritants such as harsh chemicals, perfumes, or excessive moisture. These can interfere with the healing process and increase the risk of infection. Additionally, refrain from touching the piercing with unwashed hands to minimize the introduction of bacteria.
-
Minimizing Trauma: Be mindful of activities that may subject the piercing site to trauma or pressure, such as sleeping on the pierced ear or wearing headphones that press against the tragus. Minimizing trauma to the area is essential for allowing the piercing to heal undisturbed.
-
Optimal Healing Environment: Ensure that the piercing site remains dry and well-ventilated to promote optimal healing. Avoid covering the area with tight clothing or accessories that may cause friction or trap moisture, as this can impede the healing process.
-
Healthy Lifestyle Choices: Maintaining overall health and wellness can contribute to the healing of the tragus piercing. Adequate hydration, a balanced diet, and sufficient rest support the body's natural healing processes, including the healing of the piercing site.
-
Professional Guidance: If you notice any signs of infection, persistent redness, swelling, or unusual discharge from the piercing site, seek professional guidance from a qualified piercer or healthcare provider. Prompt attention to any concerning symptoms is crucial for addressing potential issues early and ensuring the proper care of the piercing site.
By diligently adhering to these aftercare instructions, you can support the healing process of your tragus piercing and minimize the risk of complications. Consistent care and attention to the piercing site contribute to a smooth and comfortable healing experience, allowing you to enjoy your tragus piercing with confidence and optimal ear health.