Home>Home and Garden>The Ultimate Guide To Replacing Your Outdoor Water Faucet
Home and Garden
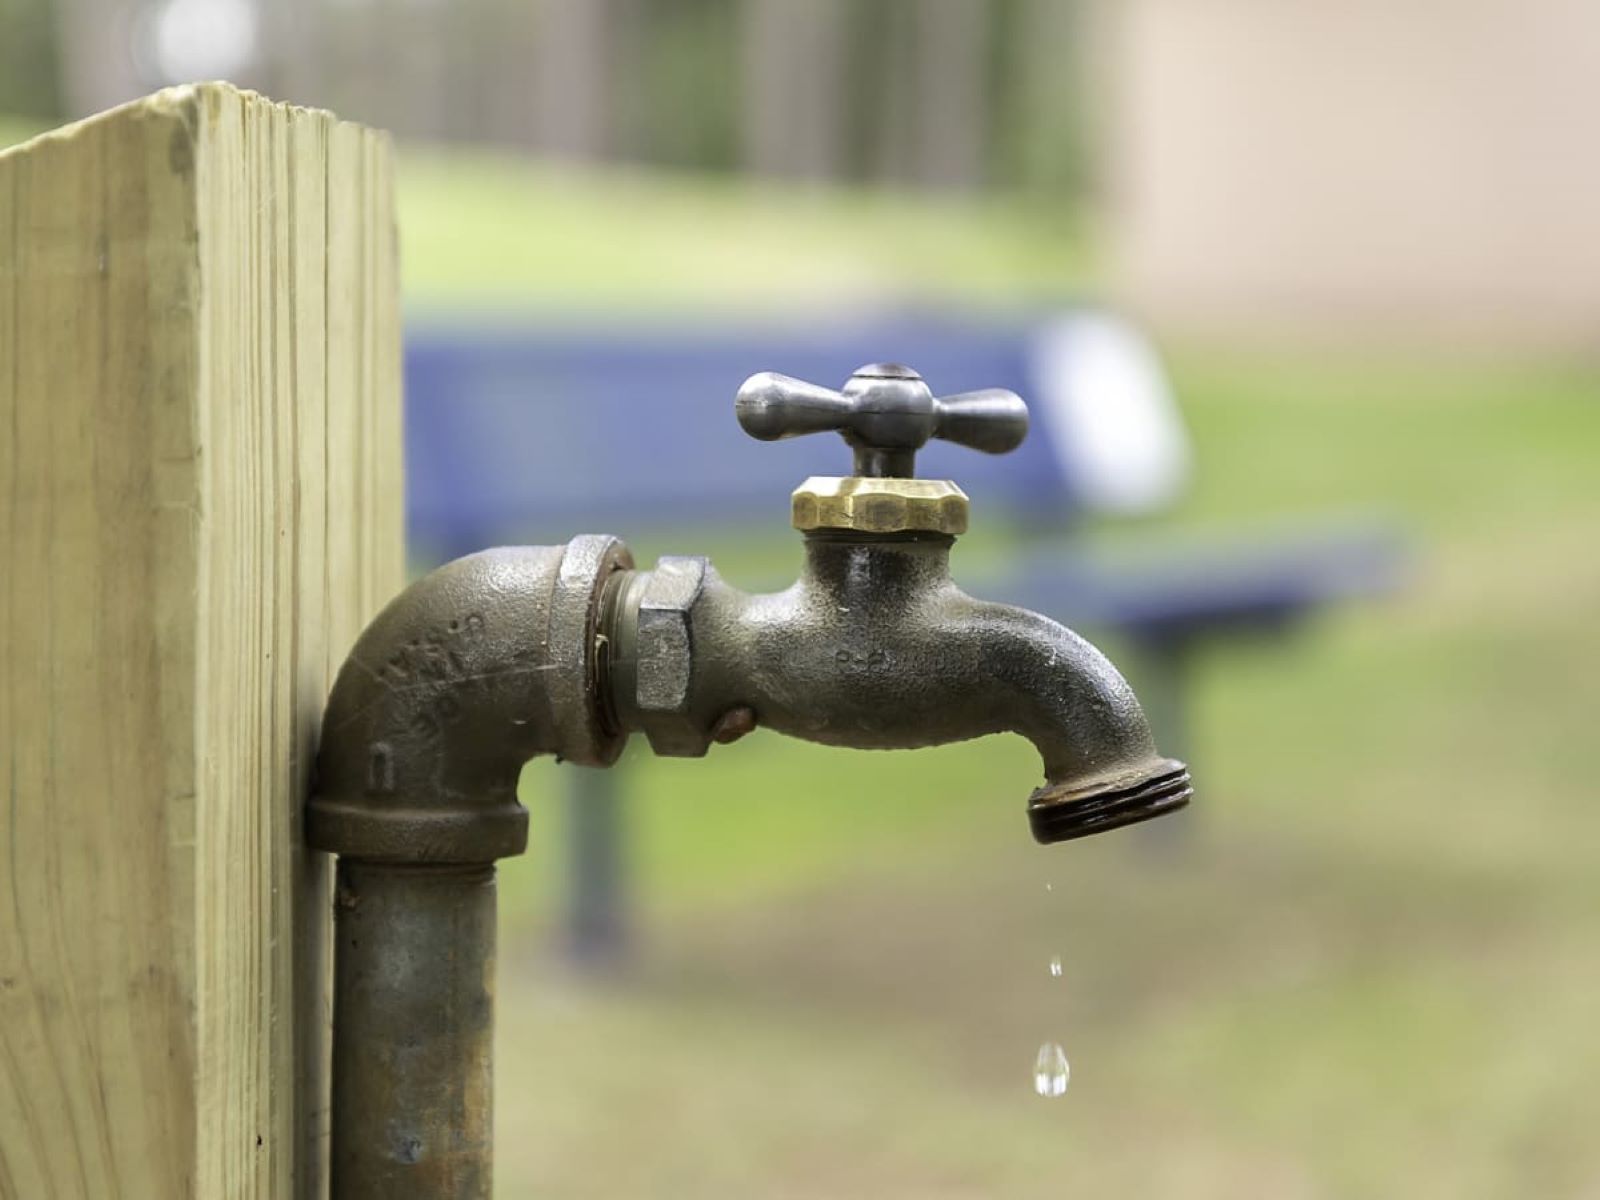
The Ultimate Guide To Replacing Your Outdoor Water Faucet
Published: January 18, 2024
Discover the ultimate guide to replacing your outdoor water faucet with expert tips and advice. Enhance your home and garden with this essential DIY project.
(Many of the links in this article redirect to a specific reviewed product. Your purchase of these products through affiliate links helps to generate commission for Regretless.com, at no extra cost. Learn more)
Table of Contents
Introduction
Replacing an outdoor water faucet may seem like a daunting task, but with the right guidance and a bit of know-how, it can be a manageable and rewarding project. Whether your current faucet is leaking, corroded, or simply outdated, installing a new one can enhance the functionality and aesthetic appeal of your outdoor space. In this comprehensive guide, we will walk you through the step-by-step process of replacing your outdoor water faucet, empowering you to tackle this project with confidence.
A reliable outdoor water faucet is essential for various tasks, such as watering the garden, washing the car, or connecting a hose for various outdoor activities. Over time, these faucets can deteriorate due to exposure to the elements, mineral deposits, or general wear and tear. By replacing your outdoor water faucet, you can ensure a reliable water source for all your outdoor needs while also preventing potential water wastage from leaks and drips.
Before diving into the practical aspects of replacing your outdoor water faucet, it's essential to understand the importance of this fixture in your outdoor space. A high-quality faucet not only provides convenience but also contributes to the overall functionality and aesthetics of your outdoor area. By choosing a new faucet that aligns with your specific needs and preferences, you have the opportunity to enhance the usability and visual appeal of your outdoor space.
Throughout this guide, we will cover each step in detail, providing valuable insights and tips to help you successfully complete the replacement process. From assessing the situation and gathering the necessary tools and materials to shutting off the water supply, removing the old faucet, and installing the new one, we have you covered. Additionally, we will guide you through testing the new faucet and ensuring its proper functionality, leaving you with a reliable and efficient outdoor water source.
By the end of this guide, you will have the knowledge and confidence to undertake this project, ultimately revitalizing your outdoor water supply and maximizing the functionality of your outdoor area. So, let's embark on this journey together and transform your outdoor water faucet from a source of frustration to a reliable and efficient asset for your home and garden.
Step 1: Assessing the Situation
Before diving into the process of replacing your outdoor water faucet, it's crucial to assess the existing situation to ensure a smooth and successful transition. Start by examining the current condition of your outdoor faucet. Look for signs of corrosion, leaks, or any visible damage that may indicate the need for replacement. Additionally, check for proper water flow and functionality, as these factors can help determine the urgency of the replacement.
Assess the type of faucet currently installed. There are various types of outdoor water faucets, including traditional compression faucets, frost-proof faucets, and ball or cartridge faucets. Understanding the specific type of faucet you have will guide you in selecting the appropriate replacement and ensure compatibility with your existing setup.
Furthermore, consider the location of the faucet and its surroundings. Take note of any obstructions or potential challenges that may arise during the replacement process. Accessibility is key, so evaluating the space around the faucet will help you anticipate any obstacles and plan accordingly.
It's also essential to check the condition of the connecting pipes and fittings. Inspect for any signs of rust, deterioration, or leaks in the pipe connections. Identifying any underlying issues with the plumbing system will allow you to address them simultaneously, preventing future complications and ensuring a seamless installation of the new faucet.
Lastly, assess your specific needs and preferences regarding the new outdoor water faucet. Consider factors such as the desired water flow rate, the inclusion of additional features such as a shut-off valve or anti-siphon device, and the overall aesthetic appeal of the new fixture. By understanding your requirements, you can make an informed decision when selecting a replacement faucet that aligns with your expectations.
By thoroughly assessing the situation, you will gain valuable insights that will guide you through the subsequent steps of the replacement process. This proactive approach sets the foundation for a successful and efficient replacement, ultimately ensuring that the new outdoor water faucet meets your functional and aesthetic needs for years to come.
Step 2: Gathering the Necessary Tools and Materials
Gathering the necessary tools and materials is a crucial preparatory step before embarking on the replacement of your outdoor water faucet. By ensuring that you have all the required items at your disposal, you can streamline the installation process and minimize potential interruptions. Here's a comprehensive list of tools and materials you will need:
Tools:
- Adjustable Wrench: A versatile tool that allows you to tighten or loosen nuts and bolts of various sizes, essential for securing the new faucet in place.
- Pipe Wrench: Specifically designed for gripping and turning pipes, this tool is indispensable for removing the old faucet and installing the new one securely.
- Screwdriver (Phillips and Flat-head): To loosen or tighten screws and fasteners as needed during the replacement process.
- Teflon Tape: Also known as plumber's tape, this thin, white tape is used to create a watertight seal when wrapping around the threaded connections of the new faucet.
- Plumbing Grease: A lubricant designed for plumbing applications, useful for ensuring smooth installation and preventing corrosion on the threads of the new faucet.
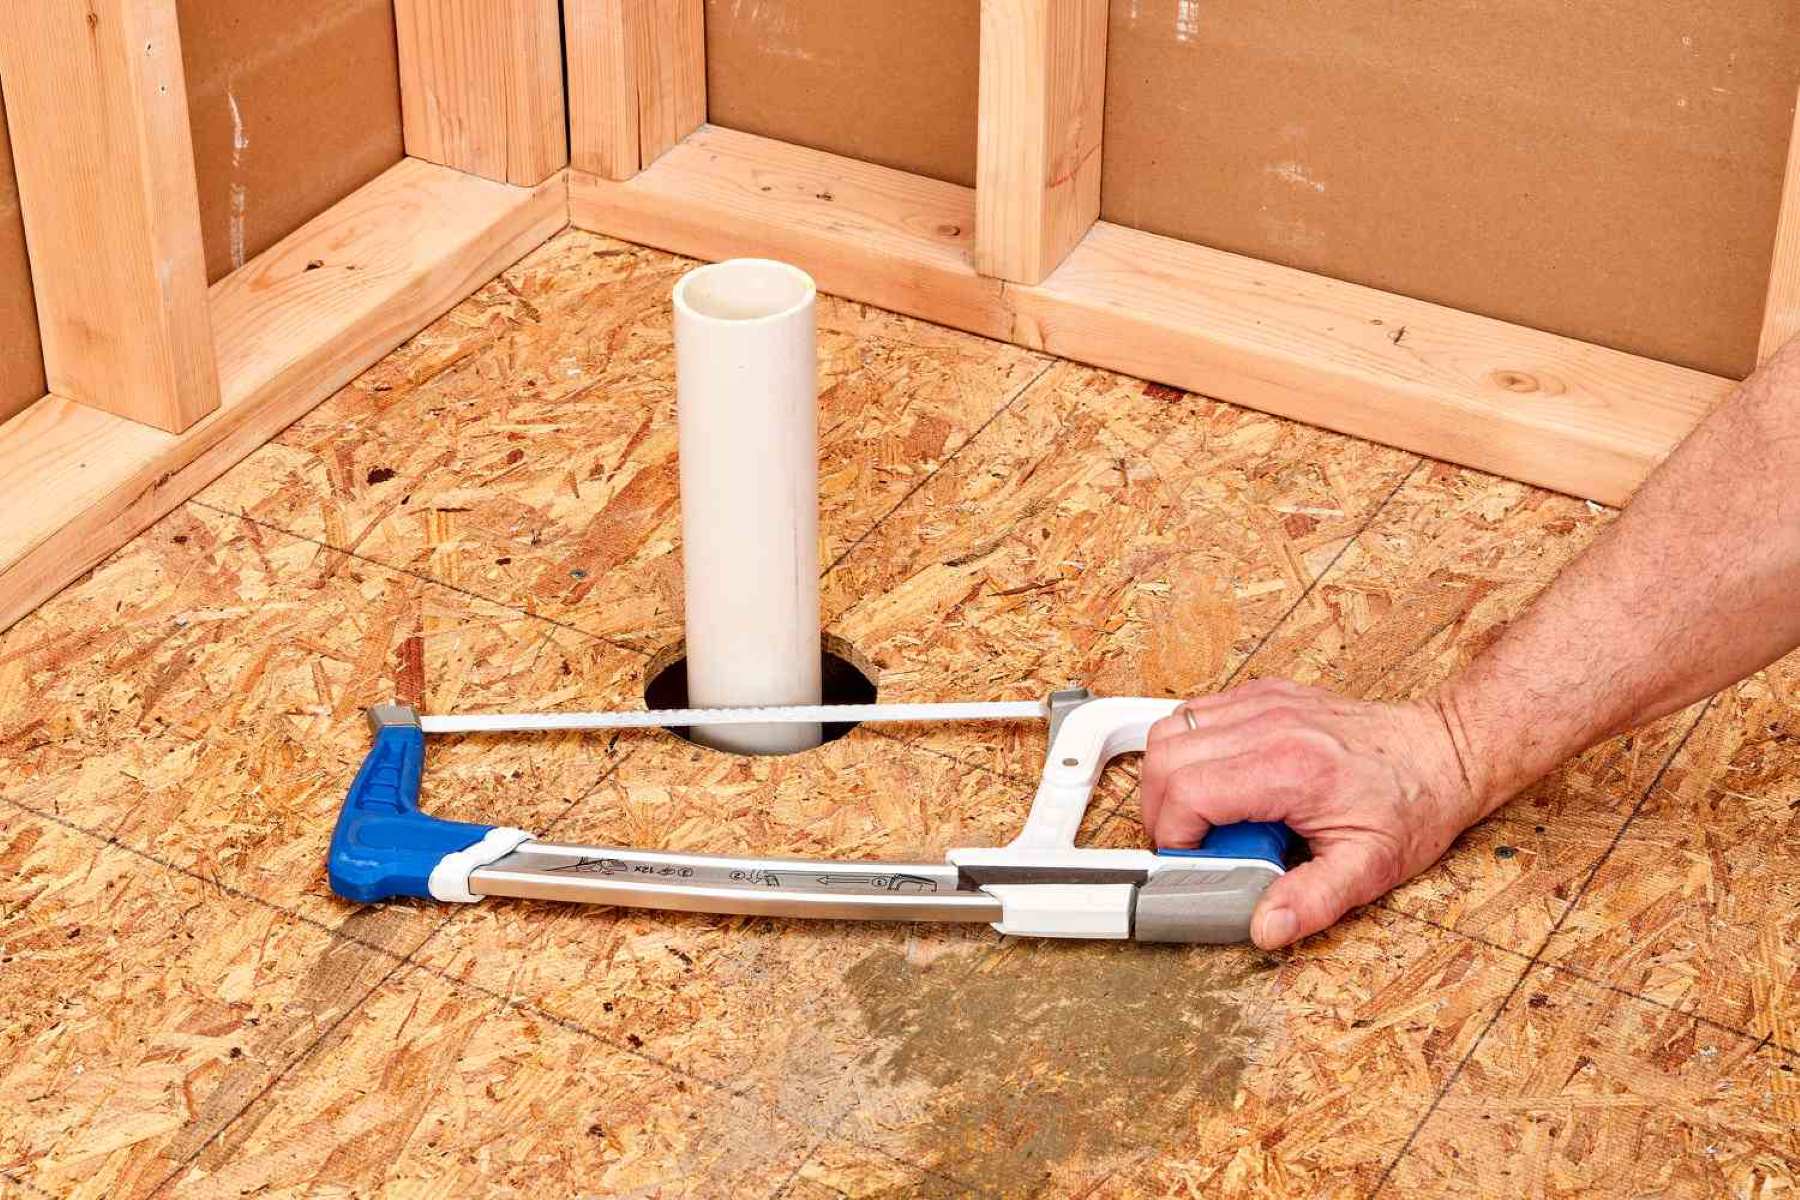
- Hacksaw or Pipe Cutter: In case you need to trim or remove a section of the water supply pipe to accommodate the new faucet's length.
- Pliers: For gripping and turning small components, particularly helpful when dealing with tight spaces.
- Flashlight: To illuminate the work area, especially if the faucet is located in a dimly lit or confined space.
Materials:
- New Outdoor Water Faucet: Select a high-quality faucet that meets your specific requirements, ensuring compatibility with the existing plumbing setup.
- Replacement Washers and O-rings: These small but essential components help create a watertight seal and prevent leaks between the faucet and the water supply pipe.
- Pipe Compound or Thread Sealant: To apply on the threads of the water supply pipe before attaching the new faucet, enhancing the seal and preventing leaks.
- Safety Glasses and Gloves: Prioritize safety by wearing protective eyewear and gloves throughout the installation process to prevent injury and exposure to debris or chemicals.
- Bucket and Rags: For catching excess water, debris, and for general cleanup during the removal and installation of the faucet.
- Pipe Cleaner and Sandpaper: To clean and smooth the pipe ends before connecting the new faucet, ensuring a secure and leak-free joint.
By gathering these tools and materials in advance, you will be well-prepared to tackle the replacement of your outdoor water faucet with confidence and efficiency. This proactive approach sets the stage for a smooth and successful installation, ultimately ensuring a reliable and functional water source for your outdoor space.
Step 3: Shutting Off the Water Supply
Before proceeding with the removal of the old outdoor water faucet, it is imperative to shut off the water supply to the faucet. This crucial step prevents any water flow during the replacement process, minimizing the risk of leaks and ensuring a safe working environment. Here's a detailed guide on how to shut off the water supply for a seamless transition:
Locate the Main Water Shut-Off Valve
Begin by locating the main water shut-off valve for your outdoor water supply. In most cases, this valve is situated near the point where the water supply enters your home or in close proximity to the outdoor faucet itself. Common locations include the basement, utility room, or an outdoor access panel. If you have difficulty locating the shut-off valve, consult your home's plumbing layout or seek professional guidance.
Turn Off the Water Supply
Once you've located the main shut-off valve, use a firm grip to turn the valve handle in a clockwise direction. This action effectively closes the valve, halting the flow of water to the outdoor faucet. It's essential to ensure that the valve is fully closed to prevent any residual water from seeping through the faucet during the replacement process.
Drain Excess Water
After shutting off the water supply, open the outdoor faucet to drain any remaining water from the pipes. This step reduces the pressure within the plumbing system and eliminates any trapped water within the faucet, minimizing the risk of leaks or spills during the removal and installation of the new faucet.
Verify Water Supply Shutdown
To confirm that the water supply is indeed shut off, attempt to turn on the outdoor faucet. If the shut-off process was successful, no water should flow from the faucet. This simple test provides assurance that the water supply has been effectively halted, allowing you to proceed with the subsequent steps of the replacement process with confidence.
By diligently following these steps to shut off the water supply, you create a safe and controlled environment for replacing your outdoor water faucet. This proactive approach minimizes potential water-related complications, ensuring a smooth transition to the installation of the new faucet. With the water supply securely shut off, you are now ready to proceed with the removal of the old faucet and the installation of the new one, taking another step towards revitalizing your outdoor water source.
Step 4: Removing the Old Faucet
Removing the old outdoor water faucet is a critical phase in the replacement process, requiring careful attention to detail and precision to ensure a smooth transition to the installation of the new fixture. Here's a detailed guide on how to effectively remove the old faucet, paving the way for the installation of a reliable and updated water source for your outdoor space.
1. Disconnect the Water Supply
Start by using an adjustable wrench to loosen and disconnect the water supply pipe from the old faucet. Carefully grip the nut connecting the pipe to the faucet and rotate it counterclockwise to loosen it. Once the nut is sufficiently loosened, gently detach the water supply pipe from the faucet, allowing any residual water to drain into a bucket or suitable container.
2. Remove the Mounting Hardware
Using a suitable wrench or pliers, loosen and remove the mounting hardware securing the old faucet to the outdoor wall or siding. This may involve unscrewing bolts, nuts, or screws, depending on the specific mounting mechanism of the existing faucet. Ensure that all fasteners are fully removed, allowing for the smooth extraction of the old faucet from its position.
3. Extract the Old Faucet
With the water supply disconnected and the mounting hardware removed, carefully extract the old faucet from its place. Depending on the condition of the faucet and its surrounding components, it may require gentle maneuvering to free it from any remaining attachments. Exercise caution to avoid damaging the water supply pipe or adjacent structures during the removal process.
4. Clean and Inspect the Area
Once the old faucet has been successfully removed, take the opportunity to clean the exposed area and inspect the condition of the water supply pipe and surrounding surfaces. Remove any debris or remnants of the old faucet, ensuring a clean and smooth surface for the installation of the new fixture. Additionally, inspect the water supply pipe for any signs of damage, corrosion, or irregularities that may require attention before installing the new faucet.
By meticulously following these steps to remove the old outdoor water faucet, you create a clear pathway for the installation of a new, reliable fixture. This proactive approach sets the stage for a seamless transition to the next phase of the replacement process, ensuring that the new faucet can be installed securely and efficiently. With the old faucet successfully removed, you are now ready to proceed with the installation of the updated outdoor water source, bringing you one step closer to enhancing the functionality and aesthetics of your outdoor space.
Step 5: Installing the New Faucet
With the old outdoor water faucet successfully removed, it's time to proceed with the installation of the new fixture, bringing you closer to revitalizing your outdoor water source. Follow these detailed steps to ensure a smooth and secure installation of the updated faucet:
-
Prepare the New Faucet:
Before installing the new outdoor water faucet, ensure that it is compatible with the existing plumbing setup and meets your specific functional and aesthetic requirements. Inspect the faucet for any visible defects or damage, and familiarize yourself with its components and installation instructions provided by the manufacturer. -
Apply Pipe Compound or Thread Sealant:
To enhance the seal and prevent leaks, apply a suitable pipe compound or thread sealant to the threads of the water supply pipe. This step is crucial for creating a secure and watertight connection between the pipe and the new faucet. -
Attach the New Faucet:
Carefully position the new faucet against the outdoor wall or siding, aligning it with the water supply pipe. Secure the faucet in place by fastening the mounting hardware, ensuring a stable and flush fit against the installation surface. Use the appropriate tools to tighten the mounting bolts or screws, firmly anchoring the new faucet. -
Connect the Water Supply:
Reconnect the water supply pipe to the new faucet, ensuring a snug and secure fit. Use an adjustable wrench to tighten the connection, effectively sealing the joint and preventing potential leaks. Exercise caution to avoid over-tightening, which may damage the components or compromise the seal. -
Apply Teflon Tape and Plumbing Grease:
Wrap Teflon tape around the threaded connections of the new faucet to create a reliable seal and prevent water leakage. Additionally, apply a thin layer of plumbing grease to the threads, promoting smooth assembly and offering protection against corrosion. -
Test the Faucet:
Turn on the main water supply valve to allow water to flow to the newly installed faucet. Check for any signs of leaks or irregularities in the connection. Test the functionality of the faucet by turning it on and off, ensuring smooth operation and consistent water flow. -
Inspect for Leaks:
Thoroughly inspect the connections and surrounding areas for any signs of leaks or drips. Address any potential leaks immediately by tightening the connections or reapplying sealant as needed. It's essential to verify that the new faucet is securely installed and free from any water-related issues.
By meticulously following these steps to install the new outdoor water faucet, you ensure a secure and reliable water source for your outdoor space. This proactive approach sets the stage for a successful transition to the final phase of the replacement process, ultimately enhancing the functionality and aesthetics of your outdoor area.
Step 6: Testing the New Faucet
After successfully installing the new outdoor water faucet, it is crucial to conduct thorough testing to ensure its functionality, reliability, and overall performance. This step serves as the final validation of the replacement process, allowing you to verify the proper operation of the new fixture and address any potential issues before concluding the project.
1. Water Flow and Pressure
Turn on the new faucet to assess the water flow and pressure. Observe the consistency of the water stream and ensure that the flow meets your expectations. Check for any irregularities, such as sputtering or fluctuating pressure, which may indicate underlying issues with the installation or the faucet itself.
2. Leak Detection
Carefully inspect the connections and surrounding areas for any signs of leaks or drips. Pay close attention to the joint between the water supply pipe and the new faucet, as well as any threaded connections. Use a dry cloth or tissue to wipe the connections and visually confirm that no water is escaping from the installed components.
3. Smooth Operation
Test the handle or knob of the new faucet to ensure smooth operation. Verify that the handle turns easily and effectively controls the water flow. If the faucet features additional functionalities, such as a shut-off valve or adjustable spray settings, test each feature to confirm its proper operation.
4. Weather Resistance (If Applicable)
If the new outdoor water faucet is exposed to the elements, such as rain, snow, or direct sunlight, consider its weather resistance. Ensure that the faucet is designed to withstand outdoor conditions and that its components are durable and resistant to corrosion. This is particularly important for faucets installed in outdoor kitchens, gardens, or recreational areas.
5. Overall Functionality
Assess the overall functionality of the new faucet, considering factors such as ease of use, ergonomic design, and compatibility with accessories such as hoses or attachments. Evaluate how the new fixture enhances the usability and convenience of your outdoor water source, meeting your specific needs and contributing to the efficiency of outdoor tasks.
6. Adjustment and Fine-Tuning
If any issues or concerns arise during the testing phase, take the necessary steps to address them promptly. This may involve adjusting the connections, reapplying sealant, or consulting the manufacturer's guidelines for troubleshooting and fine-tuning the installation. It is essential to resolve any potential issues to ensure the long-term reliability of the new faucet.
By diligently testing the new outdoor water faucet, you guarantee that it meets the highest standards of performance and reliability. This proactive approach allows you to address any potential issues before concluding the replacement process, ultimately ensuring that your outdoor water source is equipped with a dependable and efficient fixture.
Step 7: Ensuring Proper Functionality
Ensuring the proper functionality of the newly installed outdoor water faucet is paramount to the success of the replacement process. This step involves a comprehensive evaluation of the faucet's performance, reliability, and adherence to your specific functional requirements. By meticulously assessing the functionality of the new fixture, you can confirm its seamless integration into your outdoor space and address any potential concerns before finalizing the project.
Water Flow and Pressure
Begin by testing the water flow and pressure of the new faucet. Turn on the faucet and observe the consistency and strength of the water stream. Verify that the flow meets your expectations and remains steady without any fluctuations. Adequate water pressure is essential for various outdoor tasks, such as watering plants, cleaning outdoor surfaces, and filling containers. A consistent and reliable water flow ensures the faucet's effectiveness in fulfilling these essential functions.
Read more: How To Replace Your O2 Sensor
Leak Detection
Thoroughly inspect the connections and surrounding areas for any signs of leaks or drips. Pay close attention to the joint between the water supply pipe and the new faucet, as well as any threaded connections. Use a dry cloth or tissue to wipe the connections and visually confirm that no water is escaping from the installed components. Addressing any potential leaks at this stage is crucial to prevent water wastage and potential damage to the surrounding structures.
Smooth Operation
Test the handle or knob of the new faucet to ensure smooth and effortless operation. Verify that the handle turns easily and effectively controls the water flow. The ergonomic design and ease of use of the faucet contribute to its overall functionality, ensuring a user-friendly experience for anyone utilizing the outdoor water source. Additionally, if the faucet features additional functionalities, such as adjustable spray settings, confirm that these features operate smoothly and as intended.
Weather Resistance (If Applicable)
For outdoor water faucets exposed to the elements, such as rain, snow, or direct sunlight, consider their weather resistance. Ensure that the faucet is designed to withstand outdoor conditions and that its components are durable and resistant to corrosion. This is particularly important for faucets installed in outdoor kitchens, gardens, or recreational areas. A weather-resistant faucet ensures long-term reliability and minimizes the need for frequent maintenance or replacements due to environmental exposure.
Overall Functionality
Assess the overall functionality of the new faucet, taking into account its compatibility with accessories such as hoses or attachments. Evaluate how the new fixture enhances the usability and convenience of your outdoor water source, meeting your specific needs and contributing to the efficiency of outdoor tasks. A well-functioning faucet seamlessly integrates into your outdoor space, providing a reliable water source for various activities without any operational shortcomings.
Adjustment and Fine-Tuning
If any issues or concerns arise during the functionality assessment, take the necessary steps to address them promptly. This may involve adjusting the connections, reapplying sealant, or consulting the manufacturer's guidelines for troubleshooting and fine-tuning the installation. Resolving any potential issues at this stage ensures the long-term reliability and optimal performance of the new faucet, providing peace of mind and satisfaction with the replacement process.
By diligently ensuring the proper functionality of the new outdoor water faucet, you guarantee its seamless integration and reliable performance in your outdoor space. This proactive approach allows you to address any potential concerns and fine-tune the installation, ultimately ensuring that your outdoor water source is equipped with a dependable and efficient fixture that meets your specific functional requirements.
Conclusion
Congratulations on successfully completing the replacement of your outdoor water faucet! By following the comprehensive steps outlined in this guide, you have taken a proactive approach to enhancing the functionality and aesthetics of your outdoor space. The process of replacing the outdoor water faucet may have seemed daunting at first, but your determination and attention to detail have resulted in a reliable and efficient water source for various outdoor activities.
As you reflect on the journey from assessing the situation and gathering the necessary tools to shutting off the water supply, removing the old faucet, and installing the new one, you have gained valuable insights and practical skills. Your proactive approach to testing the new faucet and ensuring its proper functionality demonstrates your commitment to creating a dependable outdoor water source.
The successful replacement of the outdoor water faucet not only addresses any existing issues with the old fixture but also sets the stage for a renewed outdoor experience. Whether you use the faucet for watering your garden, washing your car, or connecting a hose for various outdoor tasks, the new fixture is poised to meet your specific needs and contribute to the overall functionality of your outdoor area.
As you enjoy the benefits of the updated outdoor water faucet, take pride in the knowledge and skills you have acquired throughout this project. Your proactive approach and attention to detail have empowered you to undertake a significant home and garden improvement, ultimately enhancing the quality of your outdoor living space.
Remember that the successful replacement of the outdoor water faucet is just one example of the rewarding projects you can tackle to improve your home and garden. Your newfound confidence and practical experience position you to explore and undertake various other home improvement endeavors, further enhancing your living environment.
As you bask in the satisfaction of a job well done, take a moment to appreciate the transformation of your outdoor water source. The reliable and efficient new faucet stands as a testament to your proactive approach and commitment to maintaining a functional and aesthetically pleasing outdoor space.
With the completion of this project, you have not only revitalized your outdoor water source but have also expanded your DIY skills and knowledge, setting the stage for future home and garden endeavors. Embrace the sense of accomplishment and the positive impact of your efforts as you continue to enhance your living environment through proactive and practical projects.