Home>Home and Garden>Stop A Leaking Bathtub Faucet Drip With These Genius Hacks!
Home and Garden
Stop A Leaking Bathtub Faucet Drip With These Genius Hacks!
Published: January 19, 2024
Learn how to stop a leaking bathtub faucet drip with these genius hacks! Get expert tips and tricks for fixing your home and garden plumbing issues.
(Many of the links in this article redirect to a specific reviewed product. Your purchase of these products through affiliate links helps to generate commission for Regretless.com, at no extra cost. Learn more)
Table of Contents
Introduction
Dealing with a leaking bathtub faucet can be a frustrating and bothersome issue for homeowners. The incessant dripping not only wastes water but also creates an annoying sound that can disrupt peace and quiet. Fortunately, you can put an end to this nuisance with a few simple hacks that are within your reach. Whether you're a seasoned DIY enthusiast or a novice in the realm of home repairs, these genius solutions will empower you to tackle the problem head-on and restore tranquility to your bathroom.
A leaking bathtub faucet is a common household dilemma that can stem from various sources, such as worn-out washers, damaged O-rings, or faulty faucet cartridges. Identifying the root cause of the leak is the first step towards resolving the issue effectively. Armed with the right tools and a bit of know-how, you can embark on this repair journey with confidence, knowing that a peaceful, drip-free bathroom experience awaits at the end of the road.
In the following sections, we'll delve into the specifics of fixing a leaking bathtub faucet using different methods. From employing a wrench to addressing the faucet cartridge and utilizing a faucet repair kit, each approach offers a unique solution to this prevalent household problem. By understanding the intricacies of each method, you'll be equipped to make an informed decision based on your specific situation. So, roll up your sleeves, gather your tools, and let's embark on a journey to bid adieu to that pesky bathtub faucet drip!
Identify the Cause of the Leak
Before diving into the repair process, it's crucial to pinpoint the exact cause of the leak. A leaking bathtub faucet can result from a range of issues, and identifying the root cause is essential for determining the most effective repair method.
The first step in this process involves observing the type of leak. Is the faucet dripping constantly, or does it only leak when the water is turned on? Understanding the behavior of the leak can provide valuable clues about the underlying problem.
Next, it's important to assess the potential sources of the leak. Common culprits include worn-out washers, damaged O-rings, or a faulty faucet cartridge. A worn-out washer can lead to dripping when the faucet is turned off, while damaged O-rings can cause leaks around the base of the faucet. On the other hand, a faulty faucet cartridge can result in erratic water flow and persistent dripping.
To further diagnose the issue, it's advisable to inspect the faucet for visible signs of wear and tear. Look for mineral deposits, corrosion, or rust, as these can indicate areas that require attention. Additionally, pay attention to any unusual sounds or vibrations emanating from the faucet, as these can provide valuable insights into the underlying issue.
In some cases, the leak may be attributed to loose connections or damaged seals. Carefully examine the faucet handles, spout, and connections to identify any potential areas of concern. Tightening loose connections and replacing damaged seals can often resolve minor leaks without the need for extensive repairs.
By taking the time to thoroughly assess the nature of the leak and inspecting the faucet for visible signs of wear and tear, you'll be better equipped to address the issue effectively. Armed with this understanding, you can proceed to gather the necessary tools and embark on the journey to fix your leaking bathtub faucet.
Gather the Necessary Tools
Before embarking on the task of fixing a leaking bathtub faucet, it's essential to gather the necessary tools to ensure a smooth and efficient repair process. Having the right tools at your disposal will not only streamline the repair but also empower you to address the issue with confidence and precision. Here's a comprehensive list of essential tools you'll need for this endeavor:
-
Adjustable Wrench: A versatile and indispensable tool for any plumbing repair, an adjustable wrench will allow you to tighten or loosen various components of the faucet with ease. Its adjustable jaw width makes it suitable for a wide range of nuts and bolts, providing flexibility during the repair process.
-
Screwdriver Set: A set of screwdrivers, including both flathead and Phillips head varieties, is crucial for accessing and disassembling different parts of the faucet. Whether it's removing handles, faceplates, or faucet components, having the right screwdriver on hand is essential for a seamless repair experience.
-
Faucet Repair Kit: Depending on the specific nature of the leak, a faucet repair kit containing replacement washers, O-rings, and other essential components may be necessary. These kits are designed to provide a comprehensive solution for common faucet issues and can be instrumental in addressing the root cause of the leak.
-
Replacement Faucet Cartridge: If the leak is attributed to a faulty faucet cartridge, having a replacement cartridge on hand is essential. Ensure that the replacement cartridge is compatible with your faucet model to facilitate a hassle-free installation.
-
Plumber's Tape: Also known as Teflon tape, plumber's tape is a crucial component for creating a watertight seal when reassembling the faucet components. Applying plumber's tape to the threaded connections can help prevent leaks and ensure a secure fit.
-
Clean Cloth or Rag: Keeping a clean cloth or rag handy is essential for wiping down the faucet components and drying the area before and after the repair. This will help maintain cleanliness and prevent water damage to surrounding surfaces.
-
Flashlight: In some cases, the area around the faucet may be dimly lit or challenging to access. A flashlight can be immensely helpful for illuminating the work area and providing better visibility during the repair process.
By ensuring that you have these essential tools at your disposal, you'll be well-prepared to tackle the task of fixing a leaking bathtub faucet. With the right tools and a methodical approach, you can proceed to implement the appropriate repair method and bid farewell to that persistent faucet drip.
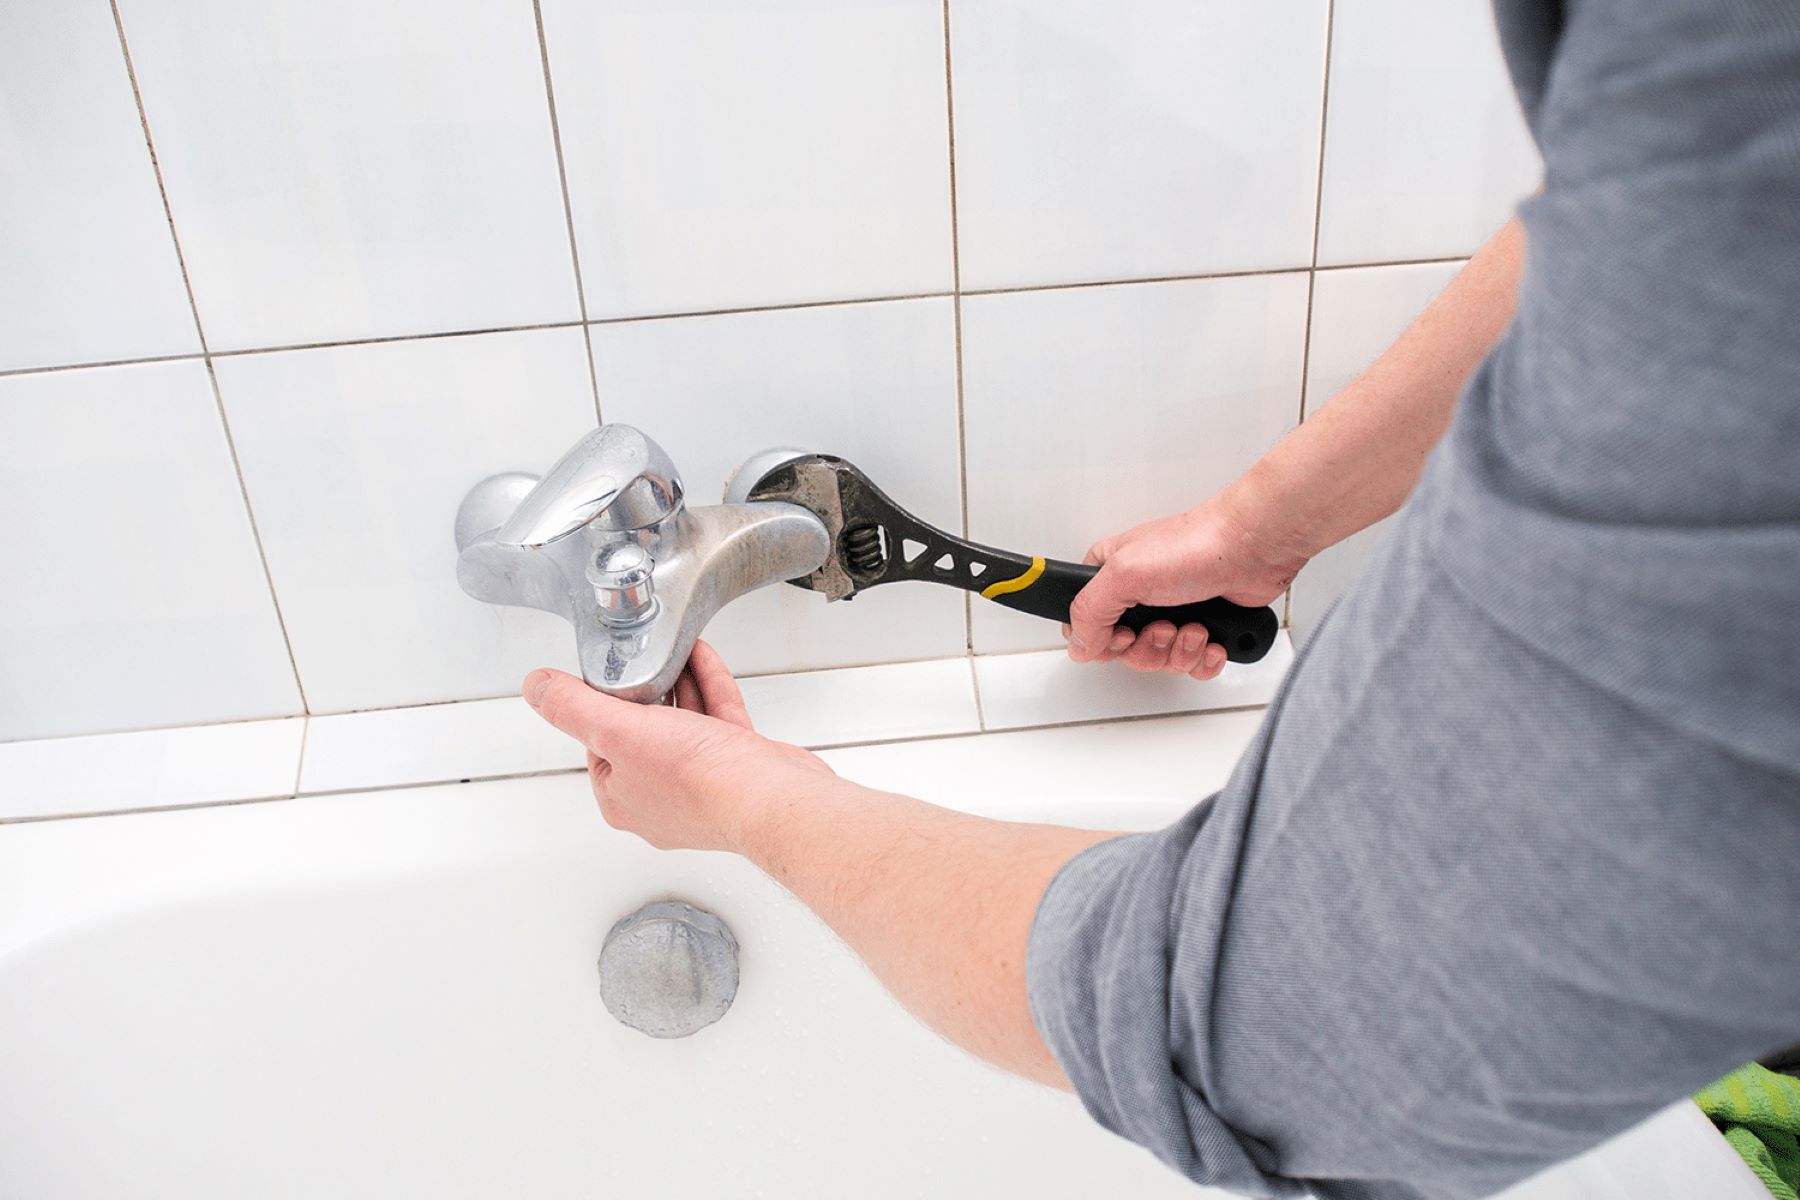
Fixing a Leaking Faucet with a Wrench
When it comes to addressing a leaking bathtub faucet, using a wrench can be a game-changer in resolving the issue. This method is particularly effective for tackling leaks caused by loose or worn-out components within the faucet assembly. Here's a step-by-step guide to fixing a leaking faucet with a wrench:
Step 1: Turn Off the Water Supply
Before commencing the repair, it's crucial to shut off the water supply to the faucet. Locate the shutoff valves beneath the sink or, if unavailable, turn off the main water supply to the house. This precautionary measure will prevent any water flow during the repair process.
Step 2: Disassemble the Faucet
Using a screwdriver, carefully remove the faucet handles and any decorative caps or covers to access the valve assembly. Once the components are exposed, use an adjustable wrench to loosen and remove the valve stem assembly, which houses the internal components of the faucet.
Step 3: Inspect and Tighten Components
With the valve stem assembly removed, inspect the various components for signs of wear, corrosion, or damage. Check the condition of the washers, O-rings, and other seals, ensuring that they are intact and free from deterioration. Utilizing the wrench, tighten any loose nuts, bolts, or connections within the assembly to eliminate potential sources of the leak.
Step 4: Replace Worn-Out Components
If the inspection reveals worn-out or damaged components such as washers or O-rings, it's advisable to replace them with new ones. A faucet repair kit containing replacement parts can be invaluable in this scenario. Carefully install the new components, ensuring a snug fit and proper alignment within the assembly.
Step 5: Reassemble the Faucet
Once the necessary adjustments and replacements have been made, reassemble the faucet by reversing the disassembly process. Tighten the valve stem assembly securely using the wrench, ensuring that all components are properly aligned and seated. Apply plumber's tape to the threaded connections to create a watertight seal.
Read more: Genius Hacks To Temporarily Bypass Qustodio
Step 6: Turn On the Water Supply and Test
After reassembling the faucet, turn on the water supply and test the repaired faucet for leaks. Observe the faucet closely to ensure that the leak has been effectively addressed. If the faucet operates without any signs of leakage, congratulations – you've successfully fixed a leaking bathtub faucet with a wrench!
By following these steps and utilizing a wrench to address loose or worn-out components, you can effectively resolve a leaking bathtub faucet and restore functionality to your bathroom fixture. This method offers a practical and cost-effective solution to common faucet leaks, empowering you to take control of the repair process with confidence and precision.
Replacing the Faucet Cartridge
When dealing with a leaking bathtub faucet attributed to a faulty faucet cartridge, replacing the cartridge is a crucial step towards resolving the issue effectively. The faucet cartridge, located within the faucet body, controls the flow of water and plays a pivotal role in ensuring a consistent and leak-free operation. Here's a detailed guide on replacing the faucet cartridge to address a leaking bathtub faucet:
Step 1: Turn Off the Water Supply
Before initiating the cartridge replacement process, it's essential to shut off the water supply to the faucet. Locate the shutoff valves beneath the sink or turn off the main water supply to the house to prevent any water flow during the repair.
Step 2: Disassemble the Faucet
Using a screwdriver, carefully remove the faucet handles and any decorative caps or covers to access the faucet's internal components. Once the components are exposed, locate and remove the retaining nut or clip securing the faucet cartridge within the faucet body.
Step 3: Remove the Old Cartridge
With the retaining nut or clip removed, gently extract the old faucet cartridge from the faucet body. Take note of the orientation and positioning of the cartridge to ensure proper installation of the replacement cartridge.
Step 4: Inspect and Clean the Faucet Body
Before installing the replacement cartridge, inspect the interior of the faucet body for any debris, mineral buildup, or signs of damage. Thoroughly clean the faucet body using a clean cloth or brush to ensure a clean and smooth surface for the new cartridge.
Step 5: Install the Replacement Cartridge
Carefully insert the replacement faucet cartridge into the faucet body, aligning it correctly based on the orientation observed during the removal of the old cartridge. Ensure that the cartridge is seated securely and aligns with any corresponding grooves or notches within the faucet body.
Step 6: Reassemble the Faucet
Once the replacement cartridge is installed, reassemble the faucet by securing the retaining nut or clip to hold the cartridge in place. Reattach the faucet handles, decorative caps, and any other removed components, ensuring a snug and secure fit.
Step 7: Turn On the Water Supply and Test
After reassembling the faucet, turn on the water supply and test the repaired faucet for leaks. Monitor the faucet closely to confirm that the replacement cartridge has effectively addressed the previous leak. If the faucet operates without any signs of leakage, you've successfully replaced the faucet cartridge and resolved the issue.
By following these steps and replacing the faucet cartridge, you can effectively address a leaking bathtub faucet attributed to a faulty cartridge. This method offers a precise and targeted solution to cartridge-related leaks, empowering you to restore functionality and efficiency to your bathroom fixture.
Fixing a Leaking Faucet with a Faucet Repair Kit
When it comes to resolving a leaking bathtub faucet, a faucet repair kit can serve as a comprehensive solution to address common issues that lead to leaks. This method is especially effective for dealing with worn-out washers, damaged O-rings, or faulty seals, which are frequent culprits behind faucet leaks. Here's a detailed walkthrough on fixing a leaking faucet with a faucet repair kit:
Step 1: Turn Off the Water Supply
As with any faucet repair process, it's essential to start by turning off the water supply to the faucet. Locate the shutoff valves beneath the sink or shut off the main water supply to the house to prevent water flow during the repair.
Step 2: Disassemble the Faucet
Using a screwdriver, carefully remove the faucet handles and any decorative caps or covers to access the internal components of the faucet. Once the components are exposed, proceed to disassemble the faucet to gain access to the problematic parts.
Step 3: Inspect and Identify Leaky Components
Upon disassembly, inspect the various components for signs of wear, deterioration, or damage. Focus on identifying the specific parts contributing to the leak, such as washers, O-rings, or seals. The faucet repair kit contains replacement components for these parts, allowing for a targeted solution to the leak.
Step 4: Replace Worn-Out Components
Utilizing the components from the faucet repair kit, replace the worn-out washers, damaged O-rings, or faulty seals within the faucet assembly. Ensure that the replacement components are compatible with your faucet model and follow the kit's instructions for proper installation.
Step 5: Reassemble the Faucet
Once the necessary replacements have been made, reassemble the faucet by reversing the disassembly process. Securely reattach the faucet handles, decorative caps, and any other removed components, ensuring a snug fit.
Read more: Genius Hacks To Temporarily Bypass Qustodio
Step 6: Turn On the Water Supply and Test
After reassembling the faucet, turn on the water supply and test the repaired faucet for leaks. Observe the faucet closely to confirm that the replacement components from the repair kit have effectively addressed the previous leak. If the faucet operates without any signs of leakage, you've successfully fixed a leaking bathtub faucet using the faucet repair kit.
By following these steps and utilizing a faucet repair kit, you can effectively address a leaking bathtub faucet caused by worn-out washers, damaged O-rings, or faulty seals. This method offers a convenient and targeted solution, enabling you to restore functionality and efficiency to your bathroom fixture.
Conclusion
In conclusion, addressing a leaking bathtub faucet is a manageable task that can be accomplished with the right approach and tools at your disposal. Whether it's employing a wrench to tighten loose components, replacing a faulty faucet cartridge, or utilizing a comprehensive faucet repair kit, each method offers a unique solution to the common issue of faucet leaks. By identifying the root cause of the leak and selecting the most appropriate repair method, you can bid farewell to the persistent drip and restore tranquility to your bathroom.
The process begins with a thorough assessment to identify the specific source of the leak, whether it's worn-out washers, damaged O-rings, or a faulty faucet cartridge. This initial step sets the stage for an informed and targeted approach to resolving the issue. Once the cause of the leak has been identified, gathering the necessary tools, including an adjustable wrench, screwdrivers, a faucet repair kit, and a replacement faucet cartridge, ensures that you're well-prepared to tackle the repair.
For leaks attributed to loose or worn-out components within the faucet assembly, employing a wrench offers a practical and cost-effective solution. By carefully disassembling the faucet, inspecting the components, and making necessary adjustments or replacements, you can effectively eliminate the source of the leak and restore the faucet's functionality.
In cases where a faulty faucet cartridge is the culprit behind the leak, replacing the cartridge emerges as a targeted and precise solution. This method involves disassembling the faucet, removing the old cartridge, installing a replacement cartridge, and reassembling the faucet to ensure a leak-free operation.
Alternatively, utilizing a faucet repair kit provides a comprehensive and convenient solution for addressing common faucet issues such as worn-out washers, damaged O-rings, or faulty seals. By replacing these components with the parts included in the repair kit, you can effectively resolve the leak and prevent future water wastage and annoying dripping sounds.
Regardless of the chosen method, the ultimate goal is to restore the functionality and efficiency of the bathtub faucet while eliminating the persistent leak. By following the step-by-step guides for each repair method, you can embark on a journey to bid adieu to that pesky bathtub faucet drip and enjoy a tranquil and leak-free bathroom experience.
In conclusion, with the right tools, knowledge, and a proactive approach, you can take control of the repair process and transform a frustrating household issue into a successful DIY accomplishment. So, roll up your sleeves, gather your tools, and embark on the journey to fix your leaking bathtub faucet – a peaceful, drip-free bathroom experience awaits at the end of the road.