Home>Lifestyle>Genius Hack: Cut Trim At A Perfect 45 Degree Angle – No Miter Saw Needed!
Lifestyle
Genius Hack: Cut Trim At A Perfect 45 Degree Angle – No Miter Saw Needed!
Published: January 13, 2024
Discover a genius hack to cut trim at a perfect 45-degree angle without needing a miter saw. Enhance your lifestyle with this time-saving DIY solution today!
(Many of the links in this article redirect to a specific reviewed product. Your purchase of these products through affiliate links helps to generate commission for Regretless.com, at no extra cost. Learn more)
Table of Contents
Introduction
Are you ready to elevate your DIY game and achieve professional-looking results without the need for expensive tools? Whether you're a seasoned DIY enthusiast or just starting to explore the world of home improvement, mastering the art of cutting trim at a perfect 45-degree angle can significantly enhance the visual appeal of your living space. The best part? You won't require a miter saw to achieve this precision.
In this comprehensive guide, we'll unveil a genius hack that empowers you to cut trim at a flawless 45-degree angle without the need for a miter saw. By following these simple yet effective steps, you'll be able to elevate the aesthetic appeal of your home with impeccably crafted trim, showcasing clean and seamless joints that exude a professional touch.
Whether you're envisioning a stunning crown molding installation, revamping your baseboards, or adding a touch of elegance to your door and window casings, mastering the art of achieving precise 45-degree angles on trim pieces will be a game-changer. With this innovative approach, you can transform your living spaces with a touch of sophistication and craftsmanship, all while embracing the satisfaction of a DIY project completed to perfection.
So, gather your materials and let's embark on this journey to unlock the secrets of achieving flawless 45-degree angles on trim pieces, all without the need for a miter saw. Get ready to witness the transformative power of this genius hack as we dive into the step-by-step process that will empower you to elevate your home's aesthetic appeal with precision-cut trim.
Materials Needed
To embark on this transformative journey of achieving impeccable 45-degree angles on trim pieces without a miter saw, you'll need a few essential materials to ensure a seamless and successful process. Here's a comprehensive list of the materials that will empower you to elevate the visual appeal of your living space with precision-cut trim:
-
Trim Pieces: Select the trim pieces that align with your project goals, whether it's crown molding, baseboards, or door and window casings. Ensure that the trim pieces are of high quality and suitable for the specific area where they will be installed.
-
Miter Box: This essential tool will serve as the foundation of our genius hack. The miter box provides a guided platform for cutting trim at precise angles, allowing you to achieve the coveted 45-degree cuts without the need for a miter saw.
-
Backsaw: A fine-tooth backsaw is instrumental in achieving clean and accurate cuts on the trim pieces. Look for a backsaw with a comfortable grip and sharp teeth to facilitate smooth cutting motions.
-
Pencil: A reliable pencil will be your trusted companion throughout the process, enabling you to mark the precise points for cutting and assembly.
-
Measuring Tape: Accurate measurements are paramount in achieving seamless joints and precise angles. A durable measuring tape will ensure that your trim pieces are cut to the perfect lengths, setting the stage for a flawless assembly.
-
Clamps: Sturdy clamps will secure the trim pieces in place during the cutting process, preventing any unnecessary movement that could compromise the accuracy of your cuts.
-
Wood Glue: Once the 45-degree cuts have been achieved, wood glue will play a crucial role in seamlessly joining the trim pieces, creating a cohesive and visually striking final result.
By ensuring that you have these essential materials at your disposal, you'll be fully equipped to embark on this innovative journey of achieving flawless 45-degree angles on trim pieces, all without the need for a miter saw. With these materials in hand, you're one step closer to transforming your living space with the impeccable craftsmanship and precision-cut trim that this genius hack enables.
Step 1: Measure and Mark
The foundational step in achieving flawless 45-degree angles on trim pieces without a miter saw revolves around precise measurements and accurate markings. This pivotal stage sets the stage for the seamless assembly of trim pieces, ensuring that each cut aligns perfectly to create the desired angles. Let's delve into the intricate process of measuring and marking, laying the groundwork for the subsequent steps that will culminate in impeccably crafted trim.
Begin by selecting the trim pieces that will adorn your living space, whether it's crown molding, baseboards, or door and window casings. With the chosen trim pieces in hand, it's time to identify the specific areas where the 45-degree cuts will be executed. Using a measuring tape, meticulously measure the length of the trim pieces, ensuring precision and accuracy in every dimension. Take into account the corners and joints where the trim will be installed, as these pivotal points will dictate the angle at which the cuts must be made.
Once the measurements have been meticulously recorded, it's time to mark the precise points where the cuts will be executed. Employ a reliable pencil to mark the trim pieces, indicating the exact locations where the 45-degree angles will be achieved. These markings will serve as your guiding beacons throughout the cutting and assembly process, ensuring that each trim piece aligns seamlessly to create the desired visual impact.
To further enhance precision, consider using a miter box as a guiding template for marking the trim pieces. The miter box's predefined angles will facilitate accurate markings, empowering you to visualize the cutting points with clarity and confidence. By aligning the trim pieces within the miter box and marking the designated cutting points, you'll fortify the foundation for achieving flawless 45-degree angles without the need for a miter saw.
As the markings take shape on the trim pieces, the meticulous attention to detail at this stage will set the tone for the subsequent steps, culminating in a visually striking assembly of trim with seamless joints and impeccable angles. With the measurements accurately recorded and the trim pieces meticulously marked, you're now poised to transition to the next phase of this transformative process: cutting the trim with precision and finesse.
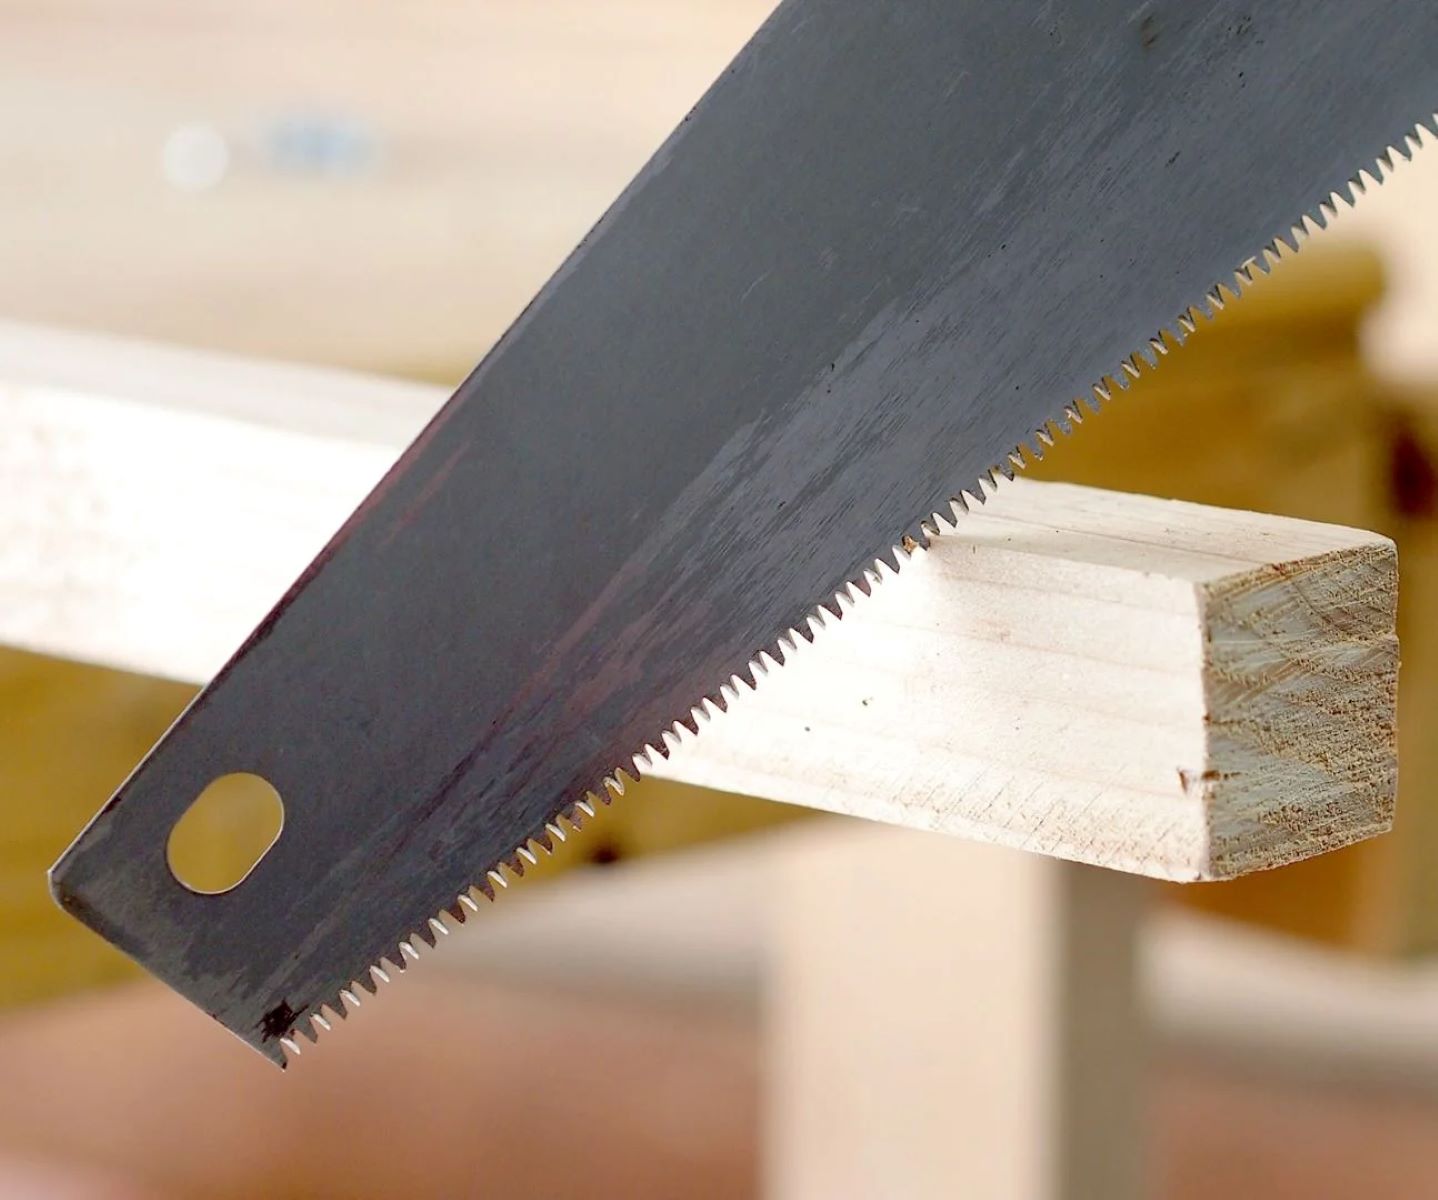
Step 2: Cut the Trim
With the trim pieces meticulously marked to indicate the precise points for achieving flawless 45-degree angles, the spotlight now shifts to the pivotal stage of cutting the trim with precision and finesse. While the absence of a miter saw may seem like a hurdle, our genius hack empowers you to navigate this challenge with ease, utilizing a miter box and a fine-tooth backsaw to execute the coveted 45-degree cuts.
Position the miter box securely on a stable surface, ensuring that it remains steadfast and level throughout the cutting process. With the marked trim piece nestled within the miter box, align the cutting point with the predefined 45-degree angle guide. This crucial step sets the stage for executing the precise cuts that will seamlessly interlock to form impeccable joints and angles.
Equipped with a fine-tooth backsaw, approach the marked cutting point on the trim piece with confidence and precision. Embrace a steady and controlled cutting motion, allowing the sharp teeth of the backsaw to glide through the trim piece with finesse. The guidance provided by the miter box serves as a beacon of accuracy, empowering you to achieve clean and seamless 45-degree cuts without the need for a miter saw.
As the first 45-degree cut is executed with precision, repeat the process for the remaining trim pieces, ensuring that each cut aligns flawlessly with the marked angles. Embrace a patient and meticulous approach, allowing the finesse of your cutting motions to reflect the precision that defines professional craftsmanship.
The absence of a miter saw is no longer a barrier as the genius hack unfolds, empowering you to elevate your DIY prowess and achieve flawless 45-degree angles on trim pieces with finesse and ingenuity. With each trim piece expertly cut to perfection, the stage is set for the transformative assembly that will bring your vision of impeccably crafted trim to fruition.
Step 3: Assemble the Trim
With the trim pieces expertly cut at flawless 45-degree angles, the stage is set for the transformative process of assembling the trim with precision and finesse. This pivotal step in the journey towards impeccable craftsmanship will bring your vision to life, culminating in seamless joints and visually striking angles that exude a professional touch.
Begin by arranging the cut trim pieces in their designated positions, carefully aligning the 45-degree cuts to form the intended joints. Embrace a methodical approach, ensuring that each trim piece seamlessly interlocks with the next to create a cohesive and visually striking assembly. The precision of your cuts will now manifest in the seamless alignment of the trim pieces, setting the stage for a transformative visual impact.
As the trim pieces are aligned to perfection, employ sturdy clamps to secure them in place, fortifying their positions as you prepare to unleash the binding power of wood glue. With the trim pieces steadfastly secured, apply a fine layer of wood glue to the adjoining surfaces, ensuring even coverage that will facilitate a durable and visually seamless bond.
As the wood glue is applied, join the trim pieces with care and precision, allowing the flawless 45-degree cuts to seamlessly interlock and form impeccable joints. Embrace a patient and deliberate approach, ensuring that each joint aligns flawlessly to create a visually striking and cohesive assembly of trim.
With the trim pieces expertly assembled and the wood glue applied, allow ample time for the adhesive to set and solidify, further fortifying the joints to ensure enduring strength and visual appeal. Embrace the satisfaction of witnessing your vision come to life as the trim pieces seamlessly unite to form a visually striking and professionally crafted assembly.
The transformative journey of achieving flawless 45-degree angles on trim pieces without a miter saw culminates in the visually striking assembly that now adorns your living space. Embrace the satisfaction of a DIY project completed to perfection, showcasing the impeccable craftsmanship and precision-cut trim that this genius hack has empowered you to achieve.
As the final assembly takes shape, revel in the transformative impact it brings to your living space, elevating the aesthetic appeal with seamless joints and visually striking angles. The art of assembling trim with precision and finesse has now become a hallmark of your DIY prowess, leaving an indelible mark of professional craftsmanship on your home's interior.
Read more: Genius Hacks To Temporarily Bypass Qustodio
Conclusion
In conclusion, the journey of achieving flawless 45-degree angles on trim pieces without the reliance on a miter saw has unveiled a transformative approach to DIY craftsmanship. Through the innovative implementation of a miter box, fine-tooth backsaw, and meticulous attention to detail, you have transcended the conventional barriers and embraced a genius hack that empowers you to elevate your living space with impeccable trim.
As you stand amidst the visually striking assembly of trim, seamlessly united with precision-cut 45-degree angles, take a moment to revel in the satisfaction of a DIY project completed to perfection. The professional touch that now adorns your living space is a testament to your ingenuity and commitment to achieving excellence in home improvement.
The absence of a miter saw is no longer a hindrance but rather an opportunity to showcase the finesse and creativity that define your DIY prowess. The flawless joints and visually striking angles that adorn your living space serve as a testament to the transformative power of this genius hack, enabling you to achieve professional-looking results without the need for expensive tools.
Embrace the newfound confidence and expertise that this journey has instilled within you. The art of measuring, marking, cutting, and assembling trim pieces with precision and finesse has become a hallmark of your DIY repertoire. As you bask in the visual allure of the impeccably crafted trim, take pride in the fact that your living space now exudes a touch of sophistication and professionalism, all courtesy of your dedication to mastering this innovative approach.
The genius hack of achieving flawless 45-degree angles on trim pieces without a miter saw has not only transformed your living space but has also expanded your horizons as a DIY enthusiast. The skills and insights garnered through this journey will continue to inspire and empower you in future home improvement endeavors, serving as a testament to the enduring impact of embracing ingenuity and creativity in the realm of DIY craftsmanship.
So, as you admire the seamless joints and visually striking angles that now adorn your living space, remember that the transformative power of this genius hack extends far beyond the confines of this project. It has fortified your confidence, expanded your skill set, and left an indelible mark of professional craftsmanship on your home's interior, setting the stage for future endeavors that will undoubtedly reflect the same dedication to excellence and ingenuity.
In the realm of DIY craftsmanship, the journey of achieving flawless 45-degree angles on trim pieces without a miter saw stands as a testament to the transformative power of innovation, dedication, and the unwavering pursuit of excellence.