Home>Health and Wellness>How To Remove A Deep Hair Splinter From Your Foot At Home During Lockdown
Health and Wellness
How To Remove A Deep Hair Splinter From Your Foot At Home During Lockdown
Published: February 19, 2024
Learn effective home remedies to safely remove a deep hair splinter from your foot during lockdown. Prioritize your health and wellness with these simple tips.
(Many of the links in this article redirect to a specific reviewed product. Your purchase of these products through affiliate links helps to generate commission for Regretless.com, at no extra cost. Learn more)
Table of Contents
Introduction
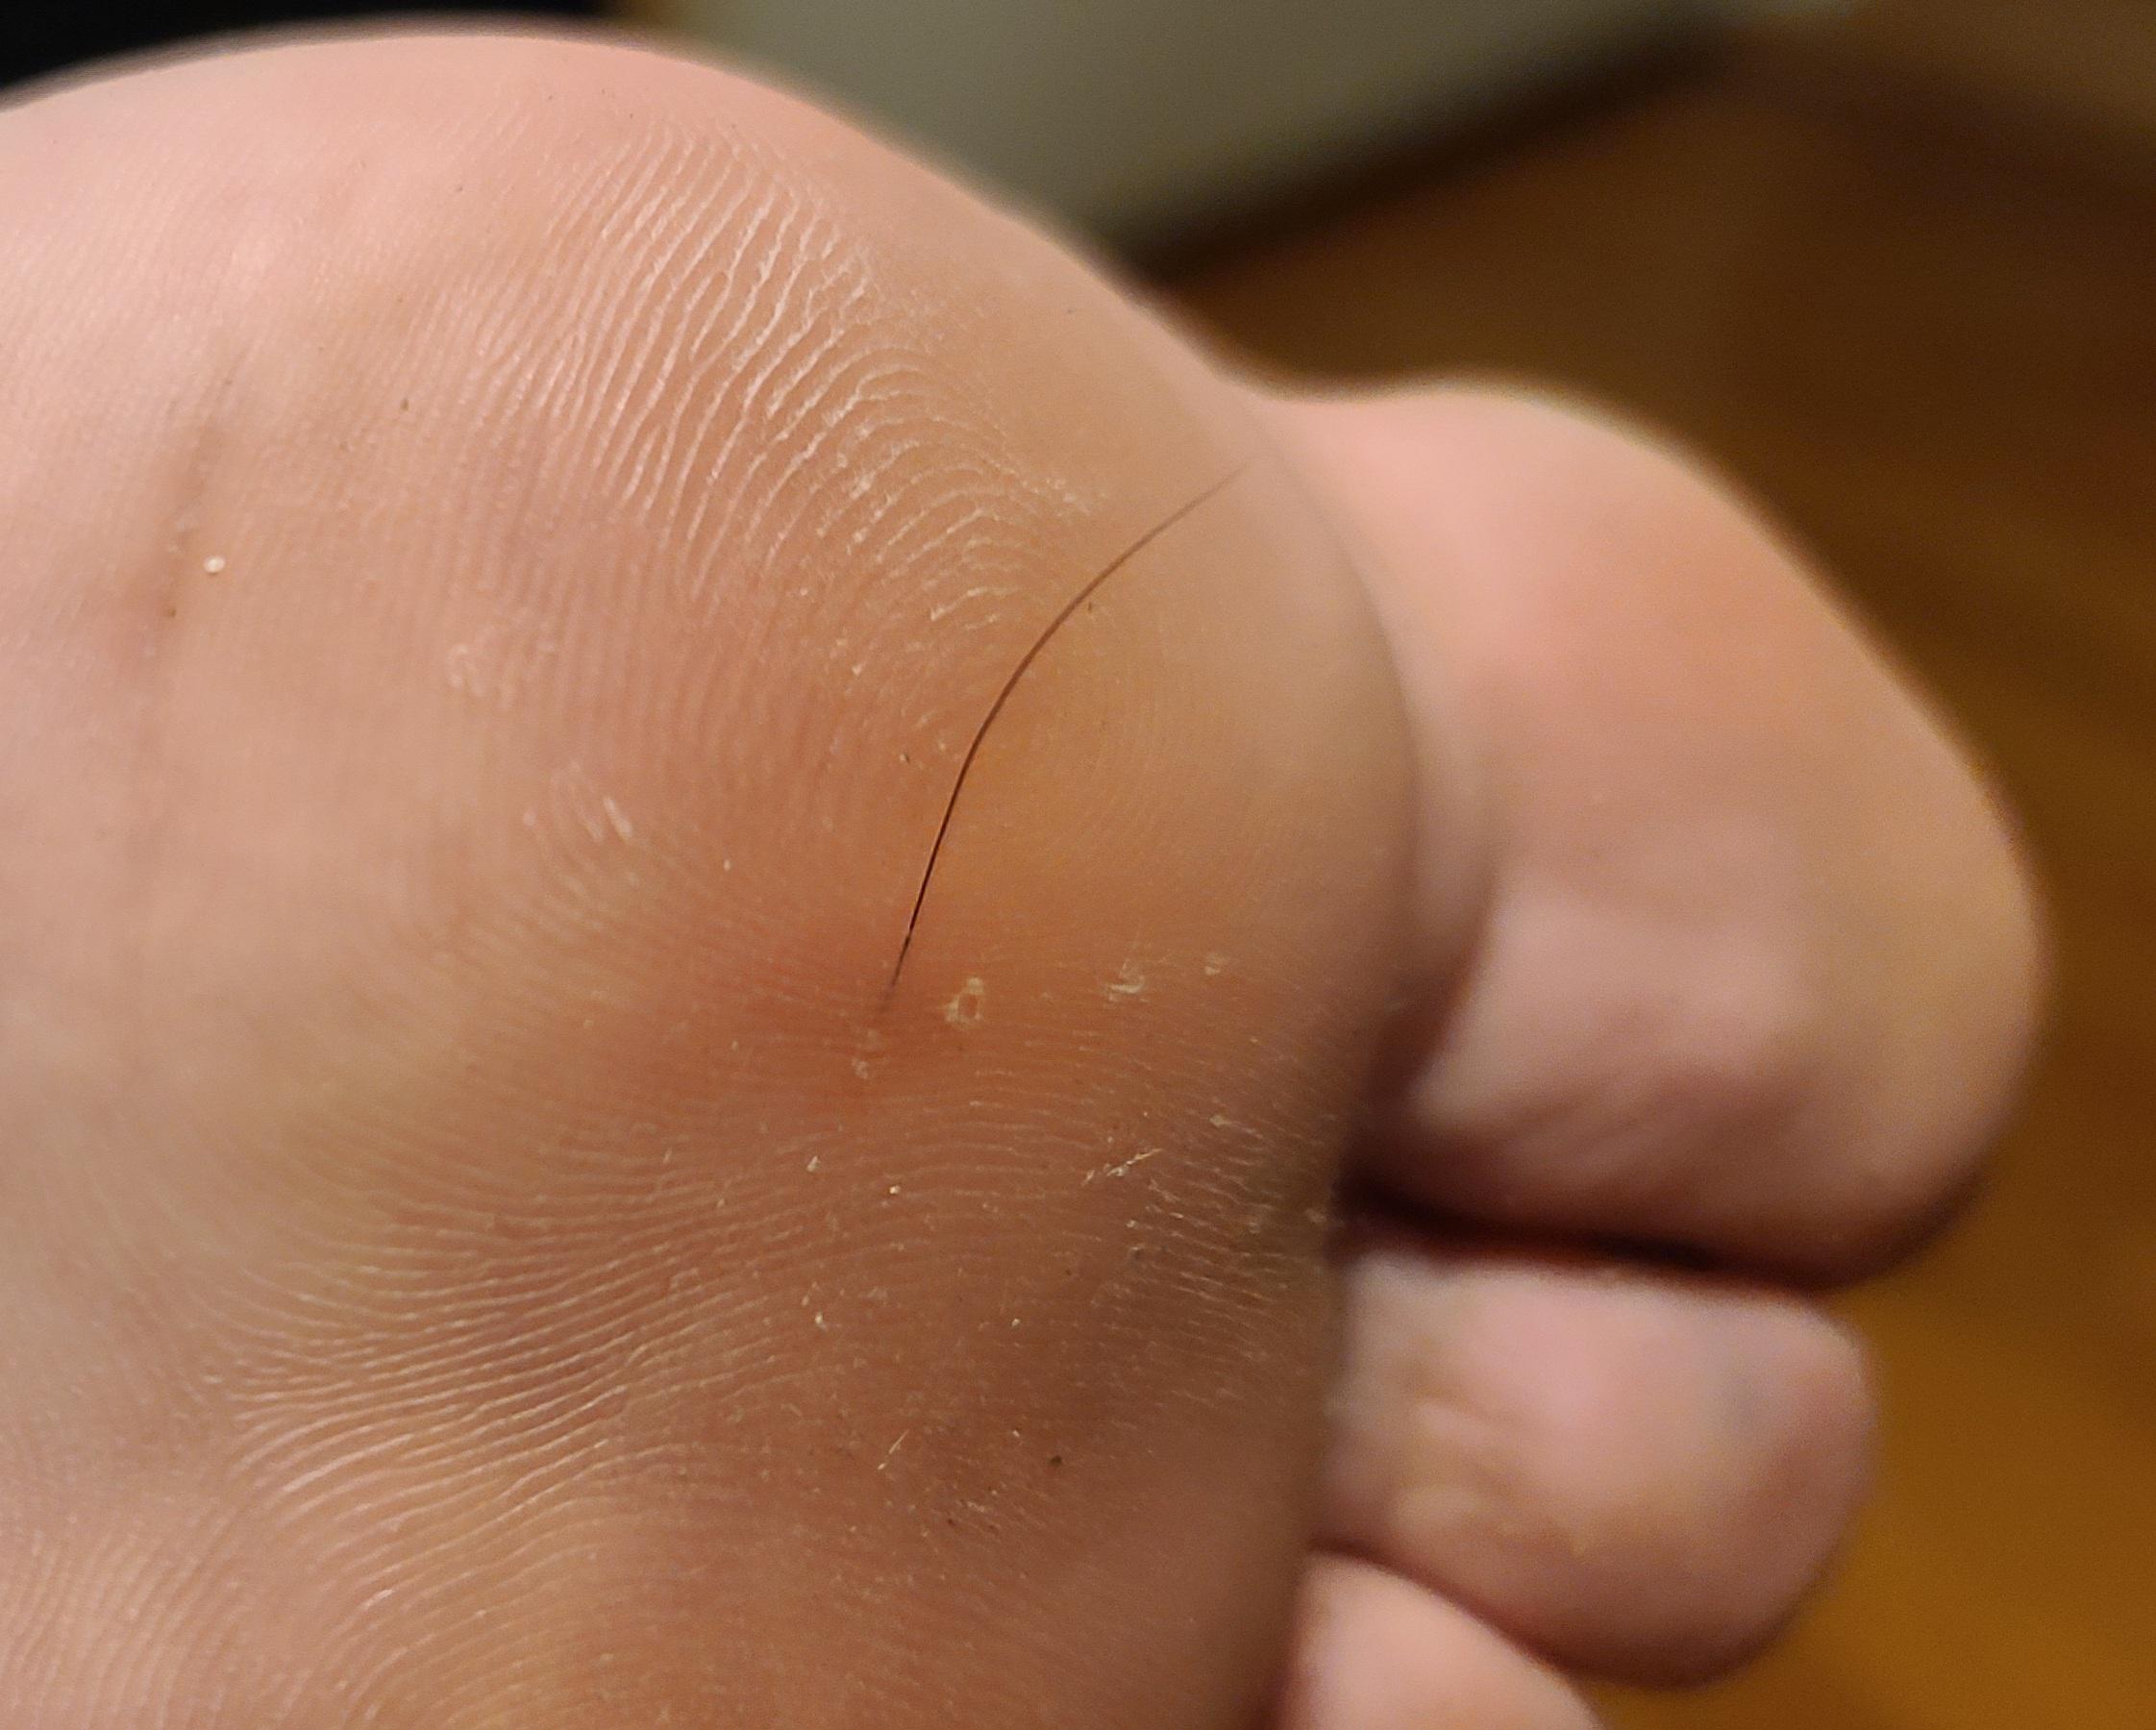
Dealing with a deep hair splinter lodged in your foot can be an uncomfortable and frustrating experience. Whether it's a tiny sliver of hair or a larger, more stubborn splinter, the pain and irritation it causes can disrupt your daily routine. During these times of lockdown and limited access to professional medical care, knowing how to safely and effectively remove a deep hair splinter from your foot at home is invaluable.
In this article, we will guide you through the step-by-step process of removing a deep hair splinter from your foot in the comfort of your own home. By following these simple yet effective methods, you can alleviate the discomfort and prevent potential complications associated with leaving a splinter untreated.
So, if you've found yourself dealing with the annoyance of a deep hair splinter, fear not! With a few household items and a little patience, you can successfully address this common issue without the need for a trip to the doctor's office. Let's dive into the steps and learn how to safely and efficiently remove a deep hair splinter from your foot.
Read more: How To Remove A Stuck Hose From A Spigot
Step 1: Soak the affected area
The first and crucial step in removing a deep hair splinter from your foot is to soak the affected area. Soaking helps to soften the skin and hair, making it easier to extract the splinter without causing further discomfort or damage.
To begin, fill a basin or shallow container with warm water. Adding a mild antiseptic solution or Epsom salts to the water can help to disinfect the area and reduce the risk of infection. Soaking your foot in this solution for 10-15 minutes will not only soften the skin but also help to draw out the splinter, making it more accessible for removal.
The warm water also relaxes the skin, reducing tension and making it easier to work with the affected area. This step is essential, especially for deeply embedded hair splinters, as it minimizes the risk of breaking the hair during extraction, which can lead to further complications.
During this time, you can gently massage the area around the splinter, aiding the softening process and potentially encouraging the splinter to work its way closer to the surface. If the splinter is particularly stubborn, you may need to repeat the soaking process several times throughout the day to achieve the desired effect.
Remember, patience is key during this step. Rushing the soaking process may make the hair splinter more difficult to remove and could cause unnecessary pain. By allowing the affected area to soften and the splinter to become more accessible, you set the stage for a successful and relatively pain-free extraction process.
Once the skin has softened and the hair splinter is closer to the surface, you can proceed to the next step with greater ease and confidence, knowing that you have prepared the area effectively for the extraction process.
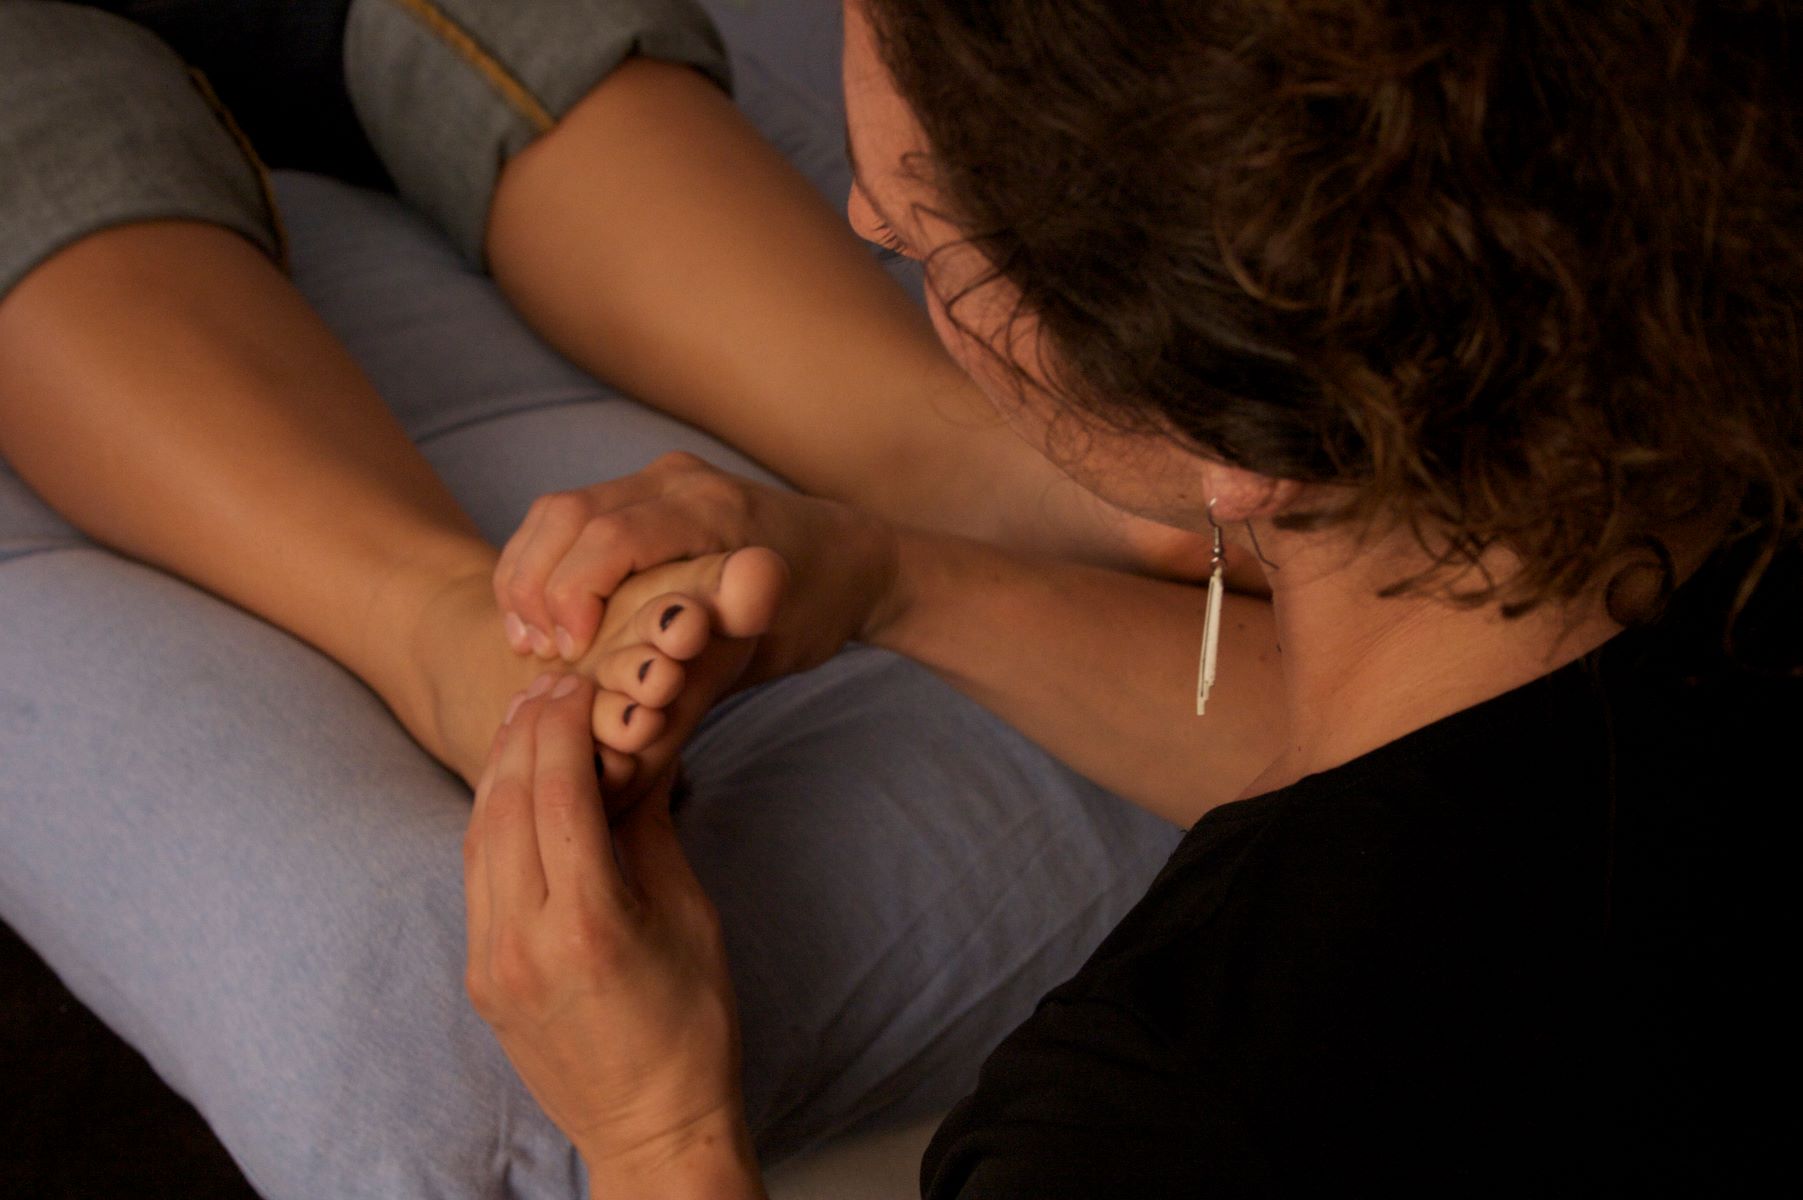
Step 2: Use tweezers to remove the splinter
After soaking the affected area and allowing the skin to soften, the next step is to use tweezers to carefully remove the hair splinter from your foot. This process requires precision and patience to ensure that the splinter is extracted completely and without causing further discomfort or injury.
Before proceeding, it's essential to ensure that the tweezers you use are clean and sterilized to minimize the risk of infection. You can do this by wiping the tweezers with rubbing alcohol or boiling them in hot water for a few minutes. Once sterilized, allow the tweezers to cool down to a safe temperature before use.
With the sterilized tweezers in hand, gently pat the affected area dry with a clean towel. Next, inspect the area to locate the hair splinter. If the splinter is still not visible, use a magnifying glass to get a closer look and determine its exact location.
When you have a clear view of the splinter, use the tweezers to grasp the end of the hair protruding from the skin. It's important to grip the hair as close to the skin's surface as possible to ensure a secure hold. With a steady hand, pull the hair in the same direction it entered the skin, using a firm and consistent motion.
If the hair splinter is deeply embedded, it may be necessary to gently lift the skin around the splinter with the tweezers to expose more of the hair. Take care to avoid applying excessive force or digging too deeply, as this can lead to skin damage and potential complications.
In some cases, the hair splinter may break during the extraction process, leaving a portion of the hair still embedded in the skin. If this occurs, do not panic. Simply repeat the soaking process to soften the skin further and carefully attempt to remove the remaining portion of the splinter using the same method.
Once the hair splinter has been successfully removed, inspect the area to ensure that no hair fragments or foreign particles remain. If any fragments are still present, use the tweezers to gently lift them out, taking care to avoid causing additional irritation to the skin.
After the splinter has been completely removed, clean the area once again with a mild antiseptic solution to reduce the risk of infection. Finally, apply a small amount of antibiotic ointment to the affected area and cover it with a sterile bandage to promote healing and protect the skin from further irritation.
By following these steps and exercising caution throughout the process, you can effectively remove a deep hair splinter from your foot at home, providing relief from discomfort and minimizing the risk of complications. Remember, if you encounter any difficulties or the splinter appears to be deeply embedded, it's advisable to seek professional medical assistance to ensure safe and proper removal.
Step 3: Clean and disinfect the area
After successfully removing the hair splinter from your foot, it's crucial to thoroughly clean and disinfect the affected area to minimize the risk of infection and promote optimal healing. Even a minor hair splinter can introduce bacteria into the skin, making proper cleaning and disinfection essential.
To begin, gently wash the area with mild soap and warm water, ensuring that any remaining debris or traces of blood are carefully removed. Use a soft, clean cloth to pat the area dry, taking care not to apply excessive pressure that could cause further irritation.
Once the area is clean and dry, apply a small amount of hydrogen peroxide or rubbing alcohol to a cotton ball or pad. Gently dab the affected area with the solution, allowing it to effectively disinfect the skin and eliminate any lingering bacteria. This step is crucial in preventing infection and promoting a healthy healing process.
Following the disinfection process, apply a thin layer of antibiotic ointment to the affected area. This not only helps to keep the skin moisturized but also creates a protective barrier against potential contaminants. The antibiotic properties of the ointment further reduce the risk of infection and support the skin's natural healing process.
After applying the antibiotic ointment, cover the area with a sterile bandage to shield it from external elements and minimize the risk of further irritation. Ensure that the bandage is secure but not too tight, allowing the skin to breathe while providing adequate protection.
It's important to change the bandage and reapply the antibiotic ointment at least once a day, or as directed by a healthcare professional, to maintain a clean and healing environment. Regularly inspect the area for any signs of infection, such as increased redness, swelling, or discharge, and seek medical attention if any concerning symptoms arise.
By diligently cleaning, disinfecting, and protecting the area after removing a hair splinter, you can support the skin's natural healing process and reduce the likelihood of complications. Remember to monitor the area closely and seek medical advice if you have any concerns about the healing progress or signs of infection.
Following these steps will help ensure that the affected area heals effectively, allowing you to resume your daily activities without the discomfort and inconvenience of a hair splinter.
Step 4: Apply a bandage
After successfully removing the hair splinter and thoroughly cleaning and disinfecting the affected area, the final step in the process is to apply a bandage to promote healing and protect the skin from external elements. Proper bandaging not only shields the area from potential contaminants but also provides a supportive environment for the skin to recover.
To begin, select a sterile adhesive bandage that is appropriately sized to cover the affected area without applying excessive pressure. It's important to choose a bandage that allows the skin to breathe while providing a secure and protective covering. Avoid using bandages that are too tight, as they can restrict blood flow and impede the healing process.
Carefully place the adhesive bandage over the cleaned and disinfected area, ensuring that it adheres securely without causing discomfort. The bandage should fully cover the affected area, extending slightly beyond the edges to create a protective barrier. If the affected area is in an area prone to movement, such as the sole of the foot, consider using a specialized adhesive bandage designed for flexibility and durability.
Once the bandage is in place, gently press along the edges to ensure a secure seal, taking care not to apply excessive pressure that could cause further irritation. The goal is to create a protective barrier that shields the skin from external elements while allowing for natural healing to take place.
It's important to change the bandage regularly, at least once a day or as directed by a healthcare professional, to maintain a clean and healing environment. When changing the bandage, carefully remove the old one and clean the area again with mild soap and warm water before applying a fresh bandage. This helps to prevent the buildup of bacteria and promotes optimal healing.
While the bandage is in place, monitor the affected area for any signs of infection or irritation. If the skin becomes increasingly red, swollen, or painful, or if there is any discharge or unusual odor, seek medical attention promptly. These may be signs of infection or an adverse reaction that requires professional evaluation.
By applying a bandage and maintaining a clean and protective environment, you can support the skin's natural healing process and minimize the risk of complications. Remember to follow the guidance of healthcare professionals and seek medical attention if you have any concerns about the healing progress or signs of infection.
Following these steps will help ensure that the affected area heals effectively, allowing you to resume your daily activities without the discomfort and inconvenience of a hair splinter.
Read more: How To Remove Tar From Your Car
Conclusion
In conclusion, successfully removing a deep hair splinter from your foot at home during lockdown requires patience, precision, and proper care. By following the step-by-step process outlined in this guide, you can effectively address the discomfort and inconvenience caused by a hair splinter without the need for professional medical assistance.
The initial step of soaking the affected area in warm water, possibly with the addition of antiseptic solution or Epsom salts, serves as a crucial preparatory measure. This process softens the skin and hair, making the splinter more accessible for extraction while minimizing the risk of further complications. Patience during this step is key, as allowing the skin to soften adequately sets the stage for a successful removal process.
Using sterilized tweezers to carefully extract the hair splinter is a delicate yet essential step. Precision and a steady hand are necessary to ensure the complete removal of the splinter without causing additional discomfort or injury. In cases where the splinter breaks during extraction, repeating the soaking process and exercising caution can lead to successful removal.
Thoroughly cleaning and disinfecting the affected area after removing the hair splinter is crucial in minimizing the risk of infection and supporting the skin's natural healing process. Applying a sterile bandage provides an additional layer of protection, shielding the area from external elements while promoting optimal healing.
By diligently following these steps and monitoring the affected area for any signs of infection or complications, you can effectively address a deep hair splinter at home. However, it's important to remember that if you encounter difficulties or the splinter appears to be deeply embedded, seeking professional medical assistance is advisable to ensure safe and proper removal.
In times of limited access to professional medical care, having the knowledge and confidence to address common issues such as a deep hair splinter at home can provide a sense of empowerment and relief. By combining patience, caution, and proper care, you can navigate the process of removing a hair splinter from your foot with greater ease and confidence.
Ultimately, the ability to address a deep hair splinter at home during lockdown underscores the importance of resourcefulness and self-care. By equipping yourself with the necessary knowledge and taking proactive steps to address minor health concerns, you can maintain your well-being and comfort, even in challenging circumstances.