Home>Home and Garden>How To Repair Vinyl Siding
Home and Garden
How To Repair Vinyl Siding
Published: February 29, 2024
Learn how to repair vinyl siding with our comprehensive guide. Get expert tips and advice for fixing your home's exterior. Perfect for DIY enthusiasts and home and garden enthusiasts.
(Many of the links in this article redirect to a specific reviewed product. Your purchase of these products through affiliate links helps to generate commission for Regretless.com, at no extra cost. Learn more)
Table of Contents
Introduction
Vinyl siding is a popular choice for homeowners due to its durability, low maintenance, and aesthetic appeal. However, over time, it's not uncommon for vinyl siding to sustain damage from various sources such as extreme weather conditions, impact, or general wear and tear. When faced with damaged vinyl siding, it's essential to address the issue promptly to prevent further deterioration and maintain the integrity of your home's exterior.
Repairing vinyl siding can seem like a daunting task, but with the right knowledge and tools, it's a manageable project that can save you time and money in the long run. Whether you're dealing with small holes, cracks, or larger damaged panels, this comprehensive guide will walk you through the step-by-step process of repairing your vinyl siding, enabling you to restore its functionality and aesthetic appeal.
By learning how to repair vinyl siding, you can take pride in preserving the beauty and structural integrity of your home while avoiding the costs associated with a full siding replacement. Additionally, tackling this project yourself can provide a sense of accomplishment and empowerment, as you take an active role in maintaining and enhancing your living space.
Throughout this guide, you'll discover valuable insights on assessing the extent of the damage, gathering the necessary tools and materials, and executing the repair process with precision. Whether you're a seasoned DIY enthusiast or a homeowner looking to expand your skill set, this article will equip you with the knowledge and confidence to tackle vinyl siding repairs effectively.
As we delve into the intricacies of repairing vinyl siding, you'll gain a deeper understanding of the materials involved, the techniques required, and the importance of meticulous attention to detail. With each step, you'll be one step closer to restoring your vinyl siding to its former glory, ensuring that your home remains a source of pride and comfort for years to come.
Read more: How To Get Paint Off Of Vinyl Floor
Assessing the Damage
Before embarking on the repair process, it's crucial to thoroughly assess the extent of the damage to your vinyl siding. This initial step sets the foundation for a successful repair, allowing you to identify the specific issues that need attention and determine the most appropriate course of action.
Begin by conducting a visual inspection of the siding, carefully examining the entire surface for any signs of damage. Look for indications of cracks, holes, warping, or discoloration, as these can signify underlying issues that require immediate attention. Pay close attention to areas that are frequently exposed to the elements, such as corners, edges, and areas near downspouts, as they are more susceptible to damage.
Next, assess the severity of the damage. Small cracks or holes may be relatively easy to repair, while larger or more extensive damage may necessitate the replacement of entire panels. Take note of any areas where the siding appears loose or detached, as this can indicate structural issues that need to be addressed.
Consider the age and condition of the siding. Older vinyl siding may be more prone to damage and deterioration, especially if it has been exposed to years of harsh weather conditions. Additionally, factors such as improper installation or inadequate maintenance can contribute to the degradation of the siding.
It's also important to inspect the underlying structure beneath the siding. Look for signs of moisture, rot, or mold, as these issues can compromise the integrity of the siding and pose potential health hazards. Addressing any underlying structural issues is essential to ensure the long-term effectiveness of the repair.
As you assess the damage, take detailed notes and photographs to document the areas that require attention. This documentation will serve as a valuable reference throughout the repair process, enabling you to accurately plan and execute the necessary repairs.
By thoroughly assessing the damage to your vinyl siding, you'll gain a comprehensive understanding of the issues at hand, empowering you to make informed decisions regarding the repair approach. This proactive approach sets the stage for a successful repair process, ensuring that your efforts yield lasting results and contribute to the overall longevity of your home's exterior.
Remember, a thorough assessment is the cornerstone of effective vinyl siding repair, laying the groundwork for a meticulous and targeted approach to restoring the beauty and functionality of your home's exterior.
Gathering the Necessary Tools and Materials
When preparing to repair vinyl siding, gathering the essential tools and materials is a critical step that sets the stage for a successful and efficient repair process. Equipping yourself with the right resources ensures that you can tackle the project with confidence and precision, ultimately achieving professional-quality results.
Here's a comprehensive list of the tools and materials you'll need to effectively repair your vinyl siding:
Tools:
- Utility Knife: A sharp utility knife is essential for cutting and shaping the siding with precision. Opt for a retractable blade for safety and convenience.
- Zip Tool: This specialized tool is designed to unlock and remove vinyl siding panels without causing damage, making it indispensable for repairs and replacements.
- Caulking Gun: A high-quality caulking gun is necessary for applying sealant to the repaired areas, ensuring a watertight and weather-resistant finish.
- Level: A level helps ensure that the replacement panels are installed correctly, maintaining the integrity and aesthetic appeal of the siding.
- Tin Snips: These are useful for cutting and shaping aluminum or vinyl pieces, allowing for customized repairs that seamlessly blend with the existing siding.
- Hammer: A standard hammer is essential for securing loose siding panels and driving nails or fasteners during the repair process.
- Screwdriver Set: A set of screwdrivers, including both flathead and Phillips head varieties, is necessary for removing and reinstalling fasteners and trim pieces.
- Pry Bar: This versatile tool assists in gently removing damaged siding without causing unnecessary strain or damage to surrounding areas.
- Ladder: Depending on the height of the repair area, a sturdy ladder is essential for safe and convenient access to the siding.
Materials:
- Replacement Panels: Ensure that you have matching replacement panels on hand to seamlessly integrate with the existing siding. Measure the dimensions of the damaged panels to procure the appropriate replacements.
- Vinyl Siding Cleaner: A specialized cleaner formulated for vinyl siding helps prepare the surface for repairs by removing dirt, grime, and mildew.
- Color-Matched Caulk: Select a high-quality caulk that matches the color of your existing siding to achieve a cohesive and professional finish.
- Nails and Fasteners: Stock up on nails and fasteners designed for vinyl siding installation, ensuring that you have an adequate supply for securing replacement panels and trim pieces.
- Sealant: Choose a durable and weather-resistant sealant to prevent moisture infiltration and ensure the longevity of the repair.
- Paint and Primer (if applicable): If painting is required to blend the repaired areas with the existing siding, select high-quality exterior paint and primer in the appropriate color.
By gathering these essential tools and materials, you'll be well-prepared to embark on the vinyl siding repair process with confidence and efficiency. Having everything you need at your disposal minimizes disruptions during the repair, allowing you to focus on executing the necessary steps with precision and attention to detail. With the right resources in hand, you're poised to restore the beauty and functionality of your vinyl siding, ensuring that your home's exterior remains a source of pride and protection for years to come.
Read more: How To Use A Double Sided Mirror Effectively
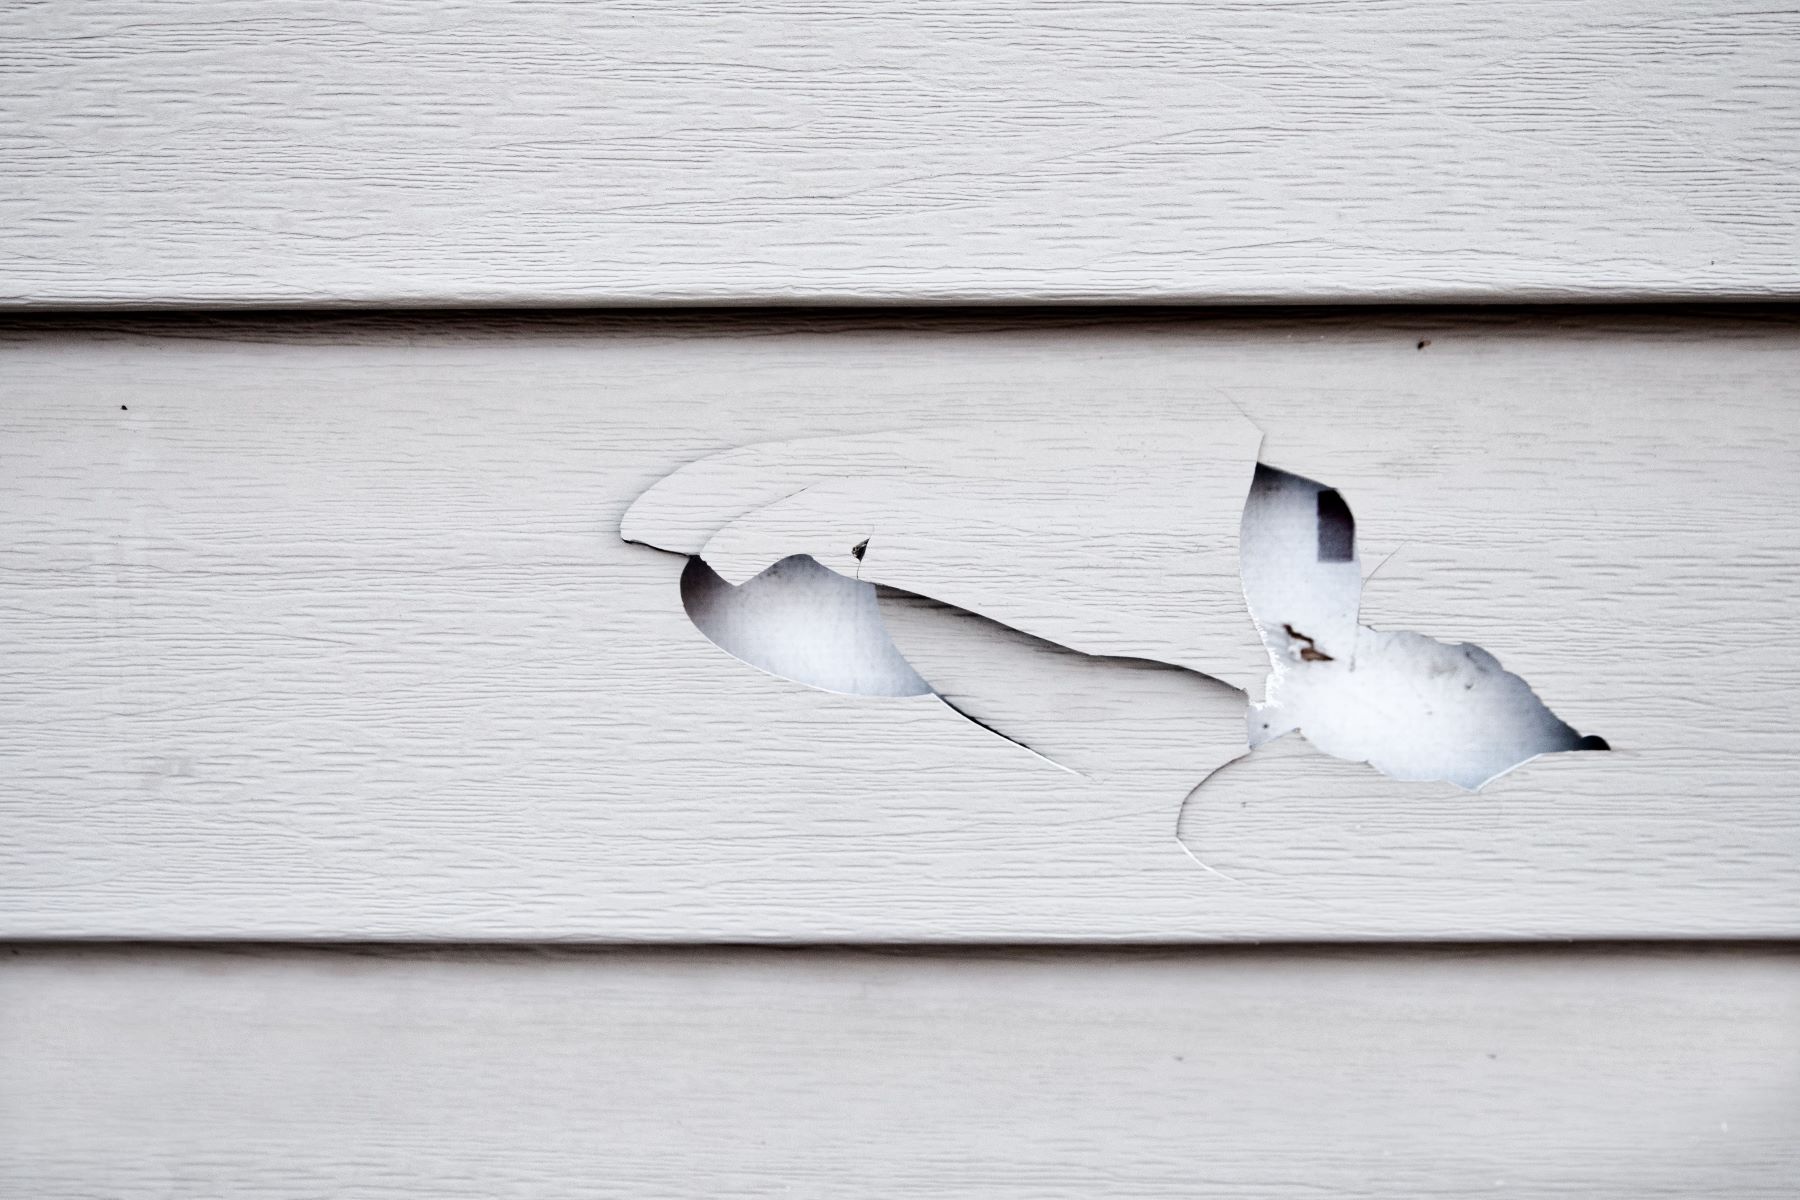
Repairing Small Holes and Cracks
Repairing small holes and cracks in vinyl siding is a common yet essential aspect of maintaining the integrity and aesthetics of your home's exterior. These minor imperfections, often caused by impact or wear and tear, can compromise the siding's ability to protect your home from the elements. Fortunately, with the right tools and techniques, you can effectively address these issues and restore the seamless appearance of your vinyl siding.
To begin the repair process, start by thoroughly cleaning the damaged area using a vinyl siding cleaner. This step is crucial for removing dirt, debris, and any contaminants that could interfere with the repair. Once the surface is clean and dry, assess the size and nature of the holes or cracks to determine the most suitable approach for addressing them.
For small holes, such as those caused by errant projectiles or minor impacts, a high-quality color-matched caulk is an effective solution. Using a caulking gun, carefully fill the hole with the caulk, ensuring that it is applied evenly and smoothly. Wipe away any excess caulk with a clean cloth to achieve a seamless finish. The caulk not only conceals the damage but also provides a protective barrier against moisture and debris, safeguarding the underlying structure of the siding.
When dealing with small cracks, particularly those that are hairline in nature, a similar approach can be employed using color-matched caulk. Apply the caulk along the length of the crack, ensuring that it penetrates the entire depth of the fissure. Smooth out the caulk with a putty knife or your finger, blending it seamlessly with the surrounding siding. This meticulous application effectively seals the crack, preventing water infiltration and preserving the structural integrity of the siding.
In some cases, small holes and cracks may be located near the edges or corners of the siding, requiring additional attention to ensure a durable and visually appealing repair. Utilizing a utility knife, carefully trim any loose or protruding edges around the damaged area, creating a clean and uniform surface for the repair. This step is essential for achieving a seamless and professional-looking result.
By addressing small holes and cracks in your vinyl siding with precision and care, you can effectively mitigate potential issues and maintain the overall quality and appearance of your home's exterior. This proactive approach not only enhances the longevity of your siding but also contributes to the curb appeal and value of your property. With the right techniques and attention to detail, you can achieve a seamless repair that blends harmoniously with the existing siding, ensuring that your home remains a source of pride and protection for years to come.
Replacing Damaged Panels
When the damage to your vinyl siding extends beyond minor imperfections, the replacement of damaged panels becomes a necessary and impactful aspect of the repair process. Whether due to severe impact, prolonged exposure to the elements, or underlying structural issues, damaged panels can compromise the functionality and visual appeal of your home's exterior. By mastering the art of replacing damaged panels, you can effectively restore the integrity and aesthetics of your vinyl siding, ensuring that your home remains a bastion of protection and beauty.
To initiate the panel replacement process, begin by carefully assessing the extent of the damage and identifying the specific panels that require replacement. Measure the dimensions of the damaged panels to ensure that the replacements are accurately sized and compatible with the existing siding. It's essential to procure replacement panels that closely match the color, texture, and profile of your current siding, facilitating a seamless and cohesive repair.
Once you have obtained the necessary replacement panels, prepare the work area by clearing any obstructions and ensuring safe and convenient access to the damaged siding. Using a zip tool, carefully unlock and remove the damaged panels, taking care to avoid unnecessary strain or damage to the surrounding areas. Exercise patience and precision during this step, as it sets the stage for the successful integration of the new panels.
Before installing the replacement panels, thoroughly clean the underlying surface to remove any debris, dirt, or remnants of the old siding. This preparatory step is crucial for ensuring a secure and durable attachment of the new panels, as it promotes optimal adhesion and minimizes the risk of future issues.
Next, carefully align the replacement panels with the existing siding, ensuring a seamless fit and uniform appearance. Use a level to verify the alignment and adjust the positioning as needed to achieve a precise and professional result. Once the panels are properly aligned, secure them in place using nails or fasteners designed for vinyl siding installation. Pay close attention to the spacing and placement of the fasteners, ensuring that the panels are firmly anchored and resistant to external forces.
After the replacement panels are securely installed, inspect the surrounding areas for any gaps or inconsistencies that may compromise the integrity of the repair. Use color-matched caulk to seal any gaps and create a uniform transition between the new and existing siding, achieving a flawless and weather-resistant finish.
By mastering the art of replacing damaged panels, you can effectively rejuvenate the beauty and functionality of your vinyl siding, ensuring that your home's exterior remains a testament to quality and craftsmanship. This meticulous approach to panel replacement not only addresses existing damage but also fortifies your home against future challenges, allowing you to enjoy a resilient and visually stunning exterior for years to come.
Painting and Finishing Touches
Once the repairs to your vinyl siding are complete, the painting and finishing touches play a crucial role in achieving a seamless and polished appearance. Whether you've replaced damaged panels or addressed small holes and cracks, the final steps of painting and finishing are essential for blending the repaired areas with the existing siding, ensuring a cohesive and professional result.
Before proceeding with painting, it's important to ensure that the repaired areas are clean and free of any debris or residue from the repair process. Thoroughly inspect the repaired sections, removing any loose caulk, dust, or particles that could interfere with the adhesion of the paint. Use a gentle cleaning solution and a soft cloth to wipe down the repaired areas, preparing them for the application of paint and finishing touches.
Select a high-quality exterior paint that closely matches the color and texture of your existing vinyl siding. It's essential to choose a paint specifically formulated for outdoor use, as it will provide the durability and weather resistance necessary to withstand the elements. Additionally, consider using a primer designed for vinyl surfaces, as it promotes optimal adhesion and enhances the longevity of the paint finish.
Before applying the paint, carefully mask off the surrounding areas to protect them from accidental splatter or overspray. Use painter's tape and plastic sheeting to create a clean and defined boundary around the repaired sections, ensuring that the paint is applied only to the intended areas.
When applying the paint, use smooth and even strokes to achieve a uniform and consistent finish. Depending on the extent of the repair and the size of the painted areas, you may need to apply multiple coats to achieve full coverage and a seamless blend with the existing siding. Allow each coat to dry thoroughly before applying the next, following the manufacturer's recommended drying times for optimal results.
Once the paint has dried, remove the masking materials to reveal the beautifully finished repair. Inspect the painted areas for any imperfections or inconsistencies, addressing them as needed to achieve a flawless and professional result. Additionally, consider applying a clear protective sealant over the painted areas to enhance the durability and weather resistance of the finish, ensuring that your repairs stand the test of time.
By meticulously attending to the painting and finishing touches, you can seamlessly integrate the repaired areas with the existing vinyl siding, achieving a cohesive and visually stunning result. This final step not only enhances the aesthetic appeal of your home's exterior but also reinforces the durability and longevity of the repairs, ensuring that your vinyl siding remains a source of pride and protection for years to come.
Conclusion
In conclusion, mastering the art of repairing vinyl siding is a valuable skill that empowers homeowners to maintain the beauty, functionality, and structural integrity of their homes' exteriors. Throughout this comprehensive guide, we've explored the essential steps involved in addressing various types of damage to vinyl siding, from small holes and cracks to the replacement of damaged panels. By equipping yourself with the right tools, materials, and techniques, you can effectively tackle vinyl siding repairs with confidence and precision, ensuring that your home remains a source of pride and protection for years to come.
The process begins with a thorough assessment of the damage, allowing you to gain a comprehensive understanding of the issues at hand and make informed decisions regarding the repair approach. By carefully examining the siding for signs of damage, assessing the severity of the issues, and documenting the areas that require attention, you set the stage for a targeted and effective repair process.
Gathering the necessary tools and materials is a critical step that ensures you are well-prepared to embark on the repair process with confidence and efficiency. Equipping yourself with essential resources minimizes disruptions during the repair, allowing you to focus on executing the necessary steps with precision and attention to detail.
Repairing small holes and cracks in vinyl siding requires meticulous attention to detail and the use of high-quality materials. By employing the right techniques, such as using color-matched caulk to fill small holes and cracks, you can effectively mitigate potential issues and maintain the overall quality and appearance of your home's exterior.
When the damage extends beyond minor imperfections, the replacement of damaged panels becomes necessary. Mastering the art of replacing damaged panels allows you to restore the integrity and aesthetics of your vinyl siding, ensuring that your home remains a bastion of protection and beauty.
Finally, the painting and finishing touches play a crucial role in achieving a seamless and polished appearance. By carefully selecting the right paint, applying it with precision, and attending to the finishing details, you can seamlessly integrate the repaired areas with the existing vinyl siding, achieving a cohesive and visually stunning result.
In essence, by mastering the art of repairing vinyl siding, you take an active role in preserving the beauty and structural integrity of your home, while also saving time and money in the long run. This proactive approach not only enhances the longevity of your siding but also contributes to the curb appeal and value of your property. With the right techniques and attention to detail, you can achieve a seamless repair that blends harmoniously with the existing siding, ensuring that your home remains a source of pride and protection for years to come.