Home>Home and Garden>How To Install Shower Drain
Home and Garden
How To Install Shower Drain
Published: February 26, 2024
Learn how to install a shower drain with our step-by-step guide. Create a functional and stylish addition to your home with our expert tips and advice. Perfect for your home and garden projects.
(Many of the links in this article redirect to a specific reviewed product. Your purchase of these products through affiliate links helps to generate commission for Regretless.com, at no extra cost. Learn more)
Table of Contents
Introduction
Installing a shower drain is a crucial aspect of any bathroom renovation or construction project. A properly installed shower drain ensures efficient water drainage, preventing potential water damage and mold growth. Whether you're upgrading your existing shower or installing a new one, understanding the process of installing a shower drain is essential for a successful project.
A well-installed shower drain not only serves a functional purpose but also contributes to the overall aesthetic appeal of the shower area. It's important to approach this task with careful attention to detail and precision to ensure a seamless and watertight installation.
In this comprehensive guide, we will walk you through the step-by-step process of installing a shower drain. From removing the old drain to testing the new installation, each stage is crucial in achieving a reliable and long-lasting result. By following these instructions and using the recommended tools and materials, you can confidently tackle this project and enjoy the satisfaction of a professionally installed shower drain.
Let's dive into the details of the tools and materials you'll need for this project.
Tools and Materials Needed
Before embarking on the installation of a shower drain, it's essential to gather the necessary tools and materials to ensure a smooth and efficient process. Here's a comprehensive list of the items you'll need:
Tools:
- Screwdriver: A Phillips or flat-head screwdriver will be required for removing the screws holding the old drain in place.
- Adjustable Wrench: This versatile tool will be used to loosen and tighten various fittings during the installation process.
- Pliers: A pair of pliers will come in handy for gripping and maneuvering small components, such as the drain flange and gaskets.
- Hacksaw: In some cases, you may need to trim the drain pipe to fit the new drain assembly, making a hacksaw an essential tool for this task.
- Plumber's Putty: This sealing compound is used to create a watertight seal between the drain flange and the shower base, preventing leaks.
- Plumber's Tape: Also known as Teflon tape, this is used to seal threaded connections and prevent leaks.
- Level: Ensuring that the new drain is installed level is crucial for proper water drainage, making a level an indispensable tool for this project.
Materials:
- New Shower Drain: Select a high-quality shower drain assembly that suits your specific shower configuration and design preferences.
- Rubber Gasket: This component provides a watertight seal between the drain body and the shower base, preventing water from seeping through.
- Cardboard or Rag: Use this to cover the drain hole to prevent debris from falling into the drainpipe during the installation process.
- Safety Glasses and Gloves: It's important to prioritize safety, so be sure to wear protective eyewear and gloves throughout the installation.
- Cleaning Supplies: Have a rag or paper towels on hand to clean any debris or old putty from the drain area before installing the new drain.
- Pipe Sealant: If your new drain assembly includes threaded connections, pipe sealant will be necessary to ensure a secure and leak-free fit.
By ensuring that you have all the required tools and materials ready before starting the installation, you can streamline the process and minimize interruptions, leading to a successful and professional-looking shower drain installation.
Step 1: Remove the Old Drain
Removing the old drain is the initial and crucial step in the process of installing a new shower drain. This task requires careful attention to detail and the use of appropriate tools to ensure a smooth transition to the new installation. Here's a detailed guide on how to effectively remove the old drain:
-
Access the Drain: Begin by accessing the underside of the shower where the drain is located. This may involve accessing the drain through a basement or crawl space if the shower is located on an upper floor. Ensure that you have proper lighting and clear visibility of the drain area.
-
Remove the Screws: Using a screwdriver, carefully remove the screws that secure the drain cover in place. In some cases, the screws may be concealed beneath a layer of silicone or putty, so be thorough in your inspection.
-
Lift the Drain Cover: Once the screws are removed, gently lift the drain cover to expose the drain assembly below. Take note of any accumulated debris or signs of wear and corrosion around the edges of the drain.
-
Loosen the Drain Body: With an adjustable wrench, loosen the locknut or compression nut that secures the drain body to the shower base. This may require some effort, especially if the drain has been in place for an extended period.
-
Detach the Drain Body: Carefully detach the drain body from the shower base, taking care not to damage the surrounding area. If the drain body is sealed in place with plumber's putty, gently pry it loose using a putty knife or similar tool.
-
Inspect the Drain Pipe: After removing the drain body, inspect the exposed drain pipe for any signs of damage, corrosion, or blockages. This is an opportune time to clean the drain pipe and ensure that it is free from any obstructions.
By following these steps, you can effectively remove the old shower drain, paving the way for the subsequent stages of the installation process. It's important to exercise patience and caution during this phase to avoid causing any damage to the shower base or surrounding plumbing components. Once the old drain has been successfully removed, you can proceed to prepare the area for the installation of the new drain.
Read more: How To Fix A Shower Diverter
Step 2: Prepare the Area
Preparing the area for the installation of the new shower drain is a critical phase that sets the foundation for a successful and watertight assembly. This step involves thorough cleaning, inspection, and ensuring that the surrounding surfaces are ready to accommodate the new drain. Here's a detailed guide on how to effectively prepare the area for the installation:
-
Clean the Drain Opening: Begin by thoroughly cleaning the drain opening and the surrounding area. Use a rag or paper towels to remove any debris, old putty, or residue from the previous drain assembly. It's essential to create a clean and smooth surface for the new drain to ensure a proper fit and seal.
-
Inspect the Drain Pipe: Take a close look at the exposed drain pipe to check for any signs of damage, corrosion, or blockages. If necessary, use a flashlight to inspect the interior of the drain pipe for accumulated debris or potential obstructions. Clearing the drain pipe of any blockages at this stage can prevent future drainage issues.
-
Check the Shower Base: Inspect the surface of the shower base around the drain opening for any damage, cracks, or uneven areas. It's crucial to ensure that the base is structurally sound and level to facilitate a secure and watertight installation of the new drain.
-
Apply Plumber's Putty: If the new drain assembly requires the use of plumber's putty for sealing, carefully apply a uniform ring of putty around the underside of the drain flange. This step is essential for creating a watertight seal between the drain and the shower base, preventing leaks and water seepage.
-
Position the New Drain: Place the new drain assembly into the prepared opening, ensuring that it sits flush and level with the shower base. Take care to align the drain body and gasket properly to facilitate a secure and watertight fit.
-
Secure the New Drain: Once the new drain is positioned correctly, secure it in place by tightening the locknut or compression nut. Use an adjustable wrench to ensure that the new drain assembly is firmly and evenly secured to the shower base, creating a reliable seal.
By meticulously preparing the area for the installation of the new shower drain, you can lay the groundwork for a successful and durable assembly. This phase sets the stage for the final step of installing the new drain and testing its functionality, bringing you closer to completing this essential aspect of your bathroom renovation or construction project.
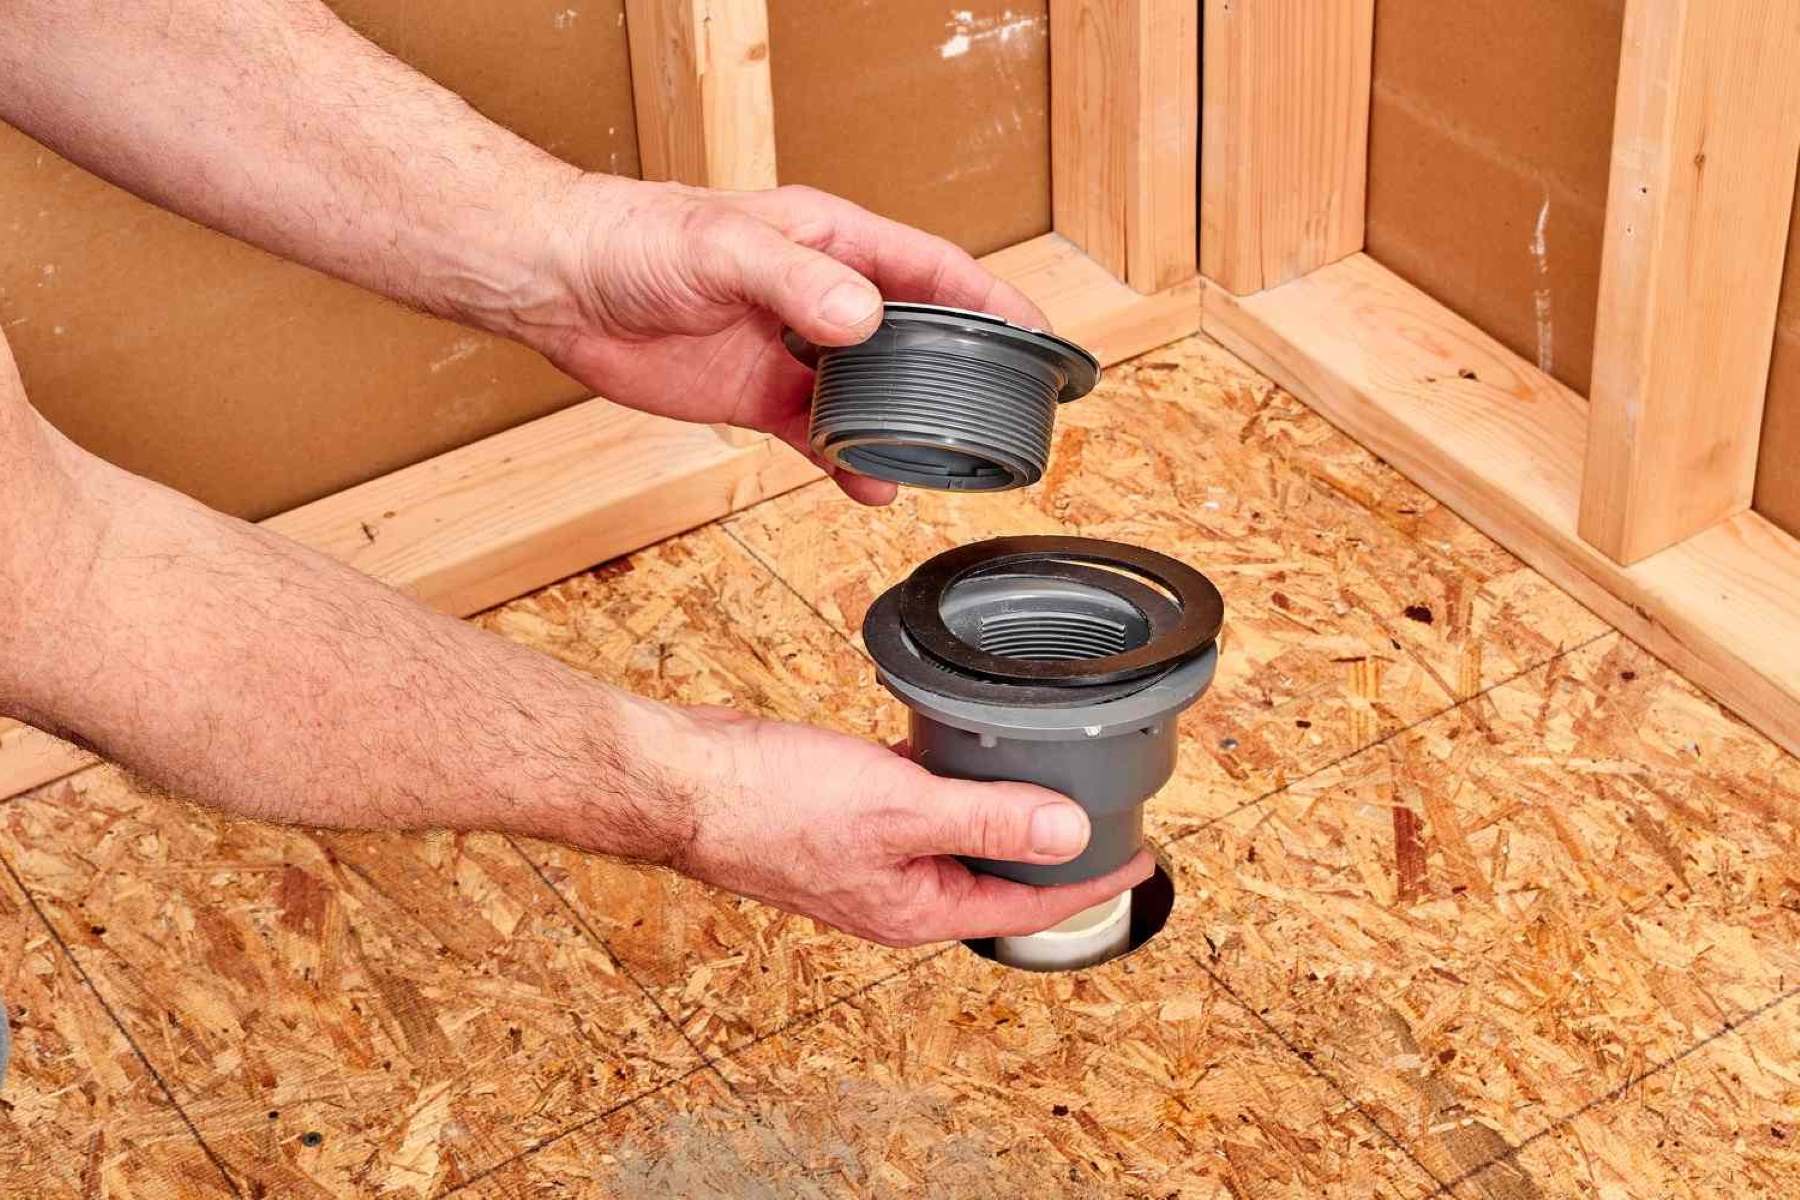
Step 3: Install the New Drain
With the area meticulously prepared, it's time to proceed with the installation of the new shower drain. This pivotal step requires precision and attention to detail to ensure a secure and watertight fit. Here's a comprehensive guide on how to effectively install the new drain:
-
Position the Drain Body: Carefully position the drain body into the prepared opening, ensuring that it aligns perfectly with the drain pipe below. Take note of any alignment marks or indicators on the drain body to ensure proper positioning.
-
Attach the Drain Flange: Place the rubber gasket over the drain body, ensuring that it sits snugly and creates a watertight seal. Next, position the drain flange over the rubber gasket, aligning it with the drain body. Press down firmly to secure the flange and gasket in place.
-
Tighten the Fasteners: Using the appropriate screws or fasteners provided with the new drain assembly, secure the drain flange to the drain body. Ensure that the fasteners are tightened evenly to prevent any distortion or misalignment of the components.
-
Check for Level: Utilize a level to verify that the installed drain flange is perfectly level. This is crucial for ensuring proper water drainage and preventing any pooling or uneven flow within the shower area.
-
Apply Additional Sealant (If Required): Depending on the specific design of the new drain assembly, you may need to apply additional sealant or adhesive to reinforce the connection between the drain flange and the shower base. Follow the manufacturer's instructions carefully when applying any supplementary sealant.
-
Remove Excess Sealant: If any excess sealant or adhesive has squeezed out during the installation, carefully remove it using a putty knife or a suitable tool. This step contributes to a clean and professional-looking finish around the installed drain.
-
Double-Check the Fit: Once the new drain is securely installed, double-check the fit and alignment of all components. Ensure that the rubber gasket is properly seated, the drain flange is level, and all fasteners are tightened to the manufacturer's specifications.
By following these detailed steps, you can effectively install the new shower drain, setting the stage for the final phase of testing the drain's functionality and ensuring a reliable and watertight installation. With the new drain in place, you're one step closer to completing this essential aspect of your bathroom renovation or construction project.
Step 4: Test the Drain
Testing the newly installed shower drain is a crucial final step to ensure its functionality and integrity. This phase allows you to verify that the drain is effectively channeling water away from the shower area and that all components are securely in place. Here's a detailed guide on how to conduct a comprehensive test of the drain:
-
Water Flow Test: Begin by pouring a moderate amount of water into the shower area, directly over the drain. Observe the flow of water as it enters the drain and ensure that it is swiftly and efficiently carried away. This test allows you to confirm that the drain is not impeded and that water is properly draining through the plumbing system.
-
Leak Inspection: While the water is flowing through the drain, carefully inspect the area around the drain flange and the connection to the shower base for any signs of leakage. Look for water seepage, drips, or moisture accumulation, which could indicate a faulty seal or improper installation. It's essential to address any leaks promptly to prevent water damage to the surrounding structures.
-
Drain Odor Check: As the water flows through the drain, pay attention to any unpleasant odors emanating from the drain. Foul smells could indicate a lack of proper venting or a buildup of organic matter within the drain system. If persistent odors are detected, further inspection and potential remediation may be necessary to ensure a fresh and hygienic shower environment.
-
Visual Inspection: After the water flow test, visually inspect the entire drain assembly, including the drain flange, gasket, and surrounding areas. Look for any signs of movement, shifting, or misalignment that may have occurred during the testing process. Additionally, ensure that the drain components remain securely fastened and that the sealant, if used, has formed a reliable bond.
-
Functional Assessment: To further evaluate the drain's functionality, allow the water to fully drain from the shower area and observe the speed and efficiency of the drainage process. A properly installed drain should swiftly and completely remove the water, leaving the shower base dry and free from standing water.
By meticulously testing the newly installed shower drain, you can confirm its proper function and address any potential issues before completing the project. This thorough evaluation ensures that the drain will effectively serve its purpose, providing reliable water drainage and contributing to a functional and inviting shower space.
Conclusion
In conclusion, the installation of a shower drain is a fundamental aspect of any bathroom renovation or construction project. By following the step-by-step process outlined in this guide and utilizing the recommended tools and materials, you can achieve a professional and reliable result.
The meticulous removal of the old drain sets the stage for a seamless transition to the new installation, ensuring that the surrounding area is prepared for the upcoming steps. Thoroughly cleaning the drain opening, inspecting the drain pipe, and checking the shower base are essential preparatory measures that contribute to the overall success of the installation.
The precise installation of the new drain, including positioning the drain body, attaching the drain flange, and securing the fasteners, is crucial for creating a watertight seal and facilitating efficient water drainage. Additionally, testing the drain through water flow, leak inspection, and functional assessment allows for the identification of any potential issues and ensures the proper functionality of the newly installed drain.
By prioritizing attention to detail and precision throughout the installation process, you can enjoy the satisfaction of a professionally installed shower drain that not only serves its functional purpose but also enhances the overall aesthetic and functionality of the shower area.
Remember, safety should always be a priority when undertaking any plumbing-related tasks. Wearing protective eyewear and gloves, as well as exercising caution when working with tools and materials, is essential to ensure a safe and successful installation process.
With the completion of the shower drain installation, you can take pride in knowing that you've contributed to the functionality and visual appeal of your bathroom space. Whether it's a refreshing morning shower or a relaxing evening routine, the reliable and efficient drainage provided by the newly installed shower drain will enhance your overall shower experience.
Embrace the satisfaction of a job well done, and revel in the knowledge that your attention to detail and commitment to quality have resulted in a professionally installed shower drain that will serve you reliably for years to come.