Home>Home and Garden>How To Fix A Shower Diverter
Home and Garden
How To Fix A Shower Diverter
Published: February 26, 2024
Learn how to fix a shower diverter and improve your home and garden with our step-by-step guide. Save time and money with our expert tips and tricks.
(Many of the links in this article redirect to a specific reviewed product. Your purchase of these products through affiliate links helps to generate commission for Regretless.com, at no extra cost. Learn more)
Table of Contents
Introduction
A malfunctioning shower diverter can quickly turn a relaxing shower into a frustrating experience. When the diverter fails to direct water to the showerhead, it can lead to low water pressure or even a complete inability to use the shower. Fortunately, with a bit of know-how and the right tools, fixing a shower diverter is a manageable task that can save you from the inconvenience of a faulty shower.
In this comprehensive guide, we will walk you through the step-by-step process of fixing a shower diverter, empowering you to tackle this common household issue with confidence. Whether you're a seasoned DIY enthusiast or a novice homeowner looking to expand your home maintenance skills, this guide will equip you with the knowledge and techniques needed to address a malfunctioning shower diverter effectively.
By understanding the inner workings of the shower diverter and following the detailed instructions provided, you'll be able to restore your shower's functionality and enjoy a rejuvenating bathing experience once again. So, roll up your sleeves, gather your tools, and let's dive into the process of fixing a shower diverter.
Understanding the Shower Diverter
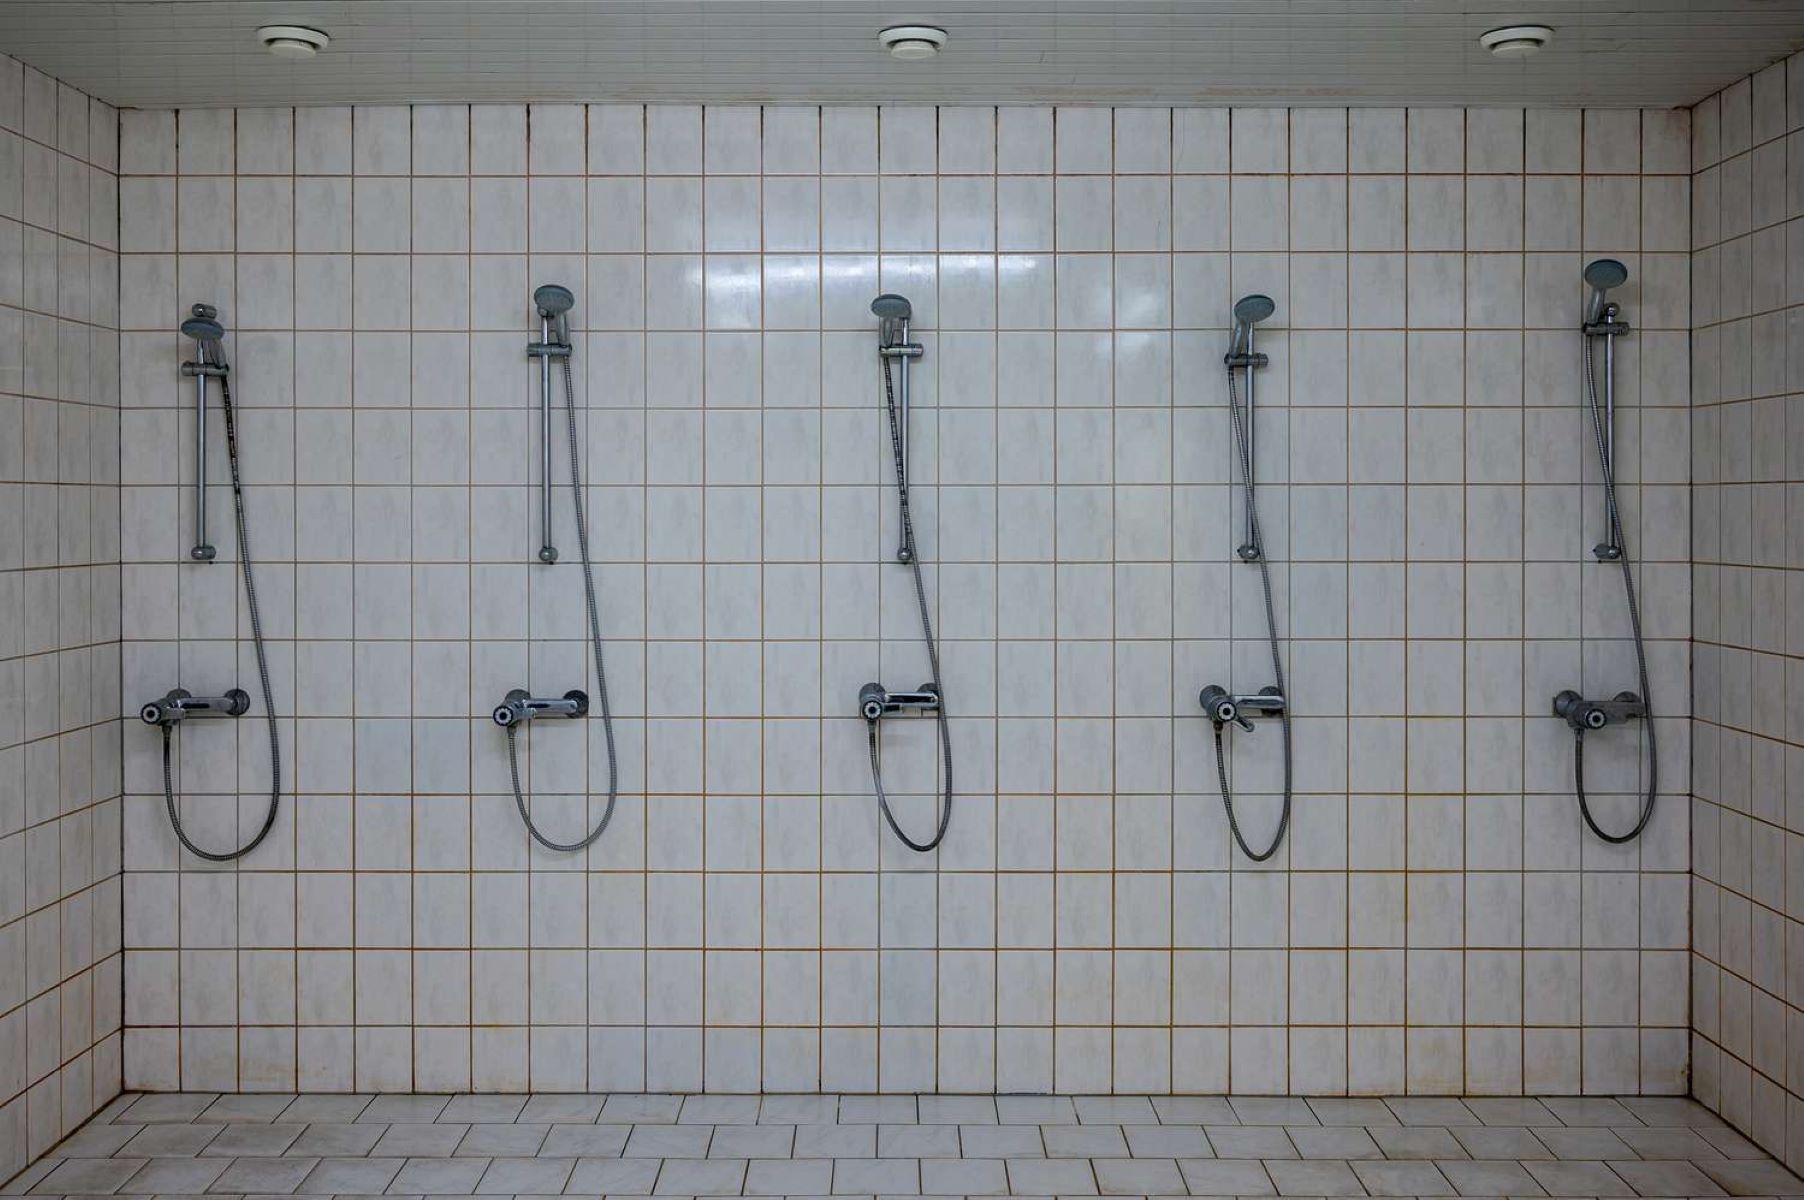
The shower diverter is a crucial component of a shower system that controls the flow of water between the bathtub faucet and the showerhead. Its primary function is to direct the water to the showerhead when the user wants to take a shower, and to the faucet when the user prefers to fill the bathtub. This mechanism is typically found in tub and shower combinations, allowing for a seamless transition between bathing and showering.
There are several types of shower diverters, including the three-valve diverter, two-valve diverter, and the more modern single-handle diverter. The three-valve diverter features a separate valve for hot water, cold water, and the diverter itself. By turning the diverter valve, the user can control the flow of water between the tub spout and the showerhead. The two-valve diverter, on the other hand, has a single handle that controls both the water temperature and the diverter function. Lastly, the single-handle diverter combines temperature control and diverter functionality into a single lever, offering a more streamlined and contemporary design.
Understanding the type of diverter in your shower is essential for troubleshooting and fixing any issues that may arise. Common problems with shower diverters include leaks, blockages, or a failure to direct water to the showerhead. By familiarizing yourself with the specific diverter mechanism in your shower, you can effectively diagnose and address any malfunctions that may occur.
In addition to the traditional manual diverters, there are also diverter valves that operate electronically, allowing for precise control over water flow and temperature. These advanced diverter systems often feature digital interfaces and programmable settings, providing a luxurious and customizable showering experience.
By gaining a comprehensive understanding of the shower diverter and its various types, you'll be better equipped to identify and resolve any issues that may impact the functionality of your shower system. With this knowledge as a foundation, you'll be ready to proceed to the next steps of fixing a shower diverter with confidence and precision.
Tools and Materials Needed
Before embarking on the task of fixing a shower diverter, it's essential to gather the necessary tools and materials to ensure a smooth and efficient repair process. Here's a comprehensive list of items you'll need to have on hand:
Tools:
- Adjustable Wrench: This versatile tool will be used to loosen and tighten various components of the shower diverter.
- Screwdriver Set: Both flathead and Phillips screwdrivers will come in handy for removing screws and disassembling the diverter mechanism.
- Needle-Nose Pliers: Useful for reaching and manipulating small components within the diverter assembly.
- Pipe Wrench: If you're working with older plumbing fixtures, a pipe wrench may be necessary for removing stubborn connections.
- Plumber's Tape: Also known as Teflon tape, this will be used to create a watertight seal when reassembling the diverter components.
- Plumber's Grease: Applying plumber's grease to the diverter valve threads can help ensure smooth operation and prevent leaks.
- Flashlight: A reliable source of illumination will aid in inspecting and working within the confined space of the shower plumbing.
Materials:
- Replacement Diverter Valve: If the existing diverter valve is damaged or malfunctioning, a suitable replacement will be required. Be sure to select a valve that matches the specifications of your shower system.
- Cleaning Solution: Depending on the condition of the diverter valve, a mild cleaning solution may be needed to remove any mineral deposits or debris that could be affecting its performance.
- Cloth or Rag: Keep a clean cloth or rag on hand for wiping down components and drying surfaces as needed.
- Safety Gloves: Protect your hands with a pair of durable gloves, especially if you'll be working with sharp or rusty components.
- Bucket or Container: Having a bucket or container nearby can be helpful for catching any water that may drain from the plumbing during the repair process.
- Safety Glasses: When working with plumbing fixtures, it's important to prioritize safety by wearing protective eyewear.
By ensuring that you have all the necessary tools and materials at your disposal, you'll be well-prepared to tackle the task of fixing a shower diverter with confidence and efficiency. With these items within reach, you can proceed to the subsequent steps of the repair process, knowing that you have everything you need to address the issue effectively.
Read more: How To Install Shower Drain
Step 1: Shut Off the Water
Before beginning any work on the shower diverter, it is crucial to shut off the water supply to the shower to prevent any potential leaks or water damage. Here's a detailed guide on how to safely shut off the water:
-
Locate the Water Shut-Off Valve: The water shut-off valve for the shower is typically located near the shower plumbing or in the vicinity of the main water supply for the house. In some cases, it may be found in a utility room or basement. If you're unsure of the valve's location, consult the home's plumbing layout or seek guidance from a professional.
-
Turn Off the Water: Once you've located the shut-off valve, turn it clockwise to shut off the water supply to the shower. This action will stop the flow of water to the shower diverter, ensuring that you can work on the system without the risk of water leakage.
-
Test the Water Supply: After turning off the water, it's advisable to test the shower faucet to confirm that the water supply has been successfully shut off. Turn on the shower faucet to verify that no water is flowing from the showerhead. If water continues to flow, revisit the shut-off valve and ensure it is fully closed.
-
Drain any Remaining Water: To further safeguard against potential leaks, it's recommended to drain any remaining water from the shower plumbing. Turn on the shower faucet and allow any residual water to drain out. This step will minimize the risk of water spillage during the repair process.
By following these steps to shut off the water supply to the shower, you can create a safe and controlled environment for working on the shower diverter. This precautionary measure helps prevent water damage and ensures that the repair process can be carried out effectively. Once the water supply has been securely shut off, you can proceed with confidence to the subsequent steps of fixing the shower diverter.
Step 2: Remove the Diverter Handle
Removing the diverter handle is the next crucial step in the process of fixing a shower diverter. This task involves disassembling the visible components of the diverter mechanism to gain access to the internal valve. Here's a detailed guide on how to remove the diverter handle effectively:
-
Identify the Handle Type: Depending on the design of your shower diverter, the handle may be secured with a screw or a decorative cap. Inspect the handle to determine the type of fastening mechanism it utilizes.
-
Remove the Screw or Cap: If the handle is secured with a screw, use an appropriate screwdriver to carefully loosen and remove it. In the case of a decorative cap, gently pry it off using a flathead screwdriver to reveal the screw beneath.
-
Detach the Handle: Once the fastening mechanism is accessible, carefully lift the handle away from the diverter assembly. Take note of any additional components, such as a trim plate or escutcheon, that may be present and remove them as well.
-
Inspect the Handle and Trim: With the handle removed, take a moment to inspect its condition and the surrounding trim components. Look for any signs of wear, corrosion, or damage that may indicate the need for replacement or refurbishment.
-
Set Aside the Components: Place the removed handle, screw, and any accompanying trim pieces in a safe location. Keeping these components organized and secure will facilitate reassembly once the repair process is complete.
By carefully following these steps to remove the diverter handle, you can effectively access the internal components of the shower diverter and proceed with the necessary repairs. With the handle and trim components safely removed, you'll be ready to move on to the subsequent steps of cleaning or replacing the diverter valve, ultimately restoring your shower's functionality.
Step 3: Remove the Diverter Valve
With the diverter handle and trim components successfully removed, the next critical step in fixing a shower diverter involves accessing and removing the diverter valve. This internal valve is responsible for directing the flow of water between the bathtub faucet and the showerhead, and addressing any issues with its functionality is essential for restoring proper shower operation. Here's a detailed guide on how to effectively remove the diverter valve:
-
Locate the Diverter Valve: Within the exposed plumbing assembly, identify the diverter valve, which is typically situated behind the wall or within the faucet assembly. Depending on the type of shower diverter, the valve may be accessible after removing the handle and trim components, or it may require further disassembly of the faucet assembly.
-
Disassemble the Faucet Assembly (if necessary): In some cases, accessing the diverter valve may require disassembling the faucet assembly to reach the internal plumbing components. Refer to the manufacturer's instructions or consult a plumbing professional to ensure that the disassembly process is carried out correctly and safely.
-
Remove the Diverter Valve: Once the diverter valve is accessible, use an adjustable wrench or an appropriate tool to carefully loosen and remove the valve from its housing. Take note of any accompanying components, such as seals or gaskets, and ensure that they are set aside in a secure location for inspection and potential replacement.
-
Inspect the Diverter Valve and Surrounding Components: With the diverter valve removed, thoroughly inspect its condition and the surrounding plumbing components. Look for any signs of wear, corrosion, mineral deposits, or damage that may be impacting the valve's performance. Additionally, check for any blockages or debris that could be obstructing the flow of water.
-
Prepare for Cleaning or Replacement: Depending on the condition of the diverter valve, determine whether it can be effectively cleaned and restored to optimal functionality, or if a replacement valve is necessary. If cleaning is required, use a mild cleaning solution and a soft brush to remove any buildup or debris from the valve and its housing.
By carefully following these steps to remove the diverter valve, you can effectively access the critical internal component of the shower diverter and proceed with the necessary cleaning or replacement. With the diverter valve removed and inspected, you'll be ready to move on to the subsequent steps of cleaning or replacing the valve, ultimately restoring your shower's functionality.
Step 4: Clean or Replace the Diverter Valve
Once the diverter valve has been removed and inspected, the next crucial step in fixing a shower diverter involves cleaning or replacing the valve to restore optimal functionality to the shower system. Depending on the condition of the valve and the extent of any issues identified during inspection, the appropriate course of action can be determined. Here's a detailed guide on how to effectively clean or replace the diverter valve:
Read more: How To Fix An Engine Misfire
Cleaning the Diverter Valve:
If the diverter valve exhibits signs of mineral deposits, corrosion, or debris buildup without significant damage, cleaning the valve may be a viable solution to restore its functionality. Follow these steps to clean the diverter valve effectively:
-
Prepare a Cleaning Solution: Create a mild cleaning solution using warm water and a gentle, non-abrasive soap or vinegar. This solution can help dissolve mineral deposits and remove any accumulated debris from the valve.
-
Soak the Valve: Submerge the diverter valve in the cleaning solution and allow it to soak for a sufficient period, typically 30 minutes to an hour. This soaking process will help loosen and dislodge any stubborn buildup within the valve.
-
Use a Soft Brush: After soaking, gently scrub the diverter valve with a soft-bristled brush to remove loosened deposits and debris. Take care to avoid using abrasive materials that could damage the valve's surfaces.
-
Rinse Thoroughly: Once the valve has been scrubbed, rinse it thoroughly with clean water to remove any remaining cleaning solution and dislodged particles. Inspect the valve to ensure that it is free from debris and buildup.
-
Dry the Valve: Use a clean, dry cloth to carefully dry the diverter valve, ensuring that all moisture is removed before reinstallation.
Replacing the Diverter Valve:
In cases where the diverter valve exhibits significant damage, wear, or corrosion that cannot be effectively remedied through cleaning, replacing the valve is the recommended course of action. Follow these steps to replace the diverter valve effectively:
-
Select a Replacement Valve: Identify the specific type and model of the diverter valve needed for your shower system. Ensure that the replacement valve matches the specifications and dimensions of the original valve to guarantee compatibility.
-
Apply Plumber's Tape: Before installing the replacement valve, apply plumber's tape to the threads of the valve to create a secure and watertight seal. This step is essential for preventing leaks and ensuring the proper functioning of the new valve.
-
Install the Replacement Valve: Carefully insert the replacement diverter valve into its housing, taking care to align it correctly and secure it in place. Use an adjustable wrench to tighten the valve securely without over-tightening, which could cause damage.
-
Inspect and Test: Once the replacement valve is installed, inspect the surrounding components to ensure that everything is properly aligned and sealed. Turn on the water supply and test the shower diverter to confirm that the new valve functions as intended.
By following these detailed steps to clean or replace the diverter valve, you can effectively address any issues affecting the functionality of the shower diverter. Whether through thorough cleaning or precise replacement, restoring the diverter valve to optimal condition is essential for ensuring a reliable and enjoyable showering experience. With the valve cleaned or replaced, you'll be ready to proceed to the final steps of reassembling the diverter and restoring the water flow to the showerhead.
Step 5: Reassemble the Diverter
With the diverter valve cleaned or replaced, the final step in fixing a shower diverter involves reassembling the components to restore the water flow to the showerhead. This critical phase of the repair process ensures that the diverter mechanism operates smoothly and efficiently, allowing for seamless transitions between the bathtub faucet and the showerhead. Here's a detailed guide on how to effectively reassemble the diverter:
-
Apply Plumber's Grease (if applicable): If the diverter valve threads were cleaned or replaced, applying a thin layer of plumber's grease to the threads can help facilitate smooth operation and prevent leaks. This step is particularly beneficial for older plumbing fixtures or valves that have undergone extensive cleaning.
-
Reinsert the Diverter Valve: Carefully reinsert the cleaned or replacement diverter valve into its housing, ensuring that it is aligned correctly and securely seated. Use an adjustable wrench to tighten the valve, taking care not to over-tighten, which could cause damage to the valve or surrounding components.
-
Reattach the Diverter Handle: Place the diverter handle back onto the diverter assembly, aligning it with the valve stem. If the handle is secured with a screw, use an appropriate screwdriver to reattach it securely. For handles with decorative caps, gently press the cap back into place to conceal the screw.
-
Install Trim Components: If the diverter assembly includes trim components such as a trim plate or escutcheon, reattach these elements to the shower wall. Ensure that the trim components are aligned properly and securely fastened to create a polished and finished appearance.
-
Test the Diverter Operation: With the components reassembled, turn on the water supply and test the diverter operation. Verify that the water flows seamlessly between the bathtub faucet and the showerhead, and check for any signs of leaks or irregularities. If the diverter functions as intended, proceed to the next step. If issues persist, revisit the assembly to identify and address any potential concerns.
-
Inspect for Leaks: After testing the diverter operation, inspect the surrounding connections and components for any signs of leaks. Ensure that all fittings are secure and that there are no indications of water seepage. Address any leaks promptly to prevent water damage and maintain the integrity of the shower system.
By following these detailed steps to reassemble the diverter, you can effectively restore the functionality of the shower system and ensure that the diverter operates smoothly and reliably. With the components securely reassembled and the water flow restored to the showerhead, you can confidently conclude the repair process, knowing that the shower diverter has been successfully fixed.
Conclusion
In conclusion, fixing a shower diverter is a manageable task that empowers homeowners to address common issues affecting the functionality of their shower systems. By understanding the inner workings of the shower diverter and following a systematic approach to diagnosis and repair, individuals can effectively restore their showers to optimal performance. From shutting off the water supply to reassembling the diverter components, each step in the repair process plays a crucial role in ensuring a successful outcome.
The process begins with the essential step of shutting off the water supply to the shower, creating a safe and controlled environment for working on the diverter mechanism. This precautionary measure minimizes the risk of water leakage and sets the stage for the subsequent repair steps. Removing the diverter handle and accessing the internal valve are pivotal tasks that provide insight into the condition of the diverter and guide the subsequent course of action.
Whether through cleaning or replacing the diverter valve, addressing any issues affecting its functionality is essential for restoring proper shower operation. Thorough cleaning can effectively remove mineral deposits and debris, while precise replacement ensures the reliable performance of the diverter mechanism. Reassembling the diverter components and testing the water flow to the showerhead complete the repair process, allowing individuals to enjoy a rejuvenating bathing experience once again.
By following the comprehensive guide outlined in this article, homeowners can confidently tackle the task of fixing a shower diverter, whether it's a traditional manual diverter or an advanced electronic system. Armed with the knowledge and techniques provided, individuals can navigate the repair process with confidence and precision, ultimately saving time and resources by addressing the issue independently.
In essence, the ability to fix a shower diverter represents a valuable skill for homeowners, enabling them to maintain and optimize their home's essential systems. With the knowledge gained from this guide, individuals can approach diverter repair with confidence, knowing that they have the tools and expertise to address common issues and restore their showers to full functionality.