Home>Health and Wellness>The Ultimate Guide To Changing Your Belly Button Ring In Just One Week!
Health and Wellness
The Ultimate Guide To Changing Your Belly Button Ring In Just One Week!
Published: February 10, 2024
Discover the ultimate guide to changing your belly button ring in just one week for improved health and wellness. Find expert tips and advice to ensure a smooth transition.
(Many of the links in this article redirect to a specific reviewed product. Your purchase of these products through affiliate links helps to generate commission for Regretless.com, at no extra cost. Learn more)
Table of Contents
- Introduction
- Week 1: Preparing for the Change
- Day 1: Assessing Your Belly Button Piercing
- Day 2: Choosing the Right Belly Button Ring
- Day 3: Cleaning and Disinfecting Your Belly Button Piercing
- Day 4: Understanding the Changing Process
- Day 5: Practicing Proper Hygiene
- Day 6: Getting Ready for the Change
- Day 7: Changing Your Belly Button Ring
Introduction
Changing your belly button ring can be an exciting and empowering experience. Whether you're looking to switch up your style, celebrate a milestone, or simply refresh your look, the process of changing your belly button ring is a significant step in your piercing journey. However, it's essential to approach this transition with careful consideration and proper preparation to ensure a smooth and successful outcome.
Throughout this comprehensive guide, we will walk you through the step-by-step process of changing your belly button ring over the course of one week. Each day will focus on crucial aspects of the preparation, from assessing the current state of your piercing to selecting the perfect new belly button ring, understanding the changing process, and practicing proper hygiene. By following this week-long plan, you will gain the confidence and knowledge needed to execute the change effectively and minimize the risk of complications.
Embarking on this journey requires patience, attention to detail, and a commitment to maintaining the health and integrity of your belly button piercing. With the right approach and guidance, you can navigate this process with ease and ensure that your new belly button ring becomes a seamless and stylish addition to your personal expression.
So, let's dive into the first day of our week-long journey as we begin the process of preparing for the exciting change ahead.
Week 1: Preparing for the Change
As you embark on the journey of changing your belly button ring, it's crucial to dedicate a week to thorough preparation. This preparation period will not only build anticipation for the change but also ensure that you approach the process with the necessary knowledge and readiness. Each day of this week will focus on specific tasks and considerations to set the stage for a successful and seamless transition to your new belly button ring.
Throughout this week, you will assess the current state of your belly button piercing, choose the perfect new belly button ring, understand the changing process, and prioritize proper hygiene. By breaking down the preparation into daily tasks, you will have the opportunity to devote focused attention to each aspect, thereby enhancing your confidence and readiness for the upcoming change.
This week is not only about physical preparation but also about mental and emotional readiness. It's a time to build excitement, envision the new belly button ring as an extension of your personal style, and embrace the anticipation of this transformative experience. By dedicating this week to preparation, you are laying the foundation for a smooth, enjoyable, and empowering process of changing your belly button ring.
So, let's dive into the first day of our week-long journey as we begin the process of preparing for the exciting change ahead.
Day 1: Assessing Your Belly Button Piercing
Assessing the current state of your belly button piercing is the crucial first step in preparing for the transition to a new belly button ring. This assessment serves as a foundation for understanding the health of your piercing and identifying any potential issues that may need to be addressed before proceeding with the change.
Begin by carefully examining your belly button piercing in a well-lit area. Look for any signs of redness, swelling, or tenderness around the piercing site. These could indicate irritation or infection and may require attention before changing your belly button ring.
Next, check the tightness of your current belly button ring. If it feels excessively tight or has been causing discomfort, it's essential to address this before attempting to change the jewelry. Similarly, if the belly button ring feels loose, it could increase the risk of the piercing getting caught on clothing or other objects, potentially leading to complications.
Pay attention to any discharge or unusual odors coming from the piercing. While a small amount of clear or slightly white discharge is normal during the healing process, excessive or discolored discharge may signal an infection that needs to be addressed promptly.
Additionally, take note of the positioning of the piercing. Ensure that the entry and exit points are properly aligned and that the piercing hasn't shifted or migrated. Any signs of migration should be evaluated by a professional piercer to determine the best course of action.
During this assessment, it's essential to resist the urge to touch or manipulate the piercing excessively. Clean hands can be used to gently inspect the area, but unnecessary touching can introduce bacteria and increase the risk of irritation or infection.
By thoroughly assessing your belly button piercing on this first day of preparation, you are taking a proactive approach to ensure that your piercing is in optimal condition for the upcoming change. This assessment sets the stage for a successful transition to a new belly button ring and reinforces the importance of attentive care and maintenance throughout your piercing journey.
Day 2: Choosing the Right Belly Button Ring
Selecting the right belly button ring is a significant aspect of the piercing journey, as it not only complements your style but also contributes to the overall comfort and well-being of your piercing. When choosing a new belly button ring, several factors come into play, ranging from material and style to size and design.
First and foremost, consider the material of the belly button ring. Opting for high-quality materials such as surgical-grade stainless steel, titanium, or solid gold can minimize the risk of allergic reactions and irritation. These materials are known for their biocompatibility, making them suitable for individuals with sensitive skin or a history of metal allergies. Additionally, these materials are durable and resistant to corrosion, ensuring long-term wear without compromising the integrity of your piercing.
Next, explore the diverse styles and designs available for belly button rings. From classic curved barbells to versatile captive bead rings and dainty dangle designs, the options are vast and cater to various preferences. Consider the aesthetic you wish to achieve, whether it's a minimalist look, a bold statement piece, or a playful and vibrant design. Keep in mind that the style of the belly button ring should align with your personal taste and complement your wardrobe, allowing you to express your individuality with confidence.
Size plays a crucial role in ensuring a comfortable fit for your new belly button ring. The length of the barbell should accommodate the thickness of your navel, preventing undue pressure or tightness that could impede the healing process. Similarly, the diameter of rings and the size of decorative charms should be proportionate to your anatomy, enhancing both comfort and aesthetics.
As you explore the myriad options for belly button rings, consider the significance of threadless or internally threaded jewelry. These designs prioritize smooth insertion and removal, reducing the risk of trauma to the piercing site. Additionally, their seamless finish minimizes the accumulation of debris and bacteria, promoting a cleaner and healthier environment for your piercing.
By thoughtfully considering the material, style, size, and design of your new belly button ring, you are not only enhancing your personal style but also prioritizing the well-being of your piercing. This careful selection process sets the stage for a successful and gratifying transition to a new belly button ring, ensuring that your piercing remains a harmonious and stylish expression of your individuality.
Day 3: Cleaning and Disinfecting Your Belly Button Piercing
Cleaning and disinfecting your belly button piercing is a fundamental aspect of maintaining its health and preparing for the transition to a new belly button ring. Proper hygiene not only minimizes the risk of infection but also promotes the healing process, ensuring that your piercing remains in optimal condition for the upcoming change.
Begin by washing your hands thoroughly with antibacterial soap to minimize the risk of introducing bacteria to the piercing site. Once your hands are clean, prepare a saline solution by mixing a quarter teaspoon of non-iodized sea salt with eight ounces of warm distilled water. This gentle saline solution serves as a natural and effective cleanser for your belly button piercing.
Using a clean cotton ball or pad, soak it in the saline solution and gently clean around the piercing site, ensuring that any crusted discharge or debris is carefully removed. Avoid using cotton swabs or pads with loose fibers, as these can leave behind residue and increase the risk of irritation. It's important to approach the cleaning process with a gentle touch, minimizing unnecessary movement or manipulation of the jewelry.
After gently cleansing the area, thoroughly rinse the piercing with warm water to remove any remaining saline solution. Pat the area dry with a disposable paper towel, as cloth towels can harbor bacteria and lint that may irritate the piercing. Ensure that the area is completely dry before proceeding with the disinfection process.
To disinfect the belly button piercing, consider using a mild antimicrobial soap that is free of fragrances and harsh chemicals. Apply a small amount of the soap to your fingertips and gently lather it around the piercing, ensuring that both the jewelry and the surrounding skin are thoroughly cleansed. Rinse the area with warm water, removing all traces of the soap to prevent residue buildup.
Following the cleaning and disinfection process, it's crucial to avoid touching or rotating the belly button ring unnecessarily. Excessive movement can disrupt the healing process and introduce bacteria to the piercing site. Additionally, refrain from using harsh cleaning agents, alcohol-based solutions, or hydrogen peroxide, as these can dry out the skin and impede the natural healing of the piercing.
By dedicating time to cleaning and disinfecting your belly button piercing on this third day of preparation, you are actively promoting its health and resilience. This meticulous approach sets the stage for a successful transition to a new belly button ring, ensuring that your piercing remains a testament to attentive care and responsible maintenance.
Day 4: Understanding the Changing Process
Understanding the changing process is essential for a smooth and successful transition to a new belly button ring. This day is dedicated to gaining a comprehensive understanding of the steps involved, the potential challenges, and the best practices for changing your belly button ring.
First and foremost, it's important to recognize that changing a belly button ring should be approached with patience and precision. The process begins with ensuring that the new belly button ring is clean, sterile, and free from any defects that could compromise the integrity of your piercing. Inspect the new jewelry carefully, paying attention to the threading, if applicable, and ensuring that any decorative elements are securely attached.
Next, familiarize yourself with the specific type of belly button ring you have, whether it's a curved barbell, captive bead ring, or another design. Understanding the mechanics of your current jewelry will enable you to navigate the changing process with confidence and ease. If you are unsure about the type of jewelry you have, consider seeking guidance from a professional piercer who can provide valuable insights and assistance.
Before proceeding with the change, it's crucial to mentally prepare for the process. Visualize the steps involved, anticipate any potential challenges, and remind yourself of the importance of maintaining a calm and steady hand throughout the transition. By cultivating a mindset of patience and attentiveness, you can approach the changing process with a sense of empowerment and control.
When it comes to the actual changing of the belly button ring, it's important to find a comfortable and well-lit space where you can proceed with the transition without unnecessary distractions. Ensure that you have access to clean and sterile tools, such as latex-free gloves and sterile cotton swabs, to minimize the risk of contamination.
As you embark on the changing process, remember to breathe deeply and maintain a steady hand. Gently remove the existing belly button ring, taking care not to force or tug at the jewelry. If you encounter resistance, consider applying a small amount of water-based lubricant to facilitate the removal process. Once the old jewelry is removed, swiftly and confidently insert the new belly button ring, ensuring that it is securely in place and positioned comfortably within the piercing.
Throughout this process, prioritize patience and precision, avoiding rushed movements or unnecessary adjustments. If you encounter any difficulties or feel unsure about the changing process, don't hesitate to seek assistance from a professional piercer who can offer guidance and support.
By dedicating this day to understanding the changing process, you are equipping yourself with the knowledge and confidence needed to execute the transition to a new belly button ring with grace and proficiency. This understanding reinforces the importance of mindful and deliberate actions, ensuring that the changing process becomes a seamless and empowering step in your piercing journey.
Day 5: Practicing Proper Hygiene
Practicing proper hygiene is a foundational element of caring for your belly button piercing and plays a crucial role in ensuring its health and resilience. As you prepare for the transition to a new belly button ring, dedicating time to prioritize hygiene will not only minimize the risk of complications but also contribute to a seamless and gratifying changing process.
Begin by incorporating gentle and consistent cleansing into your daily routine. Using a saline solution or a mild antimicrobial soap, carefully clean the area around your belly button piercing, ensuring that any accumulated debris or discharge is effectively removed. This proactive approach minimizes the risk of infection and promotes a clean and healthy environment for your piercing.
In addition to regular cleansing, it's important to avoid exposing your belly button piercing to potential sources of contamination. This includes refraining from swimming in pools, hot tubs, or natural bodies of water during the healing process, as these environments can harbor bacteria and impede the healing of your piercing. Similarly, be mindful of avoiding direct contact with cosmetics, lotions, and harsh chemicals around the piercing site, as these substances can irritate the skin and disrupt the healing process.
Clothing choice also plays a significant role in maintaining proper hygiene for your belly button piercing. Opt for loose-fitting, breathable clothing that minimizes friction and irritation around the piercing. Avoid wearing tight or restrictive clothing that can put pressure on the piercing, potentially leading to discomfort and complications. Additionally, ensure that your clothing is clean and free from potential irritants that could come into contact with the piercing.
As you practice proper hygiene, it's essential to resist the temptation to touch or manipulate your belly button piercing unnecessarily. Excessive touching can introduce bacteria and disrupt the healing process, potentially leading to complications. Instead, prioritize gentle care and minimal disruption, allowing your piercing to heal naturally and undisturbed.
By dedicating time and attention to practicing proper hygiene on this fifth day of preparation, you are actively nurturing the health and well-being of your belly button piercing. This commitment to hygiene sets the stage for a successful and seamless transition to a new belly button ring, ensuring that your piercing remains a testament to responsible care and attentive maintenance.
Day 6: Getting Ready for the Change
As you approach the penultimate day of your week-long journey to change your belly button ring, it's time to focus on getting ready for the impending transition. This day serves as a pivotal moment to gather all the essential elements, mentally prepare, and create an environment conducive to a smooth and successful changing process.
Begin by ensuring that you have all the necessary tools and supplies readily available. This includes your new belly button ring, clean latex-free gloves, a sterile saline solution, sterile cotton swabs, and a mirror to aid in the changing process. By gathering these items in advance, you can streamline the changing process and minimize the risk of last-minute complications.
In addition to the physical preparations, take a moment to mentally center yourself and cultivate a sense of calm and confidence. Visualize the changing process, envisioning a smooth and effortless transition to your new belly button ring. Embrace a mindset of patience and attentiveness, reminding yourself of the knowledge and readiness you have acquired throughout the week.
Create a clean and well-lit space where you can comfortably proceed with the changing process. Ensure that the area is free from potential distractions and that you have ample space to maneuver and position yourself effectively. By setting the stage for a focused and uninterrupted changing process, you can approach the transition with clarity and precision.
As you prepare for the change, consider seeking support from a trusted friend or family member who can provide assistance if needed. Having an extra set of hands can offer reassurance and practical help during the changing process, especially if you encounter any unexpected challenges.
Finally, take a moment to appreciate the journey you have embarked upon throughout the week. Celebrate the dedication and care you have invested in preparing for this significant transition. Embrace the anticipation of adorning your belly button with a new, stylish ring that reflects your personal taste and individuality.
By dedicating this day to getting ready for the change, you are aligning yourself with a mindset of readiness and empowerment. This proactive approach sets the stage for a seamless and gratifying transition to a new belly button ring, ensuring that the changing process becomes a rewarding culmination of your week-long preparation.
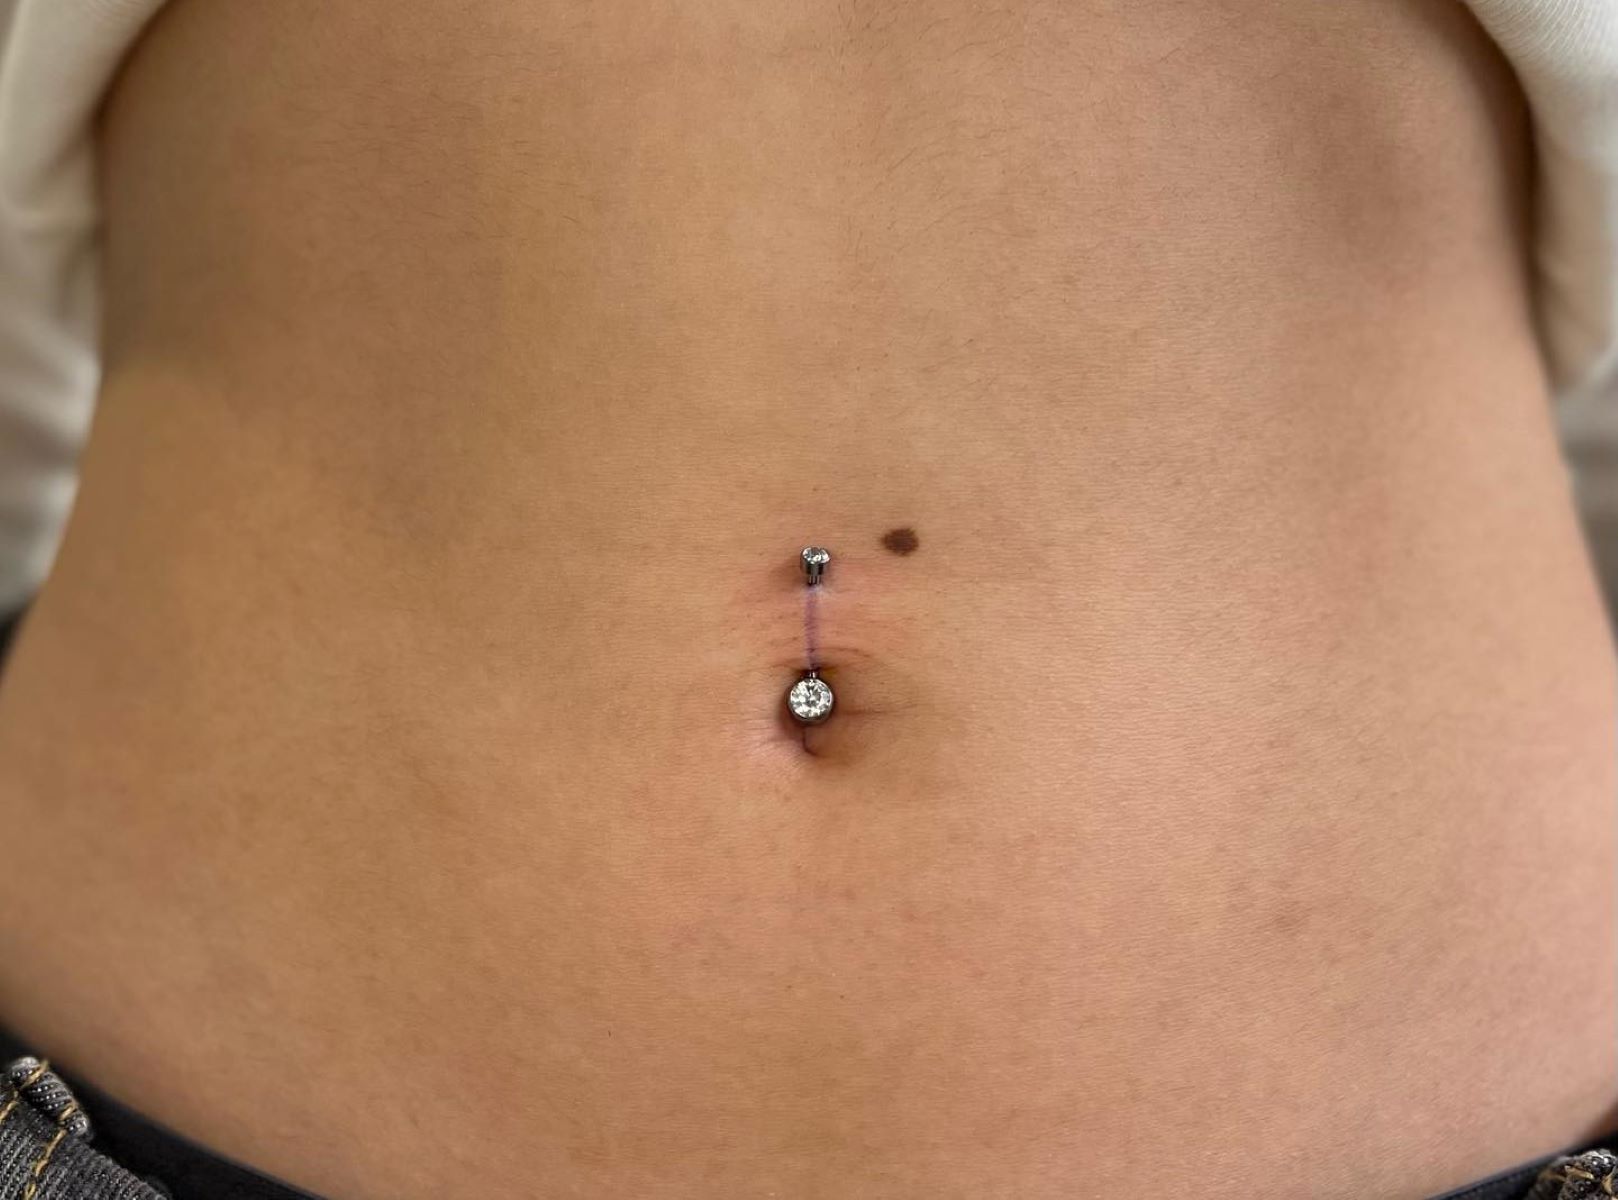
Day 7: Changing Your Belly Button Ring
The much-anticipated day has arrived, marking the culmination of your week-long preparation to change your belly button ring. As you embark on this transformative journey, it's essential to approach the changing process with a sense of confidence, mindfulness, and attentiveness. The culmination of your efforts throughout the week has prepared you for this pivotal moment, where you will seamlessly transition to a new belly button ring that reflects your personal style and individuality.
Begin by creating a calm and focused environment, free from distractions, where you can comfortably proceed with the changing process. Ensure that you have all the necessary tools and supplies within reach, including your new belly button ring, clean latex-free gloves, a sterile saline solution, sterile cotton swabs, and a well-positioned mirror to aid in the transition. By having these essentials at your disposal, you can navigate the changing process with ease and precision.
Put on the clean latex-free gloves to minimize the risk of contamination and ensure a hygienic approach to the transition. Take a moment to center yourself and cultivate a mindset of patience and attentiveness. Visualize the steps involved in changing your belly button ring, envisioning a smooth and effortless process that reflects the care and dedication you have invested throughout the week.
Gently remove the existing belly button ring, taking care not to force or tug at the jewelry. If you encounter any resistance, consider applying a small amount of water-based lubricant to facilitate the removal process. Once the old jewelry is removed, swiftly and confidently insert the new belly button ring, ensuring that it is securely in place and positioned comfortably within the piercing.
As you complete the changing process, take a moment to appreciate the significance of this transition. Embrace the empowerment that comes with expressing your personal style and individuality through your choice of belly button jewelry. Admire the new belly button ring as an extension of your unique identity, reflecting your taste, personality, and journey in the world of body art and adornment.
By navigating the changing process with grace and proficiency, you have transformed the anticipation and preparation of the past week into a rewarding and empowering experience. The seamless transition to your new belly button ring is a testament to your dedication to responsible care and maintenance, ensuring that your piercing remains a stylish and harmonious expression of your individuality.
This marks the beginning of a new chapter in your piercing journey, where your new belly button ring becomes a symbol of self-expression and personal empowerment. Embrace this moment with pride and confidence, knowing that you have embarked on this transformative experience with mindfulness, readiness, and a deep appreciation for the art of body adornment.
With the changing process successfully completed, you have set the stage for a seamless and gratifying transition to a new belly button ring, reflecting your unique style and personal journey.