Home>Arts and Culture>How To Draw Rocks

Arts and Culture
How To Draw Rocks
Modified: March 13, 2024
Learn the art of drawing rocks with our step-by-step guide. Explore the beauty of nature through your artistic skills in this arts and culture tutorial.
(Many of the links in this article redirect to a specific reviewed product. Your purchase of these products through affiliate links helps to generate commission for Regretless.com, at no extra cost. Learn more)
Table of Contents
Introduction
Drawing rocks can be a rewarding and enjoyable artistic endeavor. Whether you are a beginner or an experienced artist, capturing the rugged and weathered textures of rocks can provide a sense of accomplishment and satisfaction. Rocks come in various shapes, sizes, and formations, offering a diverse range of subjects to explore and depict in your artwork.
When it comes to drawing rocks, it's not just about replicating their physical appearance; it's about conveying their unique character and the stories they hold within their ancient formations. From the smooth, rounded edges of river rocks to the jagged, imposing cliffs of a mountainside, each rock has its own tale to tell, waiting to be brought to life on paper.
In this guide, we will delve into the art of drawing rocks, exploring the techniques and methods that will enable you to create realistic and compelling rock formations in your artwork. We will cover the essential materials needed, the fundamental shapes and forms to master, as well as the intricate details and textures that will breathe life into your rock drawings. Additionally, we will explore the nuances of creating depth and shadows to add dimension to your rock formations, along with final touches and tips to elevate your rock drawings to the next level.
Whether you are aiming to add a touch of nature to your landscape drawings or seeking to hone your skills in capturing the raw beauty of geological formations, this guide will equip you with the knowledge and techniques to embark on your rock-drawing journey with confidence and creativity. So, grab your drawing materials and let's embark on an artistic exploration of the captivating world of rocks.
Read more: How To Draw Bowser
Materials Needed
To embark on your rock-drawing adventure, you will need a few essential materials to bring your artistic vision to life. Here's a comprehensive list of the materials that will aid you in capturing the intricate details and textures of rocks in your drawings:
-
Drawing Paper: Select a high-quality, acid-free drawing paper that provides a smooth surface for your artwork. The paper should have enough tooth to hold the layers of pencil or charcoal that you will be applying to create realistic rock textures.
-
Drawing Pencils: Invest in a range of graphite pencils, including H (hard) pencils for light sketching and fine details, as well as B (soft) pencils for shading and adding depth to your rock formations.
-
Charcoal Pencils: Charcoal pencils are excellent for achieving rich, dark tones and dramatic contrasts in your rock drawings. They allow you to create bold, expressive marks and textures that can enhance the rugged appearance of rocks.
-
Kneaded Eraser: A kneaded eraser is a versatile tool that can be molded into various shapes to lift off graphite or charcoal, highlight areas, and create subtle textures in your rock drawings.
-
Blending Stumps or Tortillons: These tools are essential for blending and smudging graphite or charcoal, enabling you to achieve smooth transitions and soft textures in your rock formations.
-
Reference Images: Gather a collection of reference images of different types of rocks and geological formations. These images will serve as valuable visual aids, providing inspiration and guidance as you work on your rock drawings.
-
Fixative Spray: A fixative spray is used to protect your finished rock drawings from smudging and ensure the longevity of your artwork. It helps to set the graphite or charcoal in place, preserving the intricate details and textures you have created.
By assembling these materials, you will be well-equipped to embark on your rock-drawing journey and unleash your creativity in capturing the timeless beauty of rocks on paper. With these tools at your disposal, you can explore the diverse textures, shapes, and forms of rocks, and bring them to life through your artistic expression.
Basic Shapes and Forms
Before delving into the intricate details of rock textures, it is essential to understand the basic shapes and forms that constitute various rock formations. Rocks come in a multitude of shapes, each influenced by geological processes and environmental factors. By mastering the fundamental shapes and forms, you can lay a strong foundation for creating realistic and visually compelling rock drawings.
Understanding Geological Forms
1. Sedimentary Rocks:
- Characteristics: Sedimentary rocks are often layered and can exhibit a range of textures, from smooth and fine-grained to rough and conglomerate.
- Basic Shapes: These rocks can take on forms such as flat layers, gentle slopes, and rounded edges, reflecting their formation from the accumulation of sediments over time.
2. Igneous Rocks:
- Characteristics: Igneous rocks are formed from solidified magma or lava and can display a diverse array of textures, including crystalline, glassy, or vesicular.
- Basic Shapes: Igneous rocks may manifest as angular, jagged formations with irregular surfaces, reflecting the cooling and solidification of molten material.
3. Metamorphic Rocks:
- Characteristics: Metamorphic rocks undergo transformation under intense heat and pressure, resulting in distinct textures such as foliation and banding.
- Basic Shapes: These rocks can exhibit folded layers, foliated surfaces, and intricate patterns, showcasing the effects of geological forces on their original forms.
Sketching Basic Forms
To begin your rock drawings, start by sketching basic geometric forms that represent the underlying structure of different rock types. Experiment with ellipses, spheres, cubes, and irregular polygons to capture the essence of rocks in their raw, unrefined state. By understanding how these basic forms translate into the varied shapes and textures of rocks, you can effectively convey their unique characteristics on paper.
Read more: How To Draw A Dress
Observing Natural Variations
Study real-life rock formations and observe the diverse shapes and forms they embody. Pay attention to the interplay of light and shadow on the surfaces of rocks, as well as the irregularities and imperfections that contribute to their organic appearance. By closely observing the natural variations in rock formations, you can gain valuable insights into replicating their complexity and authenticity in your drawings.
By familiarizing yourself with the basic shapes and forms of rocks, you can lay the groundwork for capturing their inherent beauty and diversity in your artwork. This understanding will serve as a springboard for delving into the intricate textures and details that define the captivating world of rocks.
Adding Texture and Detail
Adding texture and detail is where the true character of rocks comes to life in your drawings. It's the stage where you infuse depth, ruggedness, and individuality into the rock formations, transforming them from mere shapes into compelling natural elements. Here's how you can elevate your rock drawings through the art of texture and detail:
Embracing Texture Variety
Rocks exhibit a rich tapestry of textures, from the smooth, weathered surfaces of river rocks to the coarse, jagged exteriors of mountain boulders. To capture this diversity, experiment with various mark-making techniques using your drawing pencils and charcoal. Utilize hatching, cross-hatching, and stippling to emulate the intricate textures found in different rock types. By varying the pressure and direction of your marks, you can convey the unique tactile qualities of each rock, enhancing the visual interest and authenticity of your drawings.
Incorporating Surface Irregularities
One of the defining features of rocks is their inherent irregularities. Whether it's the fissures, cracks, or mineral veins that adorn their surfaces, these imperfections contribute to the raw, unrefined allure of rocks. Integrate these surface irregularities into your drawings by carefully observing and replicating the nuanced details. Use fine lines and subtle shading to depict the natural fissures and weathering patterns, adding a sense of history and character to your rock formations.
Read more: How To Draw Characters
Capturing Light and Shadow
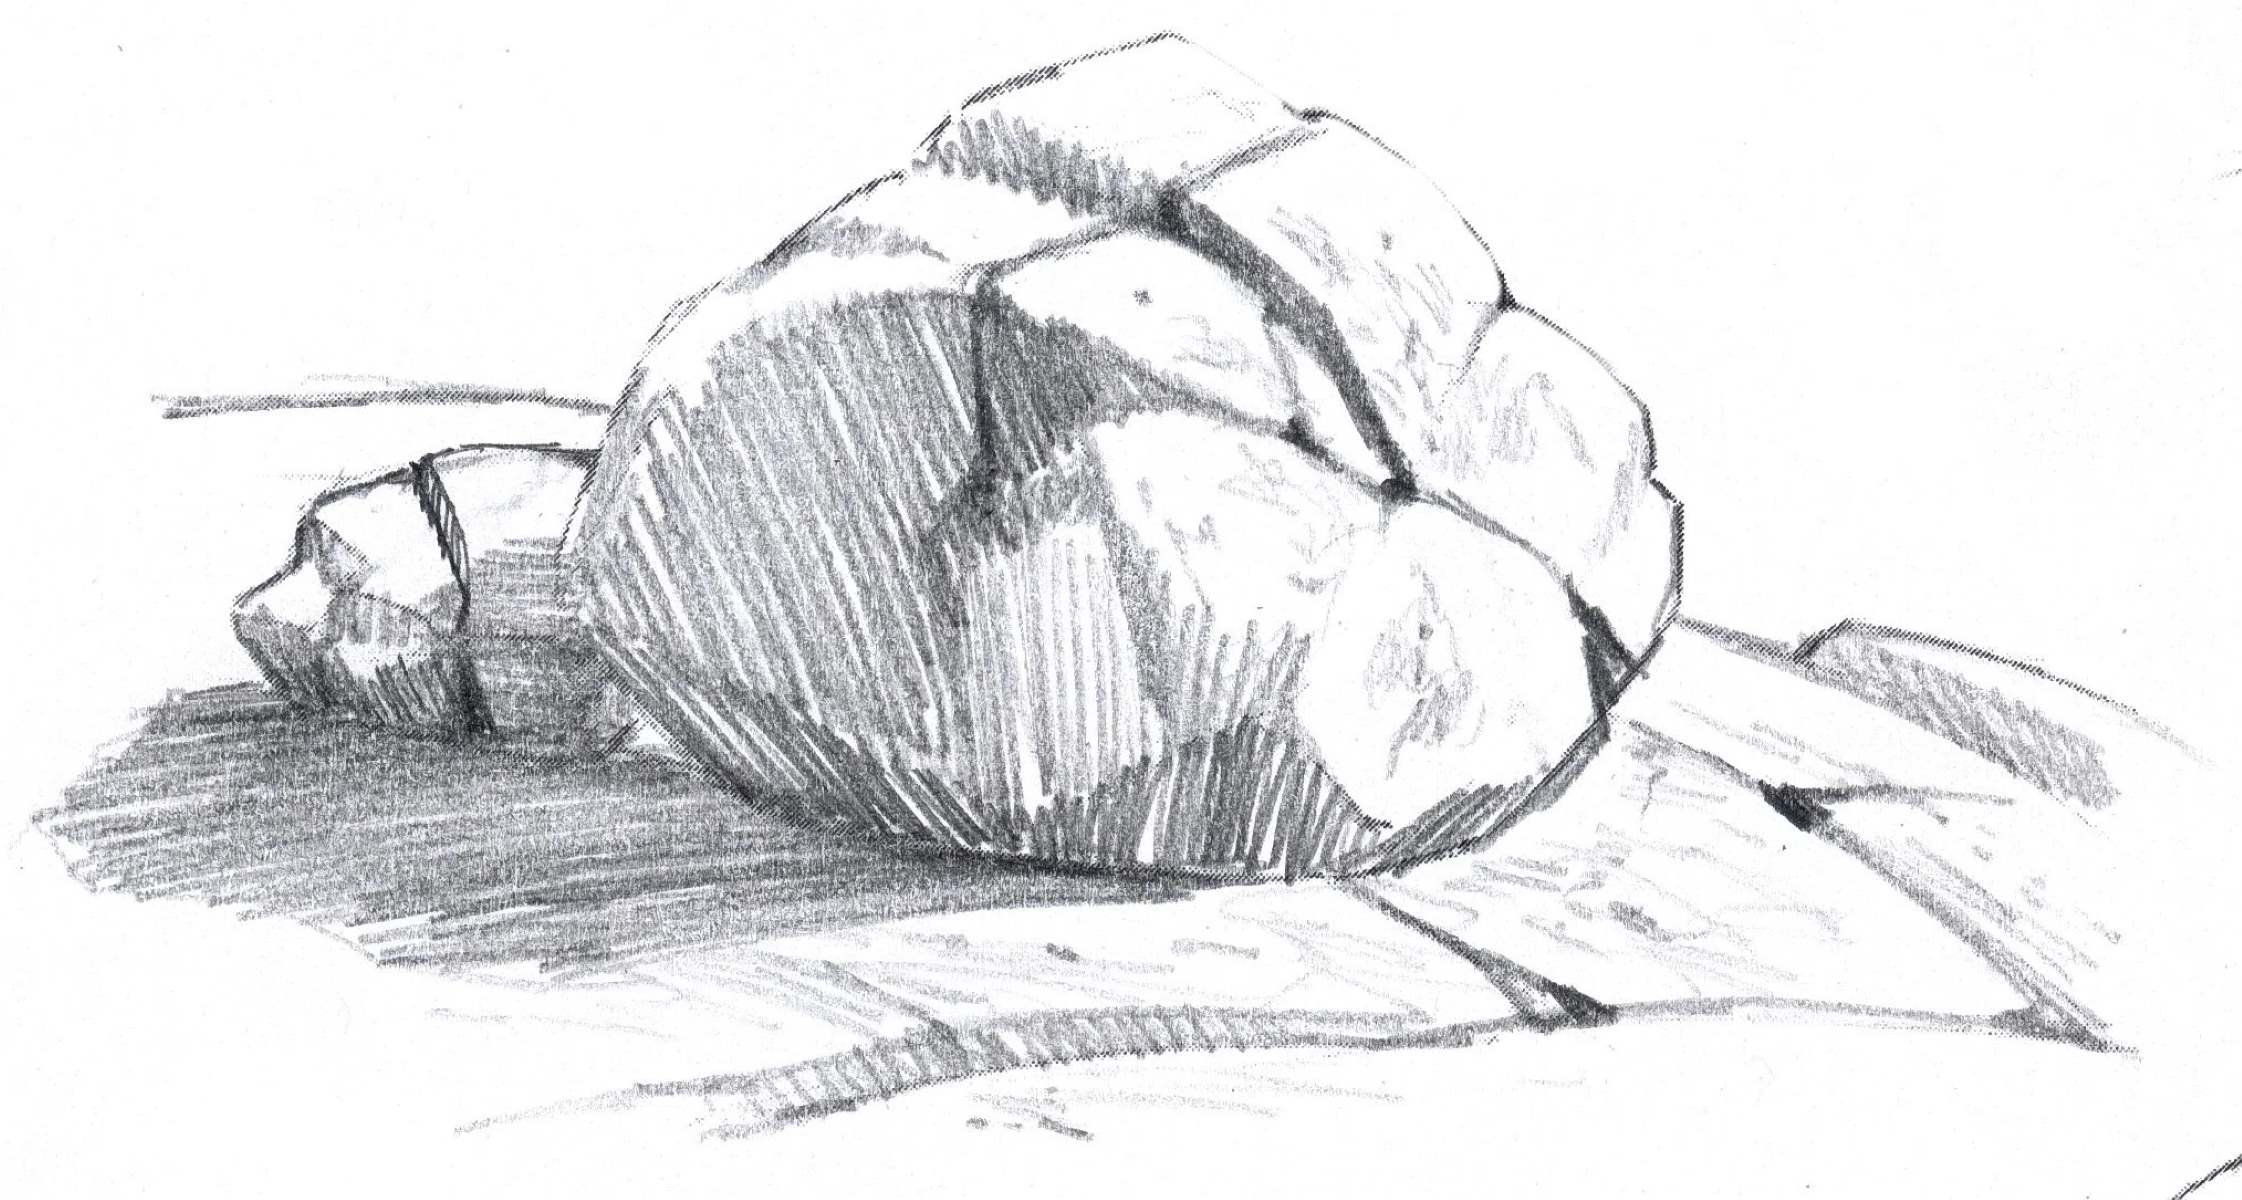
Light and shadow play a pivotal role in accentuating the textures and three-dimensional qualities of rocks. Observe how light interacts with the surfaces of rocks, casting shadows and highlighting contours. By strategically applying shading and rendering areas of light and shadow, you can create a sense of volume and depth in your rock drawings. Experiment with tonal values to convey the play of light across the rugged terrain of rocks, enhancing their visual impact and realism.
Infusing Organic Weathering
Rocks bear the marks of time and environmental exposure, exhibiting signs of erosion, weathering, and mineral deposits. Embrace the organic weathering effects by incorporating subtle gradations, speckling, and mottling in your drawings. These natural weathering patterns add a layer of authenticity to your rock formations, evoking a sense of geological history and the enduring forces of nature.
By embracing texture variety, surface irregularities, light and shadow, and organic weathering, you can breathe life into your rock drawings, infusing them with a sense of rugged beauty and timeless character. These techniques will enable you to create compelling and evocative rock formations that resonate with depth and authenticity, captivating the viewer with their natural allure.
Creating Depth and Shadows
Creating depth and shadows is a crucial aspect of capturing the three-dimensional essence of rocks in your drawings. By skillfully incorporating shading and shadows, you can imbue your rock formations with a sense of volume, presence, and realism. Here's how you can master the art of creating depth and shadows to elevate your rock drawings:
Understanding Light Sources
Before delving into shading and shadows, it's essential to consider the direction and intensity of the light source in your composition. Whether it's natural sunlight, moonlight, or artificial illumination, the positioning of the light source will dictate the placement of shadows and the distribution of light across the rocks. By establishing a clear understanding of the light source, you can effectively visualize how light interacts with the surfaces of rocks, guiding your shading decisions.
Read more: How To Draw A Bike
Utilizing Gradual Shading
To convey the three-dimensional form of rocks, employ gradual shading techniques to create smooth transitions between light and dark areas. Start by identifying the areas of the rock formations that are directly illuminated by the light source, and gradually transition into the regions that are cast in shadow. By skillfully blending and layering graphite or charcoal, you can achieve a sense of depth and dimension, accentuating the contours and undulations of the rocks.
Emphasizing Cast Shadows
As rocks protrude and intersect with one another, they cast shadows that contribute to the overall sense of depth in your drawings. Observe how the rocks interact with the light source and cast shadows onto adjacent surfaces. By accurately depicting these cast shadows, you can enhance the spatial relationships between the rocks, creating a convincing sense of depth and perspective within your compositions.
Incorporating Atmospheric Perspective
Incorporating atmospheric perspective can further enhance the illusion of depth in your rock drawings. As rocks recede into the distance, atmospheric effects such as haze and diminished contrast become more pronounced. By subtly adjusting the tonal values and softening the details of distant rock formations, you can convey the atmospheric conditions and spatial depth within your artwork, evoking a sense of vastness and scale.
Balancing Highlights and Shadows
Achieving a harmonious balance between highlights and shadows is essential for creating a compelling sense of volume and form in your rock drawings. Pay attention to the interplay of light and shadow, ensuring that the highlights accentuate the prominent features of the rocks while the shadows define their contours and recesses. By striking a delicate balance between highlights and shadows, you can infuse your rock formations with a captivating sense of realism and presence.
By mastering the techniques of creating depth and shadows, you can infuse your rock drawings with a compelling sense of spatial depth, volume, and atmospheric realism. These skills will enable you to breathe life into your rock formations, transporting the viewer into a world of rugged beauty and geological intrigue.
Read more: How To Draw A Truck
Final Touches and Tips
After meticulously crafting the textures, details, depth, and shadows of your rock drawings, the final touches and tips play a pivotal role in refining and enhancing the overall impact of your artwork. Here are essential considerations and techniques to elevate your rock drawings to a polished and captivating level:
Refining Details
Devote time to refine the intricate details of your rock formations. Pay attention to subtle variations in texture, surface irregularities, and the organic nuances that define each rock type. By refining the details with precision and care, you can infuse your drawings with a heightened sense of authenticity and visual richness.
Focusing on Focal Points
Identify focal points within your rock compositions and accentuate them with heightened detail and emphasis. Whether it's a striking geological feature, a weathered crevice, or a captivating mineral formation, directing attention to these focal points can create visual interest and draw the viewer into the intricate world of your rock drawings.
Adding Natural Elements
Consider incorporating natural elements such as foliage, moss, or lichen to complement your rock formations. These organic accents can add a sense of context and environmental realism to your drawings, evoking the symbiotic relationship between rocks and their surrounding ecosystems.
Read more: How To Draw A Boy
Experimenting with Mixed Media
Explore the creative possibilities of integrating mixed media techniques into your rock drawings. Whether it's incorporating watercolor washes to simulate geological strata or using ink to delineate geological features, experimenting with mixed media can add a dynamic and expressive dimension to your artwork.
Seeking Feedback and Iteration
Seek feedback from peers, mentors, or fellow artists to gain valuable insights and perspectives on your rock drawings. Embrace constructive criticism and use it as a catalyst for iterative refinement, continuously honing your skills and pushing the boundaries of your artistic expression.
Preserving and Displaying Your Artwork
Once your rock drawings are complete, ensure their preservation and presentation. Consider framing your artwork using archival-quality materials to protect it from environmental factors and display it proudly, allowing others to appreciate the captivating beauty of your rock-inspired creations.
By incorporating these final touches and tips into your rock drawing process, you can elevate your artwork to a level of sophistication and visual allure that resonates with the timeless fascination of geological formations. With dedication, creativity, and attention to detail, your rock drawings will stand as compelling testaments to the enduring allure of nature's ancient sculptures.
Conclusion
In conclusion, the art of drawing rocks is a captivating journey that invites artists to explore the timeless beauty and geological intrigue of these ancient formations. From the rugged cliffs of mountain ranges to the smooth, weathered pebbles found along riverbanks, rocks offer a diverse and compelling subject matter for artistic expression. Throughout this guide, we have delved into the techniques and methods that enable artists to capture the essence of rocks on paper, from mastering basic shapes and forms to infusing texture, depth, and character into their drawings.
Drawing rocks is not merely about replicating their physical appearance; it is about conveying their unique stories and the enduring forces that have shaped them over millennia. By understanding the geological forms, embracing texture variety, and skillfully incorporating depth and shadows, artists can breathe life into their rock drawings, evoking a sense of rugged beauty and geological authenticity.
As artists embark on their rock-drawing journey, it is essential to approach each rock formation with a sense of curiosity and reverence for the natural world. By observing the intricate details, surface irregularities, and interplay of light and shadow, artists can uncover the inherent beauty and complexity of rocks, translating their awe-inspiring qualities onto the canvas or paper.
Furthermore, the final touches and tips provided in this guide serve as a reminder of the importance of refining details, seeking feedback, and preserving the integrity of the artwork. By incorporating these considerations, artists can elevate their rock drawings to a level of sophistication and visual allure that resonates with the enduring fascination of geological formations.
Ultimately, the art of drawing rocks offers artists an opportunity to connect with the profound narratives and timeless allure of the natural world. Through dedication, creativity, and a keen eye for detail, artists can capture the rugged beauty and geological majesty of rocks, inviting viewers to embark on a visual journey through the captivating world of geological formations. So, pick up your drawing materials, immerse yourself in the textures and forms of rocks, and let your artistic expression unveil the captivating stories that lie within these ancient sculptures of nature.
