Home>Arts and Culture>How To Draw A Bike
Arts and Culture
How To Draw A Bike
Published: March 5, 2024
Learn how to draw a bike with easy step-by-step instructions. Explore your creativity and improve your art skills with this fun arts and culture tutorial.
(Many of the links in this article redirect to a specific reviewed product. Your purchase of these products through affiliate links helps to generate commission for Regretless.com, at no extra cost. Learn more)
Table of Contents
Introduction
Drawing is a wonderful way to express creativity and bring imagination to life. Whether you're an aspiring artist or simply looking for a fun and rewarding activity, learning how to draw a bike can be an exciting venture. The process of sketching a bike allows you to delve into the intricate details of its structure, from the sleek frame to the spinning wheels. As you embark on this artistic journey, you'll discover the joy of capturing the essence of a bike on paper, honing your skills, and unleashing your artistic flair.
Drawing a bike provides an opportunity to understand the fundamental principles of perspective, proportion, and symmetry. It's a chance to observe the interplay of shapes and lines, and to translate them into a visually appealing representation. Through this creative endeavor, you'll gain a deeper appreciation for the design and mechanics of bicycles, as well as the art of translating three-dimensional objects onto a two-dimensional surface.
In this step-by-step guide, you'll learn how to draw a bike with ease, starting from the basic framework and gradually adding intricate details. Whether you're using traditional pencil and paper or digital drawing tools, the techniques and principles shared in this tutorial will empower you to create a captivating bike illustration. So, grab your drawing materials and let's embark on this artistic adventure together, as we unravel the process of bringing a bike to life through the strokes of your pencil or stylus.
Drawing a bike is not just about replicating its physical form; it's about infusing it with character and personality. As you follow the steps outlined in this guide, remember to embrace your individual style and inject your own creative touch into the artwork. With each stroke of the pencil or swipe of the digital pen, you have the opportunity to imbue the bike with a sense of motion, energy, and charm. So, without further ado, let's dive into the world of bike drawing and unleash your artistic potential.
Read more: How To Draw A Truck
Materials Needed
Before you begin your artistic journey of drawing a bike, it's essential to gather the necessary materials to bring your vision to life. Whether you prefer traditional sketching or digital drawing, having the right tools at your disposal will set the stage for a seamless and enjoyable creative process. Here's a list of materials to prepare before you embark on this artistic endeavor:
-
Drawing Paper: Select a high-quality drawing paper that suits your preferred drawing medium. The paper should have a smooth surface to allow for precise lines and shading.
-
Pencils: A set of graphite pencils with varying lead hardness (ranging from 2H to 6B) will enable you to achieve different line weights and shading effects. Additionally, a mechanical pencil can be handy for fine details.
-
Eraser: A soft, kneaded eraser and a precision eraser (such as a retractable eraser) will aid in correcting mistakes and refining details.
-
Ruler: A straight-edge ruler will assist in creating precise lines and maintaining the proportions of the bike's components.
-
Drawing Compass: If you're aiming for accuracy in drawing the bike's wheels, a drawing compass will help you create perfectly circular shapes.
-
Reference Images: Gather reference images of bicycles to study their structure, proportions, and details. These images will serve as a visual guide and a source of inspiration as you sketch.
-
Drawing Tablet and Stylus (Optional): If you prefer digital drawing, ensure that your drawing tablet and stylus are charged and ready for use. Select a drawing software that allows for flexibility and precision in your digital artwork.
-
Coloring Materials (Optional): If you plan to add color to your bike drawing, gather colored pencils, markers, or digital coloring tools based on your preference.
By assembling these materials, you'll be well-equipped to embark on the creative process of drawing a bike with confidence and enthusiasm. With your artistic arsenal at the ready, you're poised to translate your vision of a captivating bike illustration into a tangible masterpiece. Now that you've gathered your materials, let's delve into the step-by-step process of bringing a bike to life on paper or screen.
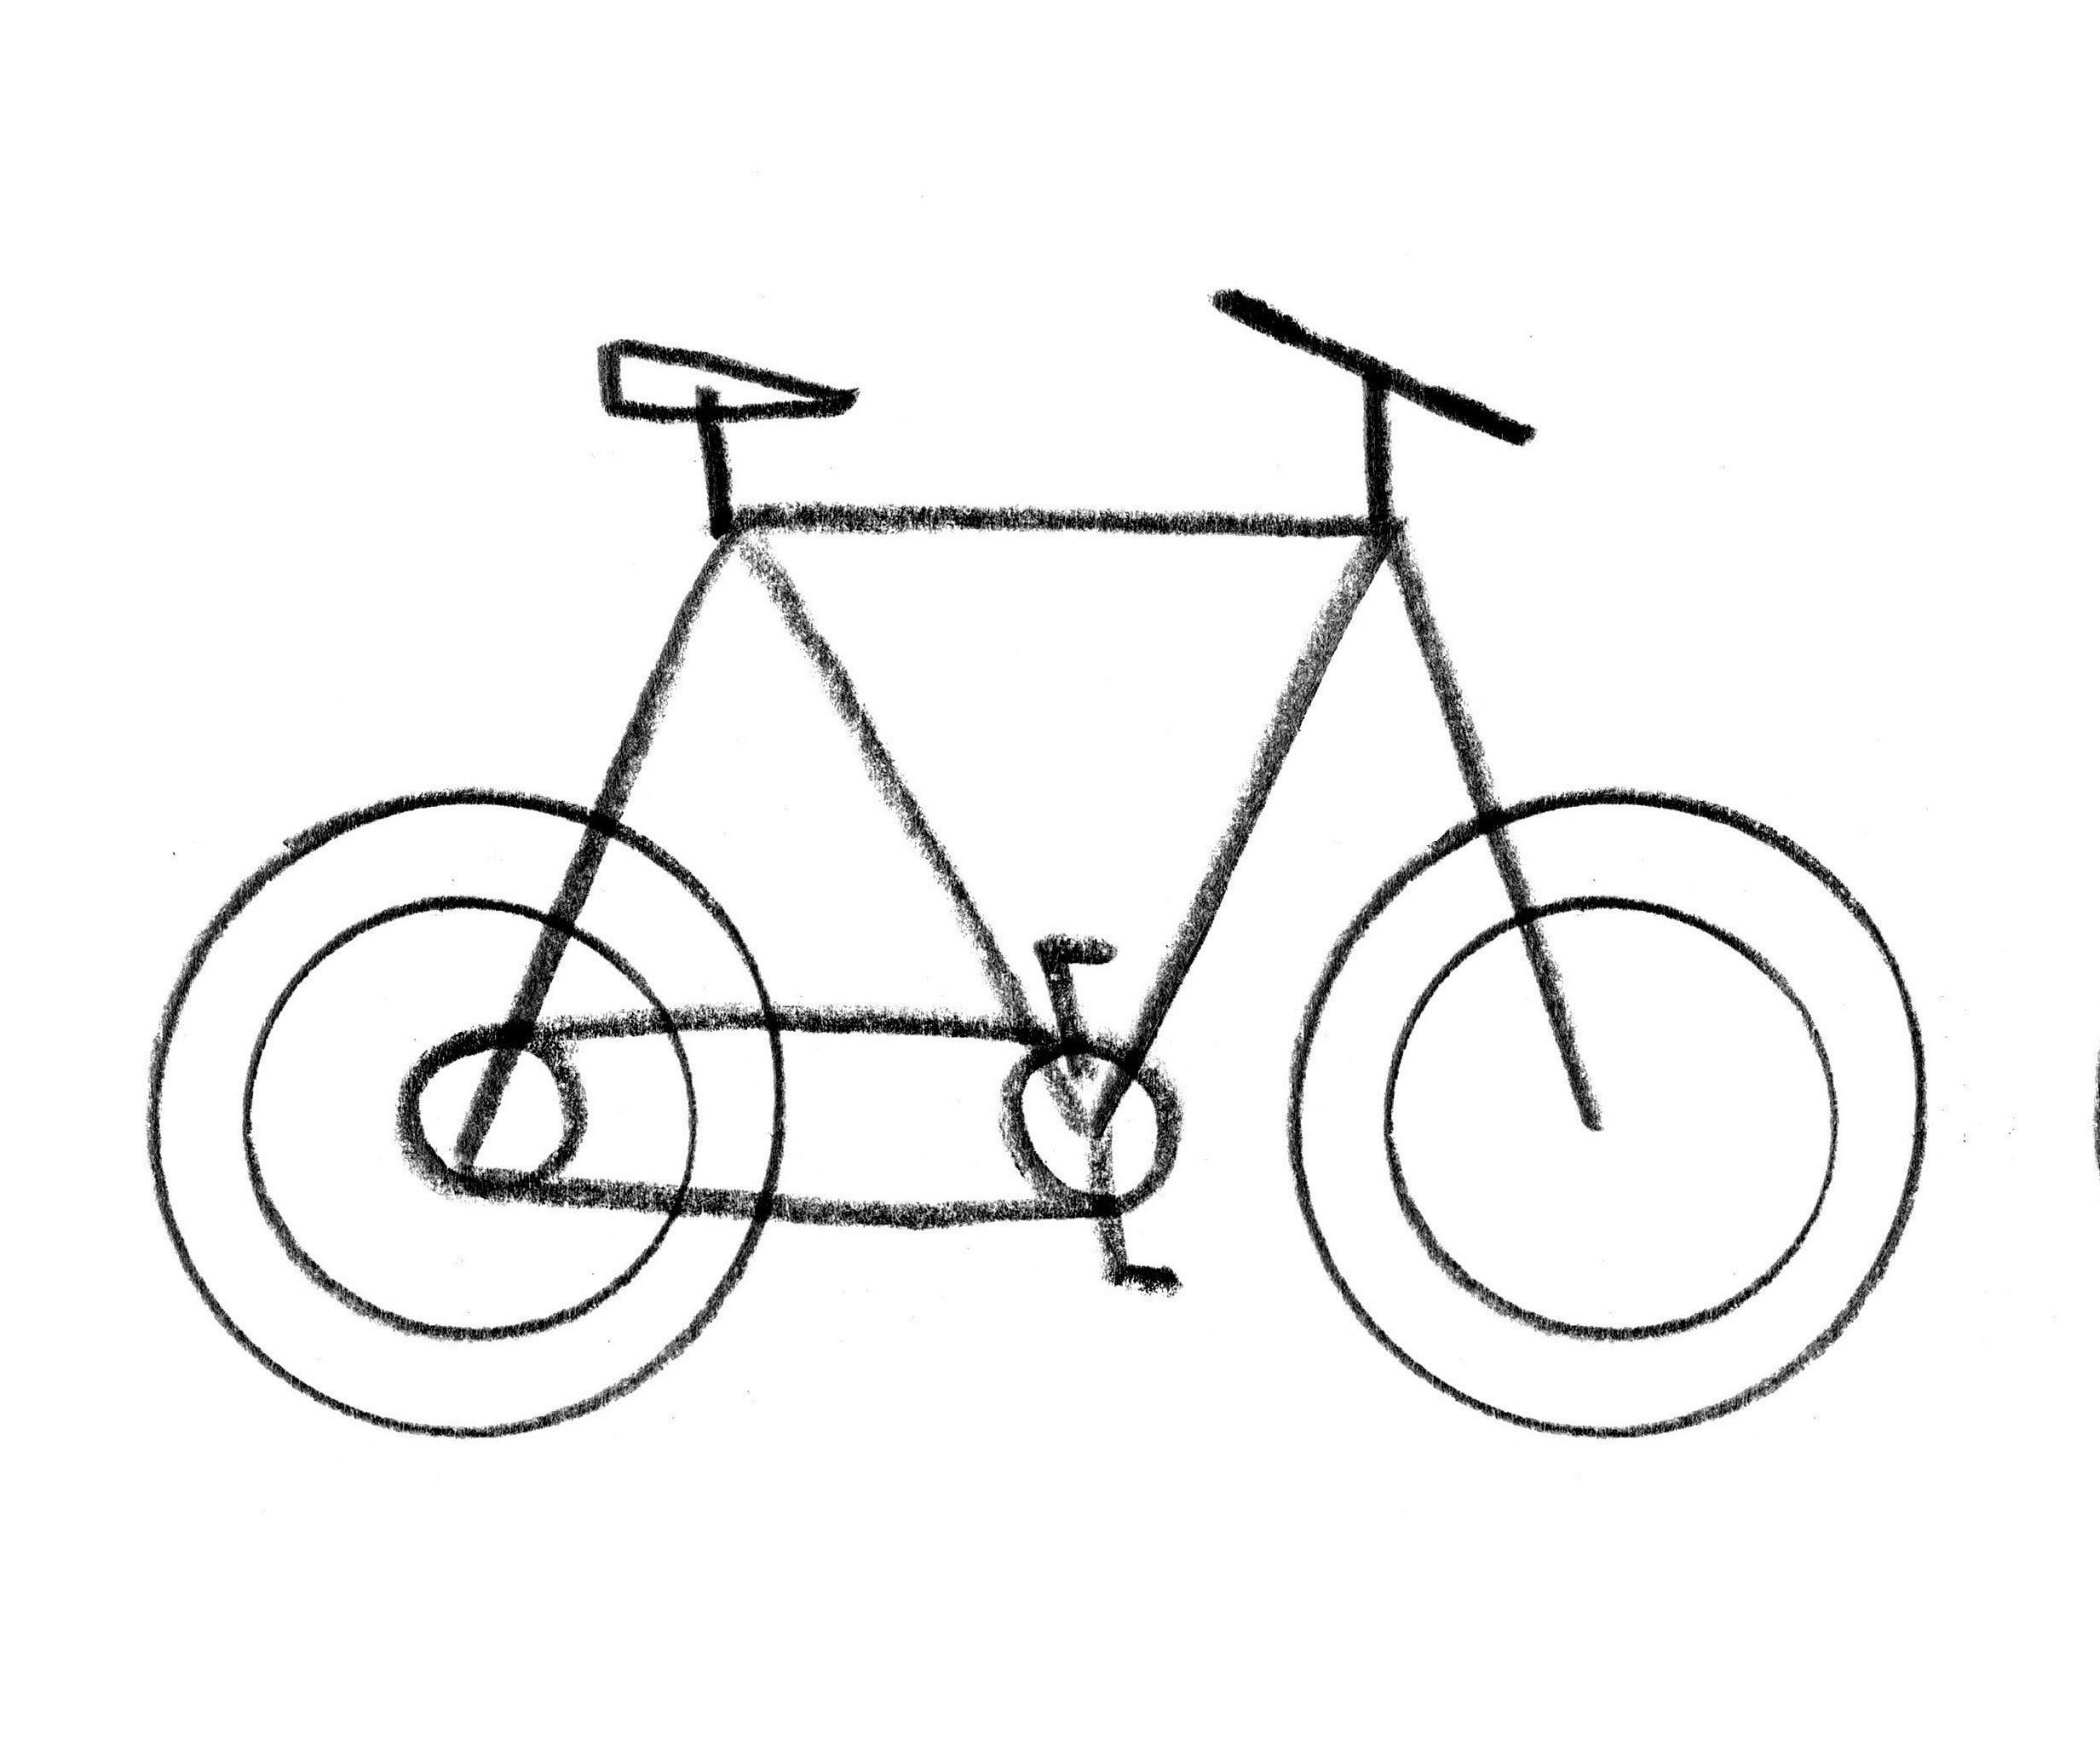
Step 1: Drawing the Frame
The first step in drawing a bike involves sketching the foundational framework that defines its structure. Begin by visualizing the basic shape of the bike's frame, which typically consists of a pair of parallel, diagonal tubes extending from the handlebars to the rear wheel. To capture the essence of the frame, start by lightly sketching the main lines that outline the top tube, down tube, and seat tube. Pay attention to the angles and proportions, ensuring that the frame maintains a balanced and symmetrical appearance.
Next, focus on the finer details of the frame, such as the junction where the seat tube meets the top tube and the down tube. These connections often form distinct angles that contribute to the bike's overall aesthetic. Use your pencil to refine the contours of these intersecting lines, gradually shaping the frame with precision and attention to symmetry.
As you progress, consider the perspective from which you're depicting the bike. If you aim to convey a three-dimensional representation, apply principles of perspective to create depth and dimension in the frame. This may involve adjusting the length and angle of certain lines to align with the chosen perspective, adding a sense of realism to your illustration.
Furthermore, take note of any additional features on the frame, such as mounting points for the wheels, pedals, and seat. These elements contribute to the functionality and visual appeal of the bike, so be mindful of their placement and proportions as you refine the frame.
Throughout this process, remember that sketching the frame serves as the foundation for the entire bike drawing. Take your time to ensure that the lines are clean and well-defined, as they will guide the placement of subsequent components in the following steps. Embrace the creative freedom to infuse the frame with your personal style, whether it's sleek and modern or classic and timeless.
By meticulously crafting the frame with attention to detail and proportion, you'll set the stage for the next steps of adding wheels, handlebars, and intricate details. With the frame taking shape on the page, you're well on your way to creating a captivating bike illustration that reflects your artistic vision and technical skill.
Step 2: Adding the Wheels
After establishing the foundational framework of the bike, the next crucial step is to add the defining elements that bring motion and functionality to the illustration: the wheels. The wheels are not only essential for the bike's functionality but also contribute significantly to its visual appeal and overall balance. As you embark on this step, focus on capturing the circular form of the wheels with precision and attention to detail.
Begin by sketching the basic outline of the wheels, ensuring that they align proportionally with the frame and exhibit a consistent diameter. If you're aiming for a realistic representation, consider using a drawing compass to create perfectly circular shapes, maintaining symmetry and accuracy in the wheel's structure. Pay close attention to the alignment of the wheels in relation to the frame, ensuring that they are parallel and positioned at the appropriate distance from each other.
As you refine the wheels, take note of the spokes, which not only contribute to the structural integrity of the wheels but also add visual interest to the illustration. Carefully sketch the spokes radiating from the center of the wheel, converging towards the outer rim. The number and placement of spokes may vary depending on the style of the bike, so refer to reference images to capture this detail authentically.
Furthermore, consider the tire treads and rims, which play a significant role in defining the character of the wheels. Whether you're drawing sleek road bike tires or rugged mountain bike treads, pay attention to the patterns and textures that distinguish each type. Additionally, refine the rims to convey depth and dimension, adding subtle shading to create a sense of volume and realism.
As you progress, evaluate the overall symmetry and balance of the wheels, ensuring that they complement the frame and contribute to the cohesive aesthetic of the bike. Take the time to refine the details, adjusting the thickness of the tires, the intricacy of the spokes, and the curvature of the rims to achieve a harmonious and visually compelling representation.
By meticulously adding the wheels to the bike illustration, you infuse the artwork with a sense of dynamism and purpose, bringing the static frame to life with the promise of motion and adventure. With the wheels taking shape on the page, you're one step closer to realizing a captivating bike drawing that embodies both technical precision and artistic expression.
Step 3: Adding the Handlebars
As the bike illustration continues to evolve, the addition of the handlebars marks a pivotal moment in capturing the essence of the bike's functionality and character. The handlebars not only serve as a crucial steering component but also contribute to the overall aesthetic and personality of the bike. With precision and attention to detail, the process of adding the handlebars involves infusing the illustration with a sense of control and dynamism.
Begin by visualizing the placement of the handlebars in relation to the frame, considering the angle and orientation that best encapsulate the bike's intended posture and style. Whether you're drawing the classic curves of a cruiser bike or the aerodynamic lines of a road bike, the handlebars play a defining role in shaping the bike's visual identity. With a light hand, sketch the basic outline of the handlebars, ensuring that they align harmoniously with the frame and convey a sense of balance and control.
Next, focus on the intricate details of the handlebars, such as the grips and the central stem. Pay close attention to the curvature and thickness of the handlebar grips, which are essential for providing a comfortable and secure hold for the rider. Whether you choose to depict traditional rubber grips or sleek metallic handles, strive to capture their tactile qualities and ergonomic design with precision.
Furthermore, refine the central stem of the handlebars, which connects them to the bike's frame. Consider the angle and length of the stem, ensuring that it complements the overall posture of the bike and aligns with the rider's reach. Pay attention to any additional components, such as brake levers and gear shifters, which may be integrated into the handlebars, adding functionality and visual interest to the illustration.
As you progress, evaluate the symmetry and proportion of the handlebars, ensuring that they enhance the overall balance and aesthetic appeal of the bike. Take the time to refine the contours and angles, infusing the handlebars with a sense of fluidity and purpose. Whether you opt for a classic upright handlebar design or a sporty drop handlebar configuration, strive to capture the unique character and functionality of each style.
By meticulously adding the handlebars to the bike illustration, you imbue the artwork with a sense of control and direction, elevating the visual narrative of the bike's form and function. With the handlebars seamlessly integrated into the composition, the illustration comes alive with the promise of steering through imaginary landscapes and embarking on exhilarating adventures. As the handlebars take shape on the page, the bike drawing evolves into a captivating portrayal of technical precision and artistic expression, inviting viewers to embark on a visual journey fueled by creativity and imagination.
Read more: How To Draw Batman
Step 4: Adding Details
With the foundational elements of the bike sketched, it's time to infuse the illustration with intricate details that breathe life and character into the artwork. Adding details to the bike drawing involves a meticulous exploration of the components that define its personality and functionality. From the pedals to the saddle, and from the chain to the gears, each detail contributes to the holistic portrayal of a fully realized bike.
Begin by focusing on the pedals, which serve as the driving force behind the bike's motion. Sketch the pedal arms and the pedal cages or platforms, paying attention to their placement and alignment with the frame. Consider the curvature and proportions of the pedals, ensuring that they convey a sense of dynamism and purpose. Whether you're drawing the classic design of platform pedals or the streamlined profile of clipless pedals, strive to capture their distinct characteristics with precision.
Next, shift your attention to the saddle, a central component that not only provides comfort to the rider but also contributes to the bike's overall aesthetic. Sketch the contours of the saddle, considering its shape, size, and position in relation to the frame. Pay attention to the details of the saddle, such as the seams, texture, and any additional features that enhance its visual appeal. Whether you're depicting a sleek racing saddle or a cushioned comfort saddle, aim to convey its unique design and functionality through meticulous lines and shading.
As you progress, delve into the intricate mechanisms of the bike, such as the chain, gears, and derailleurs. Capture the interplay of these components with precision, illustrating the connection between the pedals, chainrings, and rear cassette. Pay attention to the tension and alignment of the chain, as well as the nuanced details of the gears and derailleur components. Whether you're drawing a single-speed bike with a minimalist drivetrain or a multi-speed bike with a complex gear system, strive to convey the mechanical intricacies with accuracy and finesse.
Furthermore, consider the additional details that contribute to the bike's functionality and visual allure, such as the brake calipers, shifters, and cables. These elements not only enhance the realism of the illustration but also provide insight into the bike's technical sophistication. Pay attention to their placement, proportions, and interaction with other components, infusing the artwork with a sense of mechanical complexity and purpose.
By meticulously adding these details to the bike illustration, you elevate the artwork to a comprehensive portrayal of technical precision and artistic expression. Each component, from the pedals to the gears, contributes to the cohesive narrative of a fully realized bike, inviting viewers to appreciate the intricacies of its design and functionality. As the details seamlessly integrate into the composition, the bike drawing becomes a captivating visual tapestry that celebrates the artistry and engineering behind this beloved mode of transportation.
Step 5: Adding Color
As the foundational elements of the bike illustration have taken shape, the addition of color marks a transformative phase in bringing vibrancy and visual depth to the artwork. Adding color to the bike drawing presents an opportunity to infuse the illustration with personality, evoke a sense of realism, and elevate the overall aesthetic appeal. Whether you opt for traditional coloring mediums such as colored pencils and markers or prefer digital painting tools, the process of adding color involves a thoughtful exploration of hues, tones, and shading techniques.
Begin by considering the overall color scheme that best captures the mood and character of the bike illustration. Reflect on the style and context of the bike, whether it embodies the sleek elegance of a road bike, the rugged allure of a mountain bike, or the timeless charm of a vintage cruiser. Select a palette of colors that harmonizes with the intended visual narrative, taking into account the hues of the frame, wheels, and other components.
When applying color to the bike, pay attention to light and shadow to create a sense of dimension and realism. Consider the source of light in the scene and visualize how it interacts with the various surfaces of the bike. Apply lighter tones to areas that catch the light, while using darker shades to convey shadow and depth. This interplay of light and shadow adds a dynamic quality to the illustration, enhancing its visual impact and creating a sense of three-dimensionality.
Furthermore, explore the textures and material qualities of the bike components through color. Whether you're depicting the metallic gleam of the frame, the rubbery resilience of the tires, or the supple comfort of the saddle, consider how different materials reflect and absorb light. Experiment with blending and layering colors to convey the tactile qualities of each component, adding richness and authenticity to the illustration.
As you progress, consider the surrounding environment and its influence on the bike's appearance. Whether the bike is set against a natural landscape, an urban backdrop, or a whimsical fantasy setting, the choice of background colors can enhance the overall mood and storytelling of the illustration. Harmonize the colors of the bike with its surroundings, creating a cohesive visual narrative that transports the viewer into a captivating scene.
By meticulously adding color to the bike illustration, you breathe life and vitality into the artwork, transforming it into a captivating visual experience. The interplay of hues, tones, and shading techniques infuses the illustration with a sense of vibrancy and depth, inviting viewers to immerse themselves in the dynamic world of bike drawing. As the colors seamlessly integrate into the composition, the bike illustration evolves into a captivating portrayal of technical precision and artistic expression, celebrating the beauty and allure of this timeless mode of transportation.
Conclusion
As we conclude this artistic journey of drawing a bike, it's evident that the process of translating a mechanical marvel into a captivating illustration is a testament to the fusion of technical precision and artistic expression. From sketching the foundational framework to infusing the artwork with intricate details and vibrant color, each step has contributed to the creation of a visual narrative that celebrates the allure and functionality of bicycles.
Through the strokes of the pencil or the digital brush, we've delved into the intricacies of bike drawing, unraveling the symmetrical elegance of the frame, the dynamic motion captured in the wheels, the sense of control embodied by the handlebars, and the mechanical complexity revealed in the details. Each component, meticulously rendered, has woven together to form a cohesive and visually compelling portrayal of a beloved mode of transportation.
Beyond the technical aspects, drawing a bike has been a journey of creativity and imagination. It's an opportunity to infuse a static illustration with a sense of motion, energy, and personality. Whether capturing the sleek lines of a racing bike, the rugged spirit of a mountain bike, or the timeless charm of a vintage cruiser, the process of adding color has breathed life and vitality into the artwork, transporting viewers into a world of visual storytelling.
As we reflect on this artistic endeavor, it's essential to recognize the broader significance of drawing a bike. It's not merely about replicating its physical form; it's about celebrating the spirit of exploration, freedom, and adventure that bicycles embody. The act of drawing a bike becomes a tribute to the ingenuity of human engineering and the joy of outdoor exploration, encapsulating the essence of movement and discovery.
In essence, the journey of drawing a bike transcends the act of creating a visual representation; it becomes a celebration of the timeless appeal and universal charm of bicycles. It's a testament to the artistry and craftsmanship that define these beloved vehicles, as well as a homage to the joy and exhilaration they bring to our lives.
So, as we conclude this artistic odyssey, let the spirit of bike drawing inspire you to embark on new creative endeavors, to celebrate the beauty of everyday marvels, and to infuse your art with the boundless energy and charm that bicycles symbolize. With each stroke of the pencil or brush, may you continue to capture the essence of motion, freedom, and adventure, inviting viewers to join you on a visual journey fueled by creativity and imagination.