Home>Arts and Culture>How To Draw A Fist

Arts and Culture
How To Draw A Fist
Published: March 5, 2024
Learn how to draw a realistic fist with step-by-step instructions. Explore the art of drawing and enhance your skills in arts and culture.
(Many of the links in this article redirect to a specific reviewed product. Your purchase of these products through affiliate links helps to generate commission for Regretless.com, at no extra cost. Learn more)
Table of Contents
Introduction
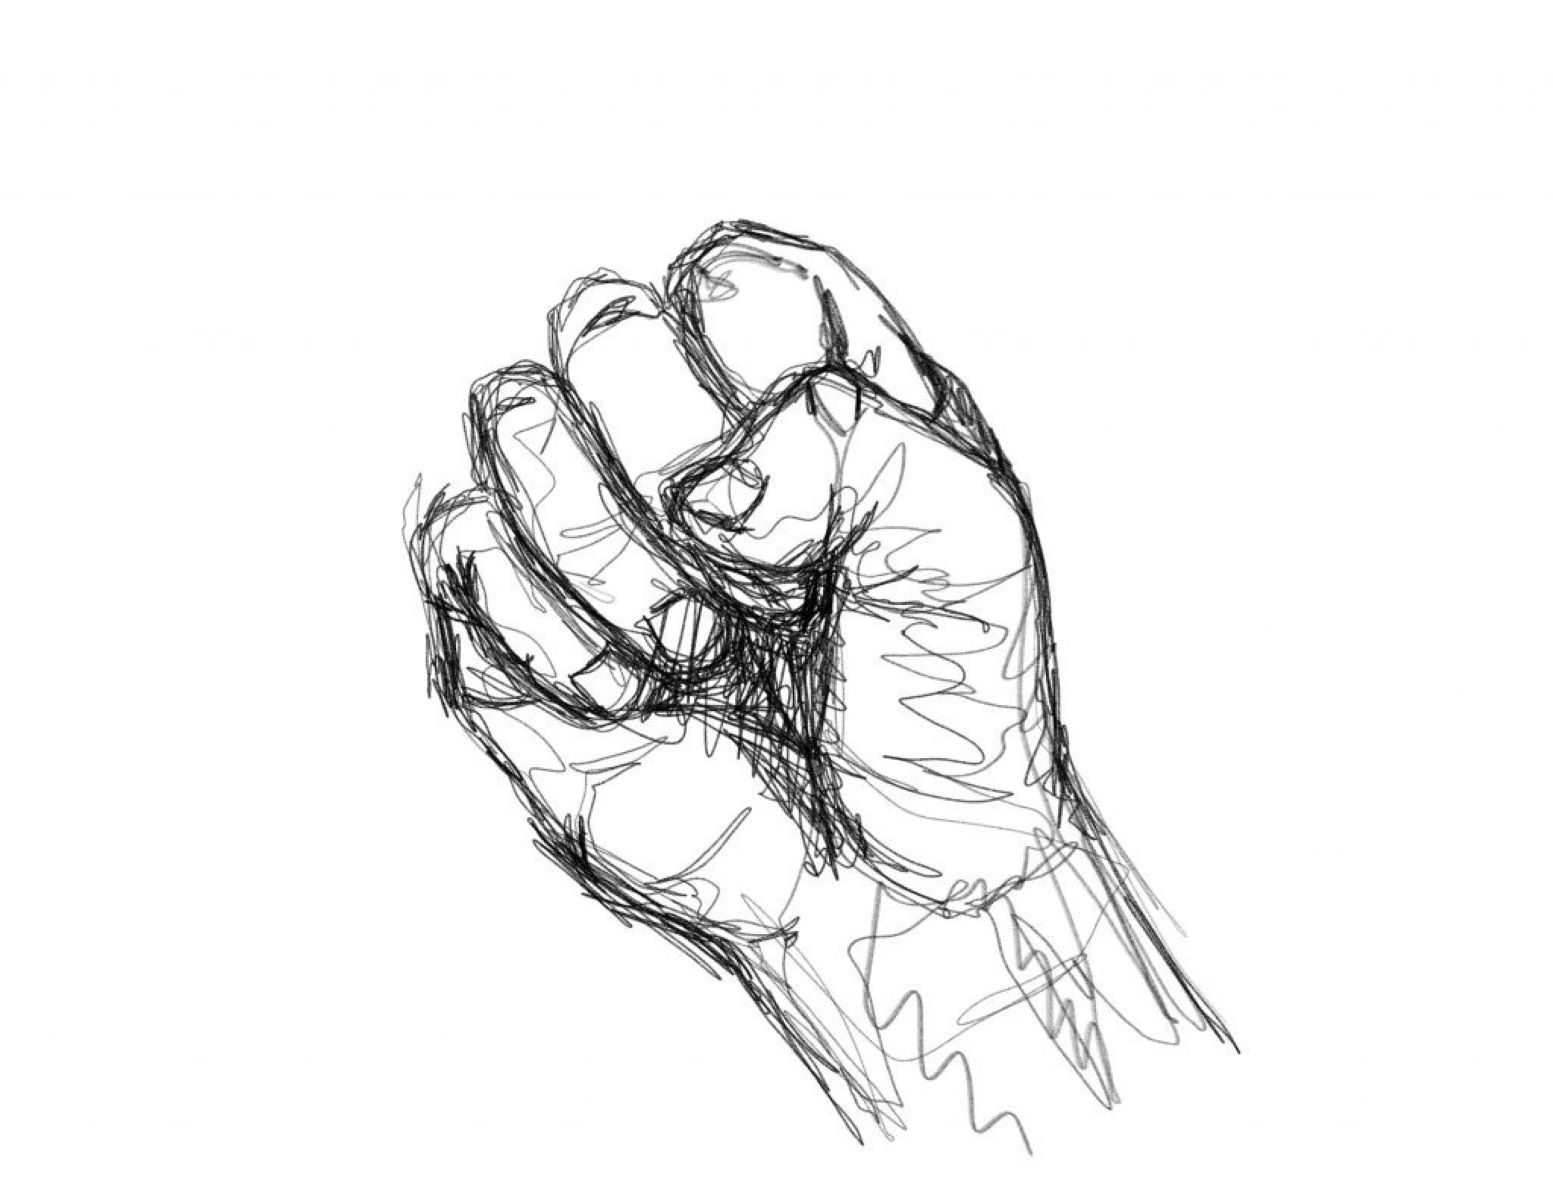
Drawing a fist can be a powerful and expressive way to convey strength, determination, and emotion in your artwork. Whether you're creating a comic book hero, illustrating a sports scene, or simply honing your artistic skills, mastering the art of drawing a fist can add depth and impact to your creations. The human hand is a complex and intricate form, and capturing the clenched power of a fist requires attention to detail and a keen understanding of its anatomy.
In this step-by-step guide, we will explore the process of drawing a fist, from establishing the basic shape to adding intricate details and shading for a realistic and dynamic effect. By following these simple yet effective techniques, you will be able to bring your drawings to life with the compelling presence of a clenched fist. So, grab your sketchbook and pencils, and let's embark on this artistic journey together. Whether you're a seasoned artist or just starting out, this guide will equip you with the skills and confidence to create captivating fist drawings that resonate with strength and emotion.
Read more: How To Draw A Bike
Materials Needed
To embark on the artistic endeavor of drawing a fist, you will need a few essential materials to bring your vision to life. Here's a list of items that will aid you in creating a compelling and realistic depiction of a clenched fist:
-
Drawing Paper: Begin with a sturdy and smooth surface to sketch your fist. Opt for high-quality drawing paper that can withstand erasing and shading without smudging or tearing.
-
Pencils: A range of graphite pencils will be indispensable for achieving depth and dimension in your drawing. Invest in a set of pencils with varying lead hardness, such as 2H, HB, 2B, 4B, and 6B, to allow for precise lines and shading.
-
Eraser: A soft, kneaded eraser is essential for correcting mistakes and refining details without damaging the paper. Additionally, a fine eraser pencil can be useful for erasing small, intricate areas.
-
Blending Stump: This tool aids in seamlessly blending and smudging graphite to achieve smooth transitions and realistic textures in your drawing.
-
Reference Images: Gather reference images of fists from various angles to study the intricate details and anatomy of a clenched hand. Observing real-life examples will enhance the authenticity and accuracy of your drawing.
-
Light Source: Ensure you have ample lighting to clearly see the details of your drawing and accurately assess the interplay of light and shadow on the fist.
-
Optional: Charcoal and Fixative: If you wish to add depth and contrast to your drawing, consider incorporating charcoal for darker tones. A fixative spray can be used to preserve your artwork and prevent smudging.
By assembling these materials, you will be well-equipped to embark on the artistic journey of drawing a fist with confidence and precision. Each item plays a crucial role in capturing the strength and intricacy of a clenched hand, allowing you to infuse your artwork with depth and emotion. Now that you have your materials ready, let's delve into the step-by-step process of bringing a powerful fist to life on paper.
Step 1: Draw the Basic Shape
To begin the process of drawing a fist, it is essential to establish the basic shape and structure of the hand. This foundational step forms the framework upon which intricate details and dynamic elements will be added. Follow these guidelines to effectively capture the essence of a clenched fist:
-
Outline the General Form: Start by lightly sketching the overall shape of the fist using a HB or 2H pencil. Begin with a simple oval or rounded rectangle to represent the palm of the hand. This initial outline will serve as a guide for positioning the fingers and thumb.
-
Position the Fingers: With a light touch, sketch the placement of the fingers in a curled position. Visualize the natural curve of the knuckles and the tapering shape of each finger as they converge towards the center of the fist. Pay attention to the proportions and spacing between the fingers to ensure a realistic and balanced composition.
-
Define the Thumb: Next, indicate the position of the thumb as it wraps around the fingers in a firm grip. The thumb should intersect with the base of the fingers, forming a cohesive and unified structure. Take note of the subtle angles and contours of the thumb to convey its three-dimensional form.
-
Refine the Wrist: Extend the basic shape to include the wrist, ensuring that it complements the proportions of the clenched fist. Pay attention to the angle at which the wrist connects to the base of the hand, as this contributes to the overall stability and power of the fist.
-
Adjust Proportions and Angles: Continuously evaluate the proportions and angles of the basic shape, making adjustments as needed to achieve a balanced and naturalistic representation. Take the time to observe your own hand in a clenched position or refer to reference images to refine the overall form.
By meticulously crafting the basic shape of the fist, you lay the groundwork for infusing it with depth and character in the subsequent steps. This initial stage sets the stage for adding intricate details and capturing the dynamic energy of a clenched fist, paving the way for a compelling and lifelike portrayal of strength and determination.
Step 2: Add Details
With the foundational structure of the clenched fist in place, it's time to infuse it with intricate details that convey the raw power and intensity of this iconic gesture. Adding these nuanced elements will elevate your drawing, bringing it to life with depth and realism. Follow these steps to intricately capture the essence of a clenched fist:
-
Refine Finger Anatomy: Focus on each finger individually, refining the contours and joints to reflect the tension and force of a clenched hand. Pay close attention to the subtle curves and creases formed by the knuckles, ensuring that they align with the natural flexion of the fingers. Emphasize the tapering shape of each digit, gradually narrowing towards the tips, and depict the subtle bulges where the fingers press against each other.
-
Define Tendons and Veins: Incorporate the intricate network of tendons and veins that become pronounced when the hand is clenched. These details add a sense of realism and vitality to your drawing, showcasing the underlying anatomy and the physical strain of the clenched fist. Carefully observe the paths of the tendons as they extend from the wrist to the base of each finger, and delicately sketch the veins that surface along the back of the hand and fingers.
-
Capture Skin Folds and Wrinkles: Depict the natural folds and wrinkles that emerge on the skin when the hand is clenched. These subtle details convey the tension and movement of the hand, adding authenticity to your drawing. Observe how the skin bunches up around the knuckles and the base of the fingers, and delicately render these folds with light, precise strokes. Pay attention to the areas of shadow and highlight created by these folds, as they contribute to the overall three-dimensional effect.
-
Emphasize Knuckle Definition: Highlight the prominence of the knuckles, accentuating their contours and protrusions. The knuckles serve as focal points that reflect the impact and force of the clenched fist. Define the rounded forms of the knuckles, ensuring that they stand out amidst the tension of the surrounding skin and tendons. Use subtle shading to create depth and volume, enhancing the visual impact of the knuckles.
-
Detail the Thumb: Refine the details of the thumb, capturing its unique structure and position within the clenched fist. Emphasize the opposing curves of the thumb's joints and the defined muscle structure as it supports the grip. Pay attention to the interplay of light and shadow on the thumb, accentuating its three-dimensional form within the composition.
By meticulously adding these details, you will infuse your drawing with a heightened sense of realism and intensity, effectively capturing the intricate nuances of a clenched fist. These elements contribute to the overall impact of your artwork, evoking a visceral response and showcasing the dynamic energy of this powerful gesture. Now, let's proceed to the next step to further refine and shade the clenched fist, bringing it to its full expressive potential.
Step 3: Refine and Shade
As we delve into the final stage of drawing a fist, the focus shifts to refining the intricate details and applying shading to imbue the composition with depth and dimension. This pivotal step elevates the clenched fist from a mere sketch to a compelling and lifelike portrayal of strength and determination. Here's a detailed exploration of the refinement and shading process:
-
Enhance Textural Elements: Pay meticulous attention to the textural elements present in a clenched fist. From the roughened skin to the subtle creases and folds, each detail contributes to the tactile authenticity of the drawing. Utilize cross-hatching and stippling techniques to convey the varied textures, ensuring that the skin, tendons, and knuckles are rendered with precision and nuance.
-
Employ Gradual Shading: Gradual shading plays a pivotal role in sculpting the three-dimensional form of the fist. Utilize a range of graphite pencils to achieve smooth transitions between light and shadow, emphasizing the contours and volumes of the hand. Build up layers of shading to create depth, paying close attention to the areas of tension and compression within the clenched fist.
-
Emphasize Light and Shadow: Deliberately observe the interplay of light and shadow on the fist, considering the direction and intensity of the light source. Enhance the realism of the drawing by accentuating the areas of highlight and casting convincing shadows. This attention to light and shadow adds a sense of drama and dynamism to the composition, amplifying the visual impact of the clenched fist.
-
Refine Edge Definition: Define the edges of the fist with precision, ensuring that the contours are crisp and well-defined. This delineation adds clarity and structure to the composition, accentuating the powerful silhouette of the clenched hand. Pay particular attention to the points of contact between the fingers and the subtle overlaps, refining these areas to convey the cohesive unity of the fist.
-
Create Atmospheric Depth: Consider the surrounding space and atmosphere to create a sense of depth within the composition. Utilize atmospheric perspective to subtly fade the background, directing the focus towards the clenched fist as the central focal point. This technique enhances the visual impact of the drawing, drawing the viewer's gaze towards the compelling gesture of strength and determination.
By meticulously refining the intricate details and applying nuanced shading, the clenched fist emerges as a captivating and evocative portrayal of raw power and emotion. This final stage of the drawing process encapsulates the culmination of skill and artistry, resulting in a compelling representation of the human hand in a moment of intense expression.
Read more: How To Draw Bowser
Conclusion
In conclusion, mastering the art of drawing a fist is a rewarding and enriching journey that allows artists to capture the raw power, emotion, and dynamism inherent in this iconic gesture. By following the step-by-step guide outlined in this comprehensive tutorial, artists can hone their skills and elevate their artistic repertoire with the compelling presence of a clenched fist. From establishing the basic shape to infusing intricate details and applying nuanced shading, each stage of the drawing process contributes to the creation of a lifelike and impactful portrayal of strength and determination.
Drawing a fist transcends the mere depiction of a hand; it embodies a potent symbol of resilience, fortitude, and unwavering resolve. The clenched fist has been utilized throughout art history as a powerful motif, representing unity, defiance, and the indomitable human spirit. Whether it graces the pages of a graphic novel, adorns a mural, or stands as a standalone work of art, a well-executed drawing of a fist resonates with viewers on a visceral level, evoking a range of emotions and narratives.
Through the meticulous attention to detail and the thoughtful application of shading and texture, artists can breathe life into their drawings, infusing them with a sense of authenticity and vitality. The process of drawing a fist serves as a testament to the artist's ability to capture the nuances of human anatomy, the play of light and shadow, and the expressive potential of the human hand. It is a testament to the artist's ability to capture the nuances of human anatomy, the play of light and shadow, and the expressive potential of the human hand.
Furthermore, mastering the art of drawing a fist equips artists with valuable skills that extend beyond the specific subject matter. The techniques and principles learned in this process, such as understanding form, texture, and composition, can be applied to a wide range of artistic endeavors, enriching the artist's creative toolkit and broadening their artistic horizons.
In essence, drawing a fist is not merely an exercise in technical proficiency; it is an exploration of the human experience, a celebration of resilience, and a testament to the artist's ability to convey profound emotion through their craft. By embracing the challenge of capturing the strength and intensity of a clenched fist, artists embark on a transformative artistic journey that yields not only striking visual representations but also a deeper understanding of the power of art to communicate and resonate with audiences on a profound level.
