Home>Food and Cooking>How To Freeze Okra


Food and Cooking
How To Freeze Okra
Published: March 6, 2024
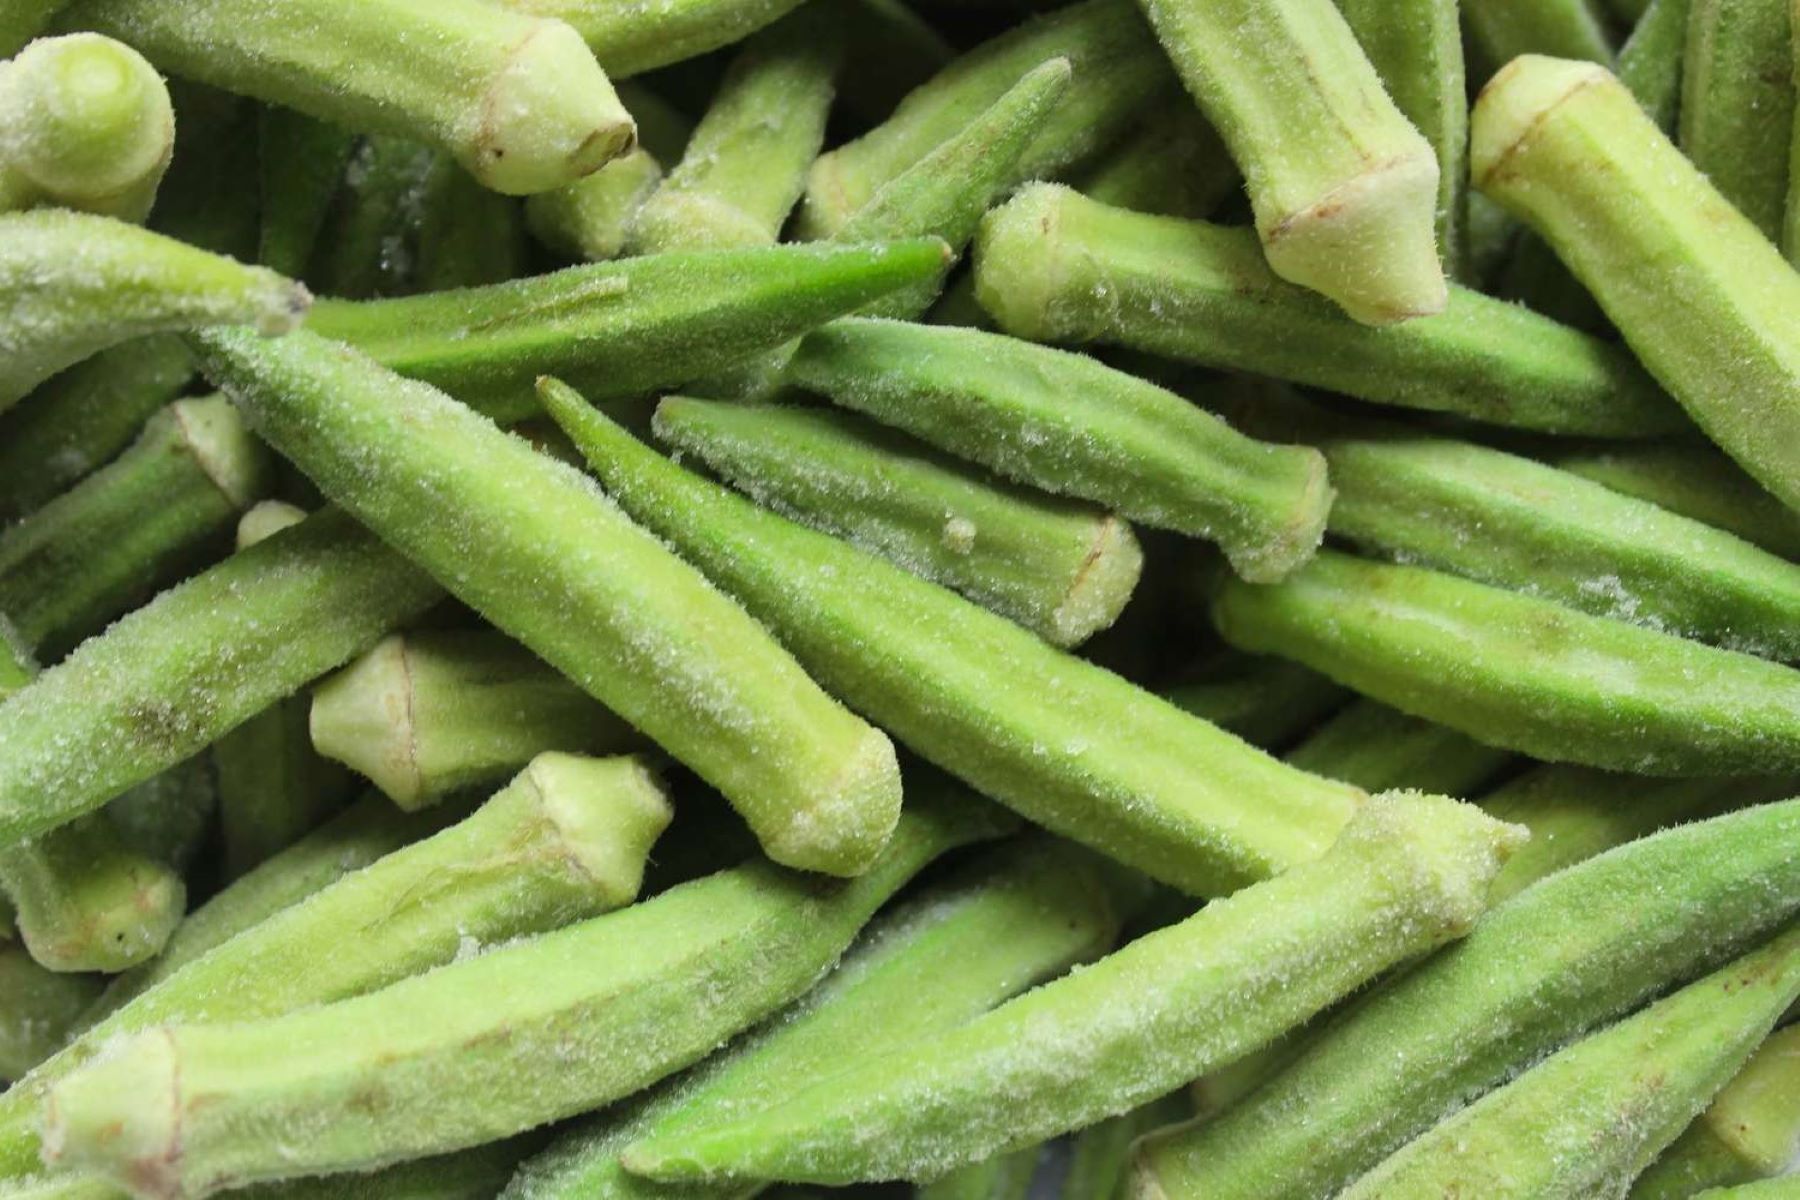
Learn how to freeze okra with our easy step-by-step guide. Keep your okra fresh and ready for cooking with these simple food preservation tips. Perfect for food and cooking enthusiasts!
(Many of the links in this article redirect to a specific reviewed product. Your purchase of these products through affiliate links helps to generate commission for Regretless.com, at no extra cost. Learn more)
Table of Contents
Introduction
Freezing okra is an excellent way to preserve this versatile and nutritious vegetable for future use. Whether you have a bountiful harvest from your garden or you've found a great deal on fresh okra at the market, freezing is a convenient method to ensure that you can enjoy okra throughout the year. By following a few simple steps, you can maintain the flavor, texture, and nutritional value of okra, allowing you to incorporate it into your favorite recipes whenever you desire.
Freezing okra at the peak of its freshness enables you to lock in its vibrant color and crispness. This process also helps to extend the shelf life of okra, preventing it from spoiling and reducing food waste. Whether you plan to use frozen okra in soups, stews, stir-fries, or as a side dish, having a stash of frozen okra on hand can save you time and effort in the kitchen.
In this comprehensive guide, we will walk you through the step-by-step process of freezing okra, from selecting the freshest okra to properly storing the frozen pods. By understanding the best practices for freezing okra, you can ensure that it retains its quality and flavor, allowing you to enjoy the taste of summer even during the coldest months.
Let's dive into the process of freezing okra, so you can savor the delightful taste and nutritional benefits of this beloved vegetable all year round.
Read more: How To Freeze Squash
Step 1: Selecting Fresh Okra
When it comes to freezing okra, selecting the freshest pods is crucial to ensure the best results. Fresh okra is characterized by its vibrant green color, firm texture, and absence of blemishes or soft spots. Whether you are harvesting okra from your garden or choosing it from the produce section of your local market, there are several key indicators to look for when selecting the best okra for freezing.
Visual Inspection: Begin by visually inspecting the okra pods. Look for pods that are small to medium in size, as they tend to be more tender and flavorful. Avoid selecting pods that are overly large, as they may be tough and fibrous. Additionally, choose okra pods that have a bright green color and are free from any discoloration or dark spots. The skin of fresh okra should appear smooth and free from wrinkles or shriveling.
Texture and Firmness: Gently squeeze the okra pods to assess their firmness. Fresh okra should feel firm to the touch, indicating that it is at its peak of ripeness. Avoid selecting pods that feel soft or mushy, as this is a sign that the okra is past its prime.
Stem End: Examine the stem end of the okra pods. The stem should appear green and free from any signs of mold or decay. A fresh okra pod will have a clean and intact stem end, indicating that it has been well-handled and is in optimal condition.
Avoiding Overripe Okra: Be mindful of selecting okra that is not overripe. Overripe okra may have a tough and woody texture, making it less suitable for freezing. Look for pods that are tender and snap easily when bent, as this indicates that they are at the ideal stage for freezing.
By carefully selecting the freshest okra, you can ensure that the frozen pods will maintain their quality and flavor. The process of freezing okra begins with choosing the best-quality pods, setting the stage for delicious and nutritious okra dishes in the months to come.
Step 2: Washing and Preparing Okra
Before freezing okra, it is essential to thoroughly wash and prepare the pods to remove any dirt, residue, or impurities. Properly washing and preparing the okra not only ensures that it is clean and safe for consumption but also helps to maintain its quality during the freezing process.
Washing the Okra
Begin by rinsing the okra pods under cool, running water. Gently rub the surface of each pod with your fingers to remove any dirt or debris. Pay close attention to the ridges and crevices of the okra, as these areas can harbor soil or foreign particles. Rinse the pods until they are visibly clean and free from any contaminants.
Trimming the Ends
After washing the okra, trim the stem ends and tips of the pods using a sharp knife. This step helps to remove any remnants of the stem and ensures that the okra is neatly trimmed and ready for freezing. Aim to make clean cuts, taking care not to remove too much of the okra flesh in the process.
Read more: How To Freeze Spinach
Slicing the Okra (Optional)
Depending on your preference and intended use, you may choose to slice the okra into rounds or leave the pods whole. Slicing the okra can make it more convenient to use in certain recipes, such as stews or gumbo. If you opt to slice the okra, aim for uniform pieces to promote even freezing and cooking.
Drying the Okra
Once the okra has been washed, trimmed, and sliced, it is important to ensure that excess moisture is removed. Pat the okra dry with paper towels or a clean kitchen towel to absorb any remaining water. Drying the okra helps to prevent ice crystals from forming on the surface of the pods during freezing, which can impact their texture and quality.
By meticulously washing and preparing the okra, you can set the stage for successful freezing and preserve the freshness of the pods. This crucial step ensures that the frozen okra will be clean, well-trimmed, and ready to be incorporated into a wide range of culinary creations.
Step 3: Blanching Okra
Blanching okra is a vital step in the process of freezing this beloved vegetable. This technique involves briefly immersing the okra in boiling water, followed by rapid cooling in an ice water bath. Blanching serves several essential purposes, including preserving the okra's vibrant color, texture, and nutritional value while also helping to maintain its overall quality during freezing and storage.
To begin the blanching process, bring a large pot of water to a rolling boil. While the water is heating, prepare a separate bowl filled with ice water. The ice water bath will be used to quickly cool the okra after blanching, halting the cooking process and preserving the okra's crispness and color.
Once the water reaches a vigorous boil, carefully add the prepared okra to the pot. It is essential to work in small batches to ensure that the water temperature remains constant and that the okra is blanched evenly. The okra should be submerged in the boiling water for approximately 3 minutes. This brief blanching period is sufficient to deactivate enzymes within the okra that can lead to spoilage and nutrient loss over time.
After the blanching time has elapsed, promptly remove the okra from the boiling water using a slotted spoon or tongs and transfer it to the ice water bath. The shock of the cold water halts the cooking process and rapidly cools the okra, preserving its vibrant green color and preventing overcooking.
Once the blanched okra has cooled in the ice water bath for approximately 3 minutes, carefully remove it and pat it dry with paper towels. It is important to ensure that excess moisture is removed before proceeding to the next step of freezing the okra.
Blanching okra is a crucial step that sets the stage for successful freezing and storage. By blanching the okra, you can effectively preserve its color, texture, and nutritional integrity, ensuring that the frozen pods maintain their quality and flavor for an extended period. This essential technique prepares the okra for long-term storage, allowing you to enjoy the taste and versatility of this beloved vegetable throughout the year.
Step 4: Freezing Okra
After the blanching process, the okra is now ready to be frozen, preserving its freshness and flavor for future use. Freezing okra is a straightforward process that involves arranging the blanched pods in a manner that facilitates efficient freezing and convenient portioning for later use.
Flash Freezing Method
One effective method for freezing okra is known as flash freezing. This technique involves arranging the blanched okra in a single layer on a baking sheet or tray. It is important to ensure that the okra pieces do not touch or overlap, as this allows for individual freezing and prevents the pods from sticking together. Placing the okra in a single layer promotes rapid freezing, preserving the okra's texture and preventing the formation of large ice crystals.
Once the okra pieces are arranged in a single layer, place the baking sheet or tray in the freezer. Allow the okra to freeze for approximately 1 to 2 hours, or until the pieces are firm and solid to the touch. Flash freezing the okra in this manner ensures that each piece freezes individually, making it easier to remove the desired quantity for cooking without having to thaw the entire batch.
Packaging for Freezing
Once the okra pieces are fully frozen, transfer them to airtight containers or resealable freezer bags for long-term storage. It is important to label the containers or bags with the date of freezing to keep track of the okra's freshness. Properly sealed containers help to protect the okra from freezer burn and maintain its quality over time.
When filling the containers or bags, be sure to leave a small amount of headspace to accommodate any potential expansion during freezing. This precaution helps to prevent the containers from cracking or the bags from bursting as the okra freezes.
Long-Term Storage
Store the packaged okra in the freezer, where it can remain viable for up to 12 months. By following these simple steps for freezing okra, you can ensure that this versatile vegetable is readily available for use in a variety of culinary applications, from hearty stews and soups to flavorful stir-fries and side dishes.
Freezing okra allows you to enjoy the taste and nutritional benefits of this beloved vegetable throughout the year, providing a convenient and cost-effective way to incorporate okra into your favorite recipes. Whether you have an abundant harvest from your garden or simply wish to take advantage of fresh okra when it is in season, freezing this versatile vegetable enables you to savor its delightful flavor and texture whenever the craving strikes.
Step 5: Storing Frozen Okra
Proper storage is essential for maintaining the quality and flavor of frozen okra over an extended period. After the okra has been successfully frozen and packaged, it is crucial to store it in a manner that safeguards its freshness and prevents freezer-related issues such as freezer burn.
Airtight Containers and Freezer Bags
When storing frozen okra, it is recommended to use airtight containers or resealable freezer bags. These containers provide a protective barrier against air and moisture, helping to prevent freezer burn and maintain the okra's texture and flavor. Ensure that the containers or bags are securely sealed to minimize the risk of exposure to air, which can compromise the quality of the frozen okra over time.
Labeling and Dating
Properly labeling the containers or bags with the date of freezing is a crucial step in the storage process. By clearly indicating the date of freezing, you can keep track of the okra's storage duration and prioritize the use of older batches before newer ones. This practice helps to ensure that the frozen okra remains within its optimal storage timeframe, allowing you to enjoy its quality and taste with confidence.
Organized Freezer Space
Arranging the frozen okra in an organized manner within the freezer contributes to efficient storage and retrieval. Designate a specific section of the freezer for storing the okra containers or bags, keeping them separate from items that emit strong odors. This separation helps to preserve the okra's natural flavor and prevents it from absorbing unwanted odors from other foods in the freezer.
Temperature and Shelf Life
Maintaining a consistent freezer temperature of 0°F (-18°C) or lower is essential for preserving the quality of frozen okra. Freezer temperatures within this range help to inhibit the growth of microorganisms and enzymatic activity, ensuring that the okra remains safe for consumption and retains its nutritional value.
When stored under optimal conditions, frozen okra can maintain its quality for up to 12 months. However, for the best flavor and texture, it is advisable to use the frozen okra within 8 to 10 months of freezing. By adhering to these storage guidelines, you can enjoy the convenience of having frozen okra readily available for use in a variety of culinary creations, from hearty soups and stews to vibrant vegetable medleys.
Proper storage practices are instrumental in preserving the quality and flavor of frozen okra, allowing you to harness the versatility and nutritional benefits of this beloved vegetable throughout the year.
Conclusion
In conclusion, mastering the art of freezing okra empowers you to extend the enjoyment of this versatile vegetable far beyond its typical harvest season. By following the step-by-step process outlined in this comprehensive guide, you can ensure that the frozen okra retains its vibrant color, crisp texture, and nutritional integrity, allowing you to incorporate it into a wide array of culinary creations throughout the year.
The journey of freezing okra begins with the careful selection of fresh pods, ensuring that they exhibit the hallmark signs of quality, including a vibrant green color, firm texture, and absence of blemishes. This initial step sets the stage for a successful freezing process, laying the foundation for flavorful and nutritious frozen okra.
Thoroughly washing and preparing the okra is a crucial step that cannot be overlooked. By meticulously cleaning, trimming, and, if desired, slicing the pods, you set the groundwork for pristine frozen okra that is ready to be utilized in an assortment of dishes, from comforting soups to zesty stir-fries.
The blanching process plays a pivotal role in preserving the okra's color, texture, and nutritional value. Through the brief immersion in boiling water followed by rapid cooling, the blanched okra is primed for successful freezing, ensuring that it maintains its quality and flavor over time.
The flash freezing method, coupled with proper packaging and long-term storage, safeguards the frozen okra, allowing it to remain viable for up to 12 months. This approach grants you the flexibility to enjoy the taste and nutritional benefits of okra at your convenience, whether you're preparing a hearty gumbo in the midst of winter or adding a pop of green to a summery vegetable medley.
By adhering to best practices for storing frozen okra, including the use of airtight containers, labeling, and maintaining optimal freezer conditions, you can savor the delightful flavor and versatility of this beloved vegetable with confidence.
In essence, the process of freezing okra is not merely a means of preservation; it is a gateway to year-round culinary creativity and nourishment. Whether you're a home gardener looking to make the most of your harvest or a savvy shopper taking advantage of peak-season produce, freezing okra empowers you to savor the taste of summer no matter the season. With the knowledge and techniques acquired from this guide, you are well-equipped to embark on a flavorful journey that transcends the limitations of time and seasonality, celebrating the enduring appeal of this beloved vegetable.


