Home>Automotive>How To Test A Starter

Automotive
How To Test A Starter
Published: February 29, 2024
Learn how to test a starter in your automotive vehicle with our step-by-step guide. Ensure your starter is functioning properly for a smooth driving experience.
(Many of the links in this article redirect to a specific reviewed product. Your purchase of these products through affiliate links helps to generate commission for Regretless.com, at no extra cost. Learn more)
Table of Contents
Introduction
When your car refuses to start, it can be a frustrating experience. One of the potential culprits behind this issue is a faulty starter. The starter is a crucial component of your vehicle's ignition system, responsible for initiating the engine's operation. Over time, wear and tear can compromise its functionality, leading to starting problems. Fortunately, you can perform a series of tests to diagnose the health of your starter and determine if it requires attention or replacement.
In this comprehensive guide, we will walk you through the step-by-step process of testing a starter. By following these instructions, you can gain valuable insights into the condition of your starter and make informed decisions regarding any necessary repairs or replacements. Whether you're a seasoned car enthusiast or a novice DIYer, this guide will equip you with the knowledge and confidence to tackle starter-related issues head-on.
Testing a starter involves a systematic approach, beginning with the gathering of essential tools and materials. From there, you'll proceed to locate the starter within your vehicle's engine bay. Once the starter is identified, you'll delve into the testing process, which includes evaluating the battery, inspecting the wiring, and testing the starter solenoid and motor. Each step is designed to provide a comprehensive assessment of the starter's functionality, allowing you to pinpoint any underlying issues.
By familiarizing yourself with the testing procedures outlined in this guide, you can save time and money by accurately diagnosing starter problems without the need for professional assistance. Additionally, gaining a deeper understanding of your vehicle's components and systems can empower you to take a proactive approach to maintenance and repairs, ultimately enhancing your overall driving experience.
So, without further ado, let's dive into the first step of testing a starter: gathering the necessary tools and materials.
Read more: How To Test A Crankshaft Position Sensor
Step 1: Gather Necessary Tools and Materials
Before embarking on the process of testing your car's starter, it's essential to gather the requisite tools and materials to ensure a smooth and efficient testing experience. By having the following items at your disposal, you'll be well-prepared to carry out the necessary diagnostic procedures:
-
Safety Gear: Prioritize safety by wearing protective gear such as gloves and safety goggles. These items will shield you from potential hazards and ensure a secure testing environment.
-
Multimeter: A multimeter is a versatile tool that allows you to measure voltage, current, and resistance. It's an indispensable instrument for testing electrical components, including the starter and associated circuits.
-
Wrenches and Sockets: Depending on your vehicle's make and model, you'll need a set of wrenches and sockets to access the starter and related components. Ensure that you have the appropriate sizes to facilitate easy removal and reinstallation.
-
Battery Charger: To conduct a thorough assessment of the starter, it's crucial to have a fully charged battery. A battery charger will enable you to ensure that the battery is in optimal condition before proceeding with the testing process.
-
Cleaning Supplies: Over time, the starter and its connections may accumulate dirt and corrosion, potentially affecting its performance. Having cleaning supplies such as a wire brush and electrical contact cleaner will allow you to remove any debris and enhance electrical conductivity.
-
Vehicle Service Manual: Refer to your vehicle's service manual for specific instructions on locating the starter and accessing relevant components. The manual provides invaluable insights into your car's electrical system and serves as a reliable reference throughout the testing process.
By assembling these tools and materials, you'll be well-equipped to initiate the testing procedures with confidence and precision. With safety gear in place and the necessary instruments at your disposal, you're ready to move on to the next step: locating the starter within your vehicle's engine bay.
Step 2: Locate the Starter
Locating the starter is a crucial initial step in the process of testing its functionality. The starter motor is typically positioned in a specific area within the engine bay, varying in accessibility based on the vehicle's make and model. To successfully locate the starter, follow these general guidelines:
-
Consult the Service Manual: The vehicle's service manual is an invaluable resource for identifying the starter's precise location. It provides detailed diagrams and descriptions that pinpoint the starter's position within the engine compartment. Refer to the manual to gain insights into the specific layout of your car's components.
-
Follow the Battery Cables: The starter is connected to the vehicle's battery through heavy-duty cables. Trace the cables from the battery, typically located in the engine bay, to their endpoint. The positive (red) cable leads to the starter solenoid, which is attached to the starter motor. By following the cable path, you can narrow down the area where the starter is situated.
-
Identify the Cylinder Block: In most cases, the starter motor is mounted on the engine's cylinder block. Look for a cylindrical component with electrical connections that align with the battery cables. The starter is often secured to the engine block with bolts and may be positioned in a manner that facilitates engagement with the flywheel or flexplate.
-
Consider Accessibility: Depending on the vehicle's design, the starter may be located in a relatively accessible or confined space. Factors such as the engine's orientation and the presence of surrounding components can influence the ease of accessing the starter for testing purposes.
-
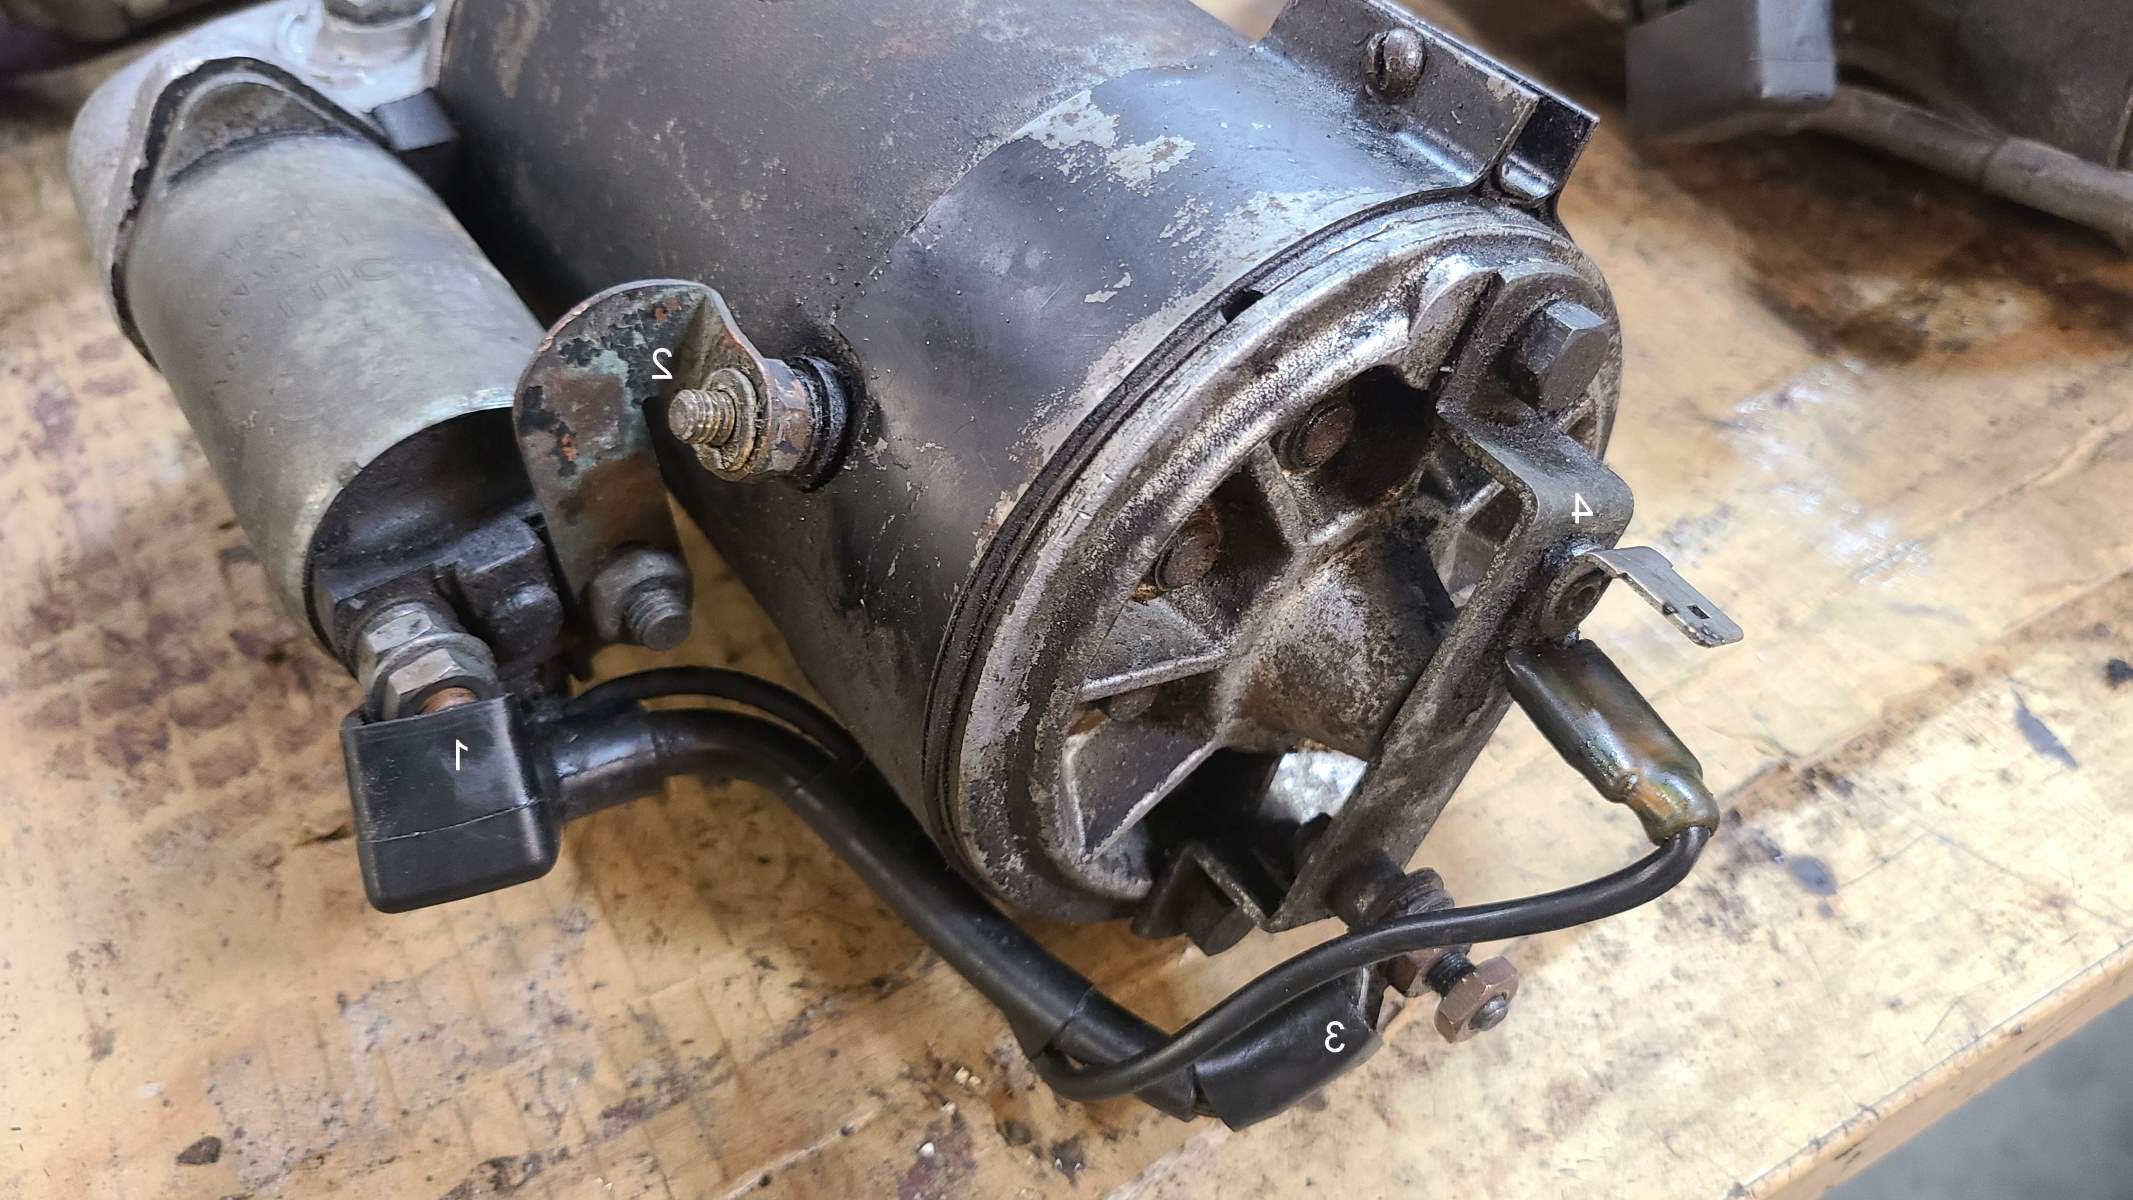
Visual Inspection: Once you've identified a cylindrical component with electrical connections and heavy-duty cables, visually inspect it to confirm that it matches the characteristics of a starter motor. Look for the solenoid, which is typically mounted on top of the starter motor and features smaller control wires in addition to the main battery cables.
By following these steps and utilizing the information provided in the service manual, you can effectively pinpoint the location of the starter within your vehicle's engine bay. Once the starter is located, you'll be ready to proceed with the subsequent testing procedures to assess its operational status.
Step 3: Test the Battery
Testing the battery is a critical aspect of diagnosing starter issues, as the battery provides the electrical power necessary to engage the starter motor. A weak or faulty battery can manifest symptoms similar to those of a malfunctioning starter, making it essential to evaluate the battery's condition before proceeding with further testing. To conduct a comprehensive battery test, follow these steps:
-
Visual Inspection: Begin by visually inspecting the battery for any signs of damage, corrosion, or leakage. Check the battery terminals for corrosion buildup, which can impede electrical conductivity. If corrosion is present, use a wire brush and a solution of baking soda and water to clean the terminals and cables, ensuring a secure connection.
-
Voltage Check: Utilize a multimeter to measure the battery's voltage. A fully charged battery should register approximately 12.6 volts. If the voltage falls below this threshold, it may indicate a depleted or undercharged battery. In such cases, use a battery charger to restore the battery to an optimal charge level before proceeding with the testing process.
-
Load Test: Perform a load test to assess the battery's ability to deliver power under a significant load, simulating the demands placed on it during the starting process. This test provides insights into the battery's overall health and its capacity to supply sufficient power to the starter motor. A failing battery may exhibit a significant voltage drop when subjected to a load, indicating a diminished ability to sustain electrical output.
-
Electrolyte Inspection (For Non-Sealed Batteries): If your vehicle is equipped with a non-sealed lead-acid battery, carefully inspect the electrolyte levels in each cell. Ensure that the electrolyte covers the battery plates adequately, as insufficient electrolyte levels can compromise the battery's performance. Additionally, verify that the electrolyte is free from contamination and appears clear and colorless.
By meticulously evaluating the battery through visual inspection, voltage checks, load testing, and electrolyte inspection (if applicable), you can gain a comprehensive understanding of its condition and its impact on the starter's operation. A healthy battery forms the foundation for a robust starting system, enabling the starter to receive the necessary electrical power to initiate the engine's operation. Once the battery's health is confirmed, you can proceed with confidence to the subsequent steps of testing the starter's components, bringing you closer to a thorough diagnosis of any starting issues.
Step 4: Inspect the Wiring
Inspecting the wiring associated with the starter is a crucial step in the diagnostic process, as it allows you to identify potential issues that may affect the starter's performance. The wiring responsible for delivering electrical power to the starter motor and solenoid must be in optimal condition to ensure seamless operation. By conducting a thorough inspection of the wiring, you can uncover common problems such as corrosion, fraying, and loose connections, all of which can impede the flow of electricity and compromise the starter's functionality.
To effectively inspect the wiring, follow these detailed steps:
-
Visual Examination: Begin by visually inspecting the wiring harness connected to the starter, paying close attention to the condition of the insulation, connectors, and terminals. Look for any signs of damage, wear, or corrosion along the length of the wiring. Additionally, check for evidence of heat damage, which may indicate electrical issues or excessive current flow.
-
Terminal Tightness: Verify the tightness of the electrical terminals and connections associated with the starter. Loose or corroded terminals can hinder the transmission of electrical signals, leading to starting problems. Use a wrench or socket to ensure that the terminals are securely fastened and free from corrosion or debris.
-
Wire Flexibility: Gently flex the wiring near the starter and along its route to assess its flexibility. Wiring that has become brittle or excessively rigid due to age or environmental factors may be prone to breakage or insulation damage. Flexible, pliable wiring is indicative of its overall health and resilience.
-
Corrosion Removal: If corrosion is present on the terminals or connectors, use a wire brush and electrical contact cleaner to carefully remove the buildup. Thoroughly clean the affected areas to restore optimal electrical conductivity and prevent future corrosion-related issues.
-
Insulation Integrity: Evaluate the integrity of the wiring insulation, ensuring that it remains intact and free from cracks, abrasions, or exposed conductors. Damaged insulation can lead to short circuits and electrical malfunctions, necessitating prompt repair or replacement.
-
Ground Connections: Pay attention to the ground connections associated with the starter and its wiring. Ensure that the ground points are clean, secure, and free from corrosion, as a robust ground connection is essential for the starter's proper operation.
By meticulously inspecting the wiring and addressing any identified issues, you can safeguard the integrity of the electrical pathways that power the starter. A thorough assessment of the wiring contributes to a comprehensive diagnosis of the starter's health, bringing you closer to resolving any underlying starting issues and ensuring the reliable performance of your vehicle's ignition system.
Read more: How To Pass A Hair Follicle Test
Step 5: Test the Starter Solenoid
The starter solenoid plays a pivotal role in the starting process, serving as a relay switch that controls the flow of electrical current to the starter motor. Testing the starter solenoid is essential to ascertain its functionality and determine if it is contributing to any starting issues. By following a systematic testing procedure, you can gain valuable insights into the solenoid's performance and its impact on the overall starting system.
To test the starter solenoid, proceed with the following steps:
-
Visual Inspection: Begin by visually examining the solenoid for any visible signs of damage, corrosion, or loose connections. The solenoid is typically mounted on the starter motor and features electrical terminals for connecting to the battery and starter motor. Ensure that the connections are secure and free from debris or corrosion buildup.
-
Solenoid Activation Test: With the assistance of a helper, attempt to start the vehicle while listening for a distinct clicking sound emanating from the solenoid. The clicking noise indicates that the solenoid is receiving the necessary electrical signal from the ignition switch and is engaging the starter motor. If no clicking sound is heard, it may indicate a faulty solenoid or an issue with the electrical circuitry leading to the solenoid.
-
Voltage Test: Use a multimeter to measure the voltage at the solenoid's electrical terminals during a start attempt. The solenoid should receive a strong, consistent voltage signal when the ignition key is turned to the start position. Any significant voltage drop or irregularities may point to a malfunctioning solenoid or underlying electrical issues.
-
Solenoid Bench Test: If necessary, remove the solenoid from the starter motor and conduct a bench test to evaluate its performance in isolation. Apply battery voltage to the solenoid's terminals and observe its response. A healthy solenoid should produce an audible click and visibly engage its internal components, indicating its operational status.
By meticulously testing the starter solenoid through visual inspection, activation tests, voltage measurements, and bench testing, you can gain a comprehensive understanding of its condition and its contribution to any starting difficulties. Identifying and addressing solenoid-related issues is crucial for ensuring the reliable operation of the starter and the overall ignition system, ultimately enhancing the vehicle's starting performance and reliability.
Step 6: Test the Starter Motor
Testing the starter motor is a pivotal step in the diagnostic process, as it directly assesses the core component responsible for initiating the engine's operation. By subjecting the starter motor to a series of comprehensive tests, you can gain valuable insights into its functionality and identify any underlying issues that may impede its performance.
To effectively test the starter motor, follow these detailed steps:
-
Visual Inspection: Begin by visually examining the starter motor for any visible signs of damage, corrosion, or abnormal wear. Inspect the motor's housing, electrical connections, and mounting bolts for any indications of wear, heat damage, or loose components. Additionally, check for the presence of debris or foreign objects that may impede the motor's operation.
-
Voltage Check: Utilize a multimeter to measure the voltage at the starter motor's electrical terminals during a start attempt. When the ignition key is turned to the start position, the motor should receive a strong, consistent voltage signal. Any significant voltage drop or irregularities may indicate potential issues with the motor's electrical supply or internal components.
-
Starter Current Draw Test: Conduct a starter current draw test to assess the electrical load placed on the motor during the starting process. By connecting a current clamp around the starter motor's positive cable and initiating a start attempt, you can measure the current draw. An excessive current draw may indicate mechanical resistance within the motor, worn internal components, or electrical issues.
-
Starter Bench Test: If necessary, remove the starter motor from the vehicle and perform a bench test to evaluate its performance in isolation. Apply battery voltage directly to the motor's terminals and observe its response. A healthy starter motor should engage promptly, exhibiting smooth and consistent rotation without unusual noises or excessive resistance.
By meticulously testing the starter motor through visual inspection, voltage measurements, current draw assessments, and bench testing, you can gain a comprehensive understanding of its operational status. Identifying any anomalies or deficiencies within the starter motor is crucial for addressing potential starting issues and ensuring the reliable initiation of the engine.
Testing the starter motor serves as a critical component of the overall diagnostic process, enabling you to pinpoint any underlying mechanical or electrical issues that may compromise the vehicle's starting performance. By following the outlined testing procedures, you can effectively evaluate the starter motor's health and contribute to the resolution of any starting difficulties, ultimately enhancing the vehicle's operational reliability.
Conclusion
In conclusion, the process of testing a starter encompasses a systematic and comprehensive approach to diagnosing potential issues that may impede the vehicle's starting performance. By following the outlined steps, you can gain valuable insights into the condition of the starter, battery, wiring, solenoid, and motor, ultimately empowering you to make informed decisions regarding any necessary repairs or replacements.
The initial step of gathering the necessary tools and materials sets the stage for a well-prepared testing process, ensuring that you have the essential instruments and safety gear to conduct the diagnostic procedures effectively. Locating the starter within the vehicle's engine bay provides a foundational understanding of its physical placement, enabling you to proceed with targeted testing.
Testing the battery serves as a fundamental aspect of the diagnostic process, as the battery's health directly impacts the starter's ability to initiate the engine's operation. By evaluating the battery's voltage, conducting load tests, and inspecting electrolyte levels (for non-sealed batteries), you can ascertain the battery's condition and its influence on the starting system.
Inspecting the wiring associated with the starter is crucial for identifying potential issues such as corrosion, fraying, and loose connections. A thorough assessment of the wiring safeguards the integrity of the electrical pathways, ensuring optimal power delivery to the starter motor and solenoid.
The testing of the starter solenoid and motor provides critical insights into the functionality of these key components. By conducting visual inspections, activation tests, voltage measurements, current draw assessments, and bench testing, you can gain a comprehensive understanding of the solenoid and motor's operational status, identifying any anomalies or deficiencies that may contribute to starting difficulties.
By meticulously following the testing procedures outlined in this guide, you can effectively diagnose starter-related issues and take proactive measures to address them. Whether it involves cleaning corroded terminals, tightening loose connections, or replacing faulty components, the knowledge gained from the testing process empowers you to enhance the vehicle's starting performance and reliability.
Ultimately, the ability to test a starter not only saves time and money by accurately diagnosing issues but also fosters a deeper understanding of the vehicle's electrical system. This knowledge equips you with the confidence to tackle maintenance and repairs, contributing to an enhanced driving experience and the long-term reliability of your vehicle.

