Home>Arts and Culture>Creative Homemade Teacher’s Day Card Ideas

Arts and Culture
Creative Homemade Teacher’s Day Card Ideas
Published: January 23, 2024
Discover creative homemade Teacher's Day card ideas that celebrate arts and culture. Show your appreciation with unique DIY cards for your beloved teachers!
(Many of the links in this article redirect to a specific reviewed product. Your purchase of these products through affiliate links helps to generate commission for Regretless.com, at no extra cost. Learn more)
Table of Contents
Handprint Flower Card
Creating a handprint flower card is a delightful and meaningful way to show appreciation to teachers on their special day. This homemade gesture not only conveys gratitude but also allows students to express their creativity. The process is simple, and the end result is a charming keepsake that will surely bring a smile to any teacher's face.
Materials Needed:
- Colored construction paper
- Green pipe cleaners
- Glue
- Scissors
- Markers or crayons
- A small circular object for tracing (e.g., a coin or bottle cap)
Step-by-Step Guide:
-
Fold the Paper: Take a piece of colored construction paper and fold it in half to create the card's base. This will serve as the canvas for the handprint flower.
-
Handprint Creation: Choose a contrasting color of construction paper for the handprint. Place the paper on a flat surface and carefully trace the child's hand using a marker or crayon. Then, cut out the handprint.
-
Flower Assembly: Glue the handprint onto the front of the card, positioning it so that the fingers spread out like flower petals. The base of the handprint should align with the fold of the card, ensuring that the fingers open up when the card is opened.
-
Stem and Leaves: Cut out several green paper strips to create the stem and leaves of the flower. Glue them onto the card, extending from the base of the handprint flower to the bottom of the card.
-
Personalized Message: Inside the card, write a heartfelt message to the teacher, expressing gratitude and admiration for their hard work and dedication.
-
Final Touches: To add a finishing touch, twist two green pipe cleaners together and attach them to the bottom of the card to resemble the flower's stem.
The handprint flower card is not only a token of appreciation but also a wonderful way for students to engage in a hands-on, artistic activity. This personalized gesture is bound to be cherished by teachers, serving as a heartwarming reminder of the positive impact they have on their students' lives.
Creating a handprint flower card fosters a sense of thoughtfulness and creativity, making it a memorable and meaningful way to honor teachers on their special day. This simple yet heartfelt gesture embodies the gratitude and respect students have for their educators, making it a cherished memento that celebrates the invaluable role teachers play in shaping young minds.
Pop-Up Apple Card
Crafting a pop-up apple card is a delightful and thoughtful way to celebrate Teacher's Day. This creative and personalized gesture not only conveys appreciation but also allows students to showcase their artistic skills. The process of making a pop-up apple card is both enjoyable and rewarding, resulting in a charming token of gratitude that will undoubtedly bring joy to any teacher's heart.
Materials Needed:
- Red and green construction paper
- Scissors
- Glue
- Pencil
- Black marker
- Ruler
- Cardstock or thick paper for the card base
Step-by-Step Guide:
-
Card Base: Begin by folding a piece of cardstock or thick paper in half to form the base of the card. This will provide a sturdy foundation for the pop-up apple design.
-
Apple Design: On the red construction paper, sketch the outline of an apple. You can use a circular object, such as a small plate, as a guide for creating a symmetrical shape. Once the apple shape is drawn, carefully cut it out using scissors.
-
Pop-Up Feature: With the apple cutout, carefully fold it in half, ensuring that the fold aligns with the top of the apple. Then, using a ruler, make two parallel cuts along the fold, leaving a small section uncut at the top and bottom. Gently push the center of the apple inward to create a subtle pop-up effect.
-
Leaf and Stem: From the green construction paper, cut out a leaf and a stem for the apple. These can be simple and stylized to add a charming touch to the design. Glue the leaf and stem onto the top of the pop-up apple, enhancing its visual appeal.
-
Personalization: Inside the card, express heartfelt gratitude to the teacher with a personalized message. This message can convey admiration for the teacher's dedication and the positive impact they have had on their students.
-
Final Touches: To complete the card, use a black marker to add small details such as seeds on the apple or a thoughtful border around the card. These details contribute to the overall aesthetic and demonstrate attention to the card's design.
Crafting a pop-up apple card offers students an opportunity to engage in a hands-on and creative activity while expressing gratitude to their teachers. The combination of artistic expression and heartfelt words makes this homemade card a cherished token of appreciation. Moreover, the pop-up feature adds an element of surprise and delight, making the card even more memorable.
The process of making a pop-up apple card not only fosters creativity but also encourages students to reflect on the impact of their teachers. By creating a personalized and visually appealing card, students can convey their gratitude in a meaningful and memorable way, honoring the dedication and hard work of their educators.
Thank You Note Card
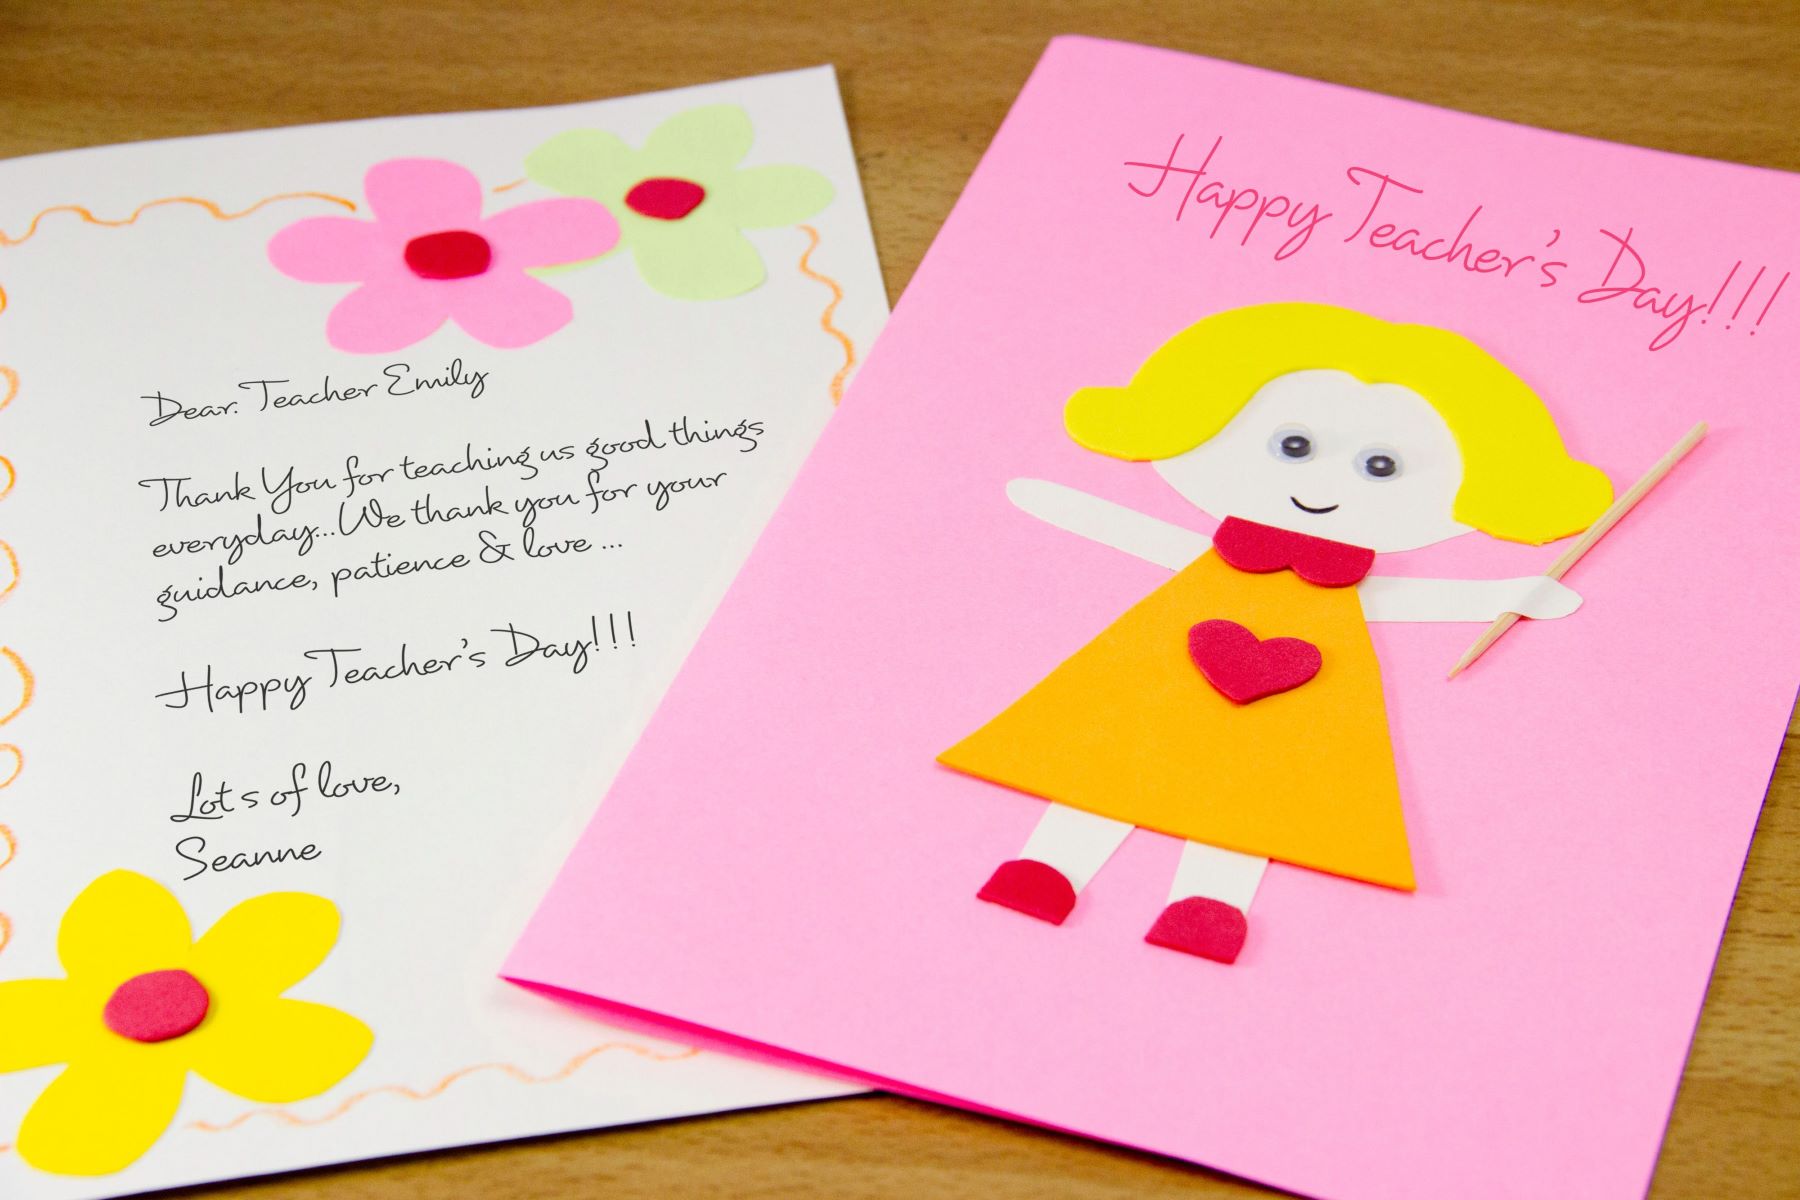
Crafting a thank you note card is a heartfelt and sincere way to express gratitude to teachers on their special day. This personalized gesture not only conveys appreciation but also allows students to convey their heartfelt sentiments in a meaningful manner. The process of creating a thank you note card is simple yet impactful, resulting in a tangible token of appreciation that will undoubtedly brighten any teacher's day.
Materials Needed:
- Colored cardstock or construction paper
- Markers or gel pens
- Decorative stickers or embellishments
- Scissors
- Glue
- Envelopes
Step-by-Step Guide:
-
Card Base: Begin by selecting a piece of colored cardstock or construction paper as the base of the card. Fold the paper in half to create the card's structure, providing a canvas for the heartfelt message.
-
Personalized Message: Inside the card, carefully craft a personalized message to the teacher. Express gratitude for their dedication, guidance, and support. Share specific examples of how the teacher has positively impacted your academic and personal growth.
-
Artistic Touch: Use markers or gel pens to add decorative elements to the card. This can include vibrant designs, colorful borders, or intricate patterns that reflect the teacher's favorite colors or themes. Additionally, consider incorporating uplifting quotes or inspiring words to enhance the visual appeal of the card.
-
Embellishments: To add a touch of creativity, consider using decorative stickers, glitter, or small embellishments to adorn the card. These elements can add a charming and personalized touch, making the card visually appealing and unique.
-
Envelope and Delivery: Once the thank you note card is completed, carefully place it in an envelope. Address the envelope to the teacher and consider adding a decorative seal or sticker for an extra special touch. Present the card to the teacher with a warm smile and genuine appreciation.
Crafting a thank you note card provides students with an opportunity to express their gratitude in a thoughtful and personalized manner. This heartfelt gesture not only showcases creativity but also fosters a sense of appreciation and respect for the teachers who play a pivotal role in shaping their students' lives.
The process of creating a thank you note card allows students to reflect on the positive impact of their teachers and convey their heartfelt sentiments in a tangible form. By crafting a personalized and visually appealing card, students can express their gratitude in a memorable way, honoring the dedication and hard work of their educators.
Crayon Monogram Card
The Crayon Monogram Card is a delightful and personalized way to express gratitude to teachers on their special day. This creative and visually appealing homemade card not only conveys appreciation but also allows students to showcase their artistic skills in a meaningful manner. The process of crafting a Crayon Monogram Card is both enjoyable and rewarding, resulting in a unique token of appreciation that is sure to make a lasting impression.
Materials Needed:
- White cardstock or heavy paper
- Assorted crayons
- Pencil
- Scissors
- Glue
- Ruler
- Optional: Decorative elements such as stickers or glitter
Step-by-Step Guide:
-
Card Base: Begin by selecting a piece of white cardstock or heavy paper as the base of the card. Fold the paper in half to create a sturdy and visually appealing canvas for the monogram design.
-
Monogram Design: Using a pencil and ruler, sketch the initial of the teacher's name in a large, decorative font on the front of the card. This initial will serve as the focal point of the design and can be embellished with various colors to create a vibrant and eye-catching effect.
-
Crayon Mosaic: With the monogram outlined, invite students to fill in the letter with a mosaic of colorful crayon shavings. To create the shavings, use a pencil sharpener to sharpen crayons of different hues, collecting the shavings in separate piles. Then, carefully sprinkle and arrange the shavings within the sketched initial, creating a visually captivating and textured effect.
-
Gluing the Shavings: Apply a thin layer of glue within the sketched initial, working in small sections. Carefully place the crayon shavings onto the glue, ensuring they adhere securely to the paper. Encourage students to experiment with color combinations and patterns, adding depth and dimension to the monogram design.
-
Personalized Message: Inside the card, students can craft a personalized message to the teacher, expressing their gratitude and admiration. This message serves as a heartfelt accompaniment to the visually striking monogram, adding a personal touch to the card.
-
Optional Embellishments: For an extra touch of creativity, students can incorporate decorative elements such as stickers, glitter, or small embellishments to further enhance the card's visual appeal. These additions can complement the monogram design and add a charming and personalized touch to the overall presentation.
Crafting a Crayon Monogram Card offers students an opportunity to engage in a hands-on and creative activity while expressing their gratitude to their teachers. The combination of artistic expression and heartfelt words makes this homemade card a cherished token of appreciation. Moreover, the vibrant and textured monogram design adds a unique and visually captivating element, making the card truly stand out.
The process of creating a Crayon Monogram Card not only fosters creativity but also encourages students to reflect on the impact of their teachers. By crafting a personalized and visually appealing card, students can convey their gratitude in a memorable way, honoring the dedication and hard work of their educators.
Pencil Shavings Card
The Pencil Shavings Card is a unique and artistic way to convey appreciation to teachers on their special day. This creative and visually captivating homemade card not only serves as a token of gratitude but also allows students to showcase their artistic abilities in a meaningful manner. The process of crafting a Pencil Shavings Card is both engaging and rewarding, resulting in a one-of-a-kind expression of appreciation that is certain to leave a lasting impression.
Materials Needed:
- White cardstock or heavy paper
- Pencils with colorful erasers
- Pencil sharpener
- Glue
- Scissors
- Optional: Decorative elements such as ribbons or sequins
Step-by-Step Guide:
-
Card Base: Begin by selecting a piece of white cardstock or heavy paper as the base of the card. Folding the paper in half provides a sturdy and visually appealing canvas for the pencil shavings design.
-
Pencil Shavings Collection: Using pencils with colorful erasers, carefully sharpen the pencils with a pencil sharpener, collecting the vibrant shavings in separate piles. Encourage students to experiment with different colors and gather a sufficient amount of shavings for the design.
-
Design Creation: With the pencil shavings collected, invite students to apply a thin layer of glue onto the front of the card in a pattern or shape of their choice. This could be a heart, star, or any other design that holds significance. Once the glue is applied, carefully sprinkle the pencil shavings onto the glue, ensuring they adhere securely and create a visually captivating and textured effect.
-
Embellishments: For an extra touch of creativity, students can incorporate optional decorative elements such as ribbons or sequins to further enhance the card's visual appeal. These additions can complement the pencil shavings design and add a charming and personalized touch to the overall presentation.
-
Personalized Message: Inside the card, students can craft a personalized message to the teacher, expressing their gratitude and admiration. This message serves as a heartfelt accompaniment to the visually striking pencil shavings design, adding a personal touch to the card.
Crafting a Pencil Shavings Card provides students with an opportunity to engage in a hands-on and creative activity while expressing their gratitude to their teachers. The combination of artistic expression and heartfelt words makes this homemade card a cherished token of appreciation. Moreover, the vibrant and textured pencil shavings design adds a unique and visually captivating element, making the card truly stand out.
The process of creating a Pencil Shavings Card not only fosters creativity but also encourages students to reflect on the impact of their teachers. By crafting a personalized and visually appealing card, students can convey their gratitude in a memorable way, honoring the dedication and hard work of their educators.
Bookworm Card
The Bookworm Card is a delightful and imaginative way to express appreciation to teachers on their special day. This creative and visually captivating homemade card not only serves as a token of gratitude but also allows students to showcase their artistic abilities in a meaningful manner. Crafting a Bookworm Card is both engaging and rewarding, resulting in a one-of-a-kind expression of appreciation that is certain to leave a lasting impression.
Materials Needed:
- Colored cardstock or heavy paper
- Googly eyes
- Scissors
- Glue
- Markers or gel pens
- Optional: Decorative elements such as stickers or ribbons
Step-by-Step Guide:
-
Card Base: Start by selecting a piece of colored cardstock or heavy paper as the base of the card. Folding the paper in half provides a sturdy and visually appealing canvas for the bookworm design.
-
Bookworm Design: Using scissors, carefully cut out a wavy, worm-like shape from a contrasting color of cardstock. This will serve as the body of the bookworm. Additionally, cut out smaller oval shapes to represent colorful book covers that the bookworm will be "crawling" over.
-
Assembling the Bookworm: Glue the wavy shape onto the front of the card, positioning it to resemble the body of a whimsical bookworm. Then, attach the oval book covers along the length of the body, creating the illusion that the bookworm is playfully making its way across the card.
-
Googly Eyes: Affix googly eyes to the top of the bookworm's body, giving it a charming and endearing appearance. The eyes add a touch of personality to the design, making the bookworm come to life.
-
Personalized Message: Inside the card, students can craft a personalized message to the teacher, expressing their gratitude and admiration. This message serves as a heartfelt accompaniment to the visually striking bookworm design, adding a personal touch to the card.
-
Optional Embellishments: For an extra touch of creativity, students can incorporate optional decorative elements such as stickers, ribbons, or other embellishments to further enhance the card's visual appeal. These additions can complement the bookworm design and add a charming and personalized touch to the overall presentation.
Crafting a Bookworm Card provides students with an opportunity to engage in a hands-on and creative activity while expressing their gratitude to their teachers. The combination of artistic expression and heartfelt words makes this homemade card a cherished token of appreciation. Moreover, the whimsical and playful bookworm design adds a unique and visually captivating element, making the card truly stand out.
The process of creating a Bookworm Card not only fosters creativity but also encourages students to reflect on the impact of their teachers. By crafting a personalized and visually appealing card, students can convey their gratitude in a memorable way, honoring the dedication and hard work of their educators.
Chalkboard Card
The Chalkboard Card is a charming and nostalgic way to convey appreciation to teachers on their special day. This creative and visually captivating homemade card not only serves as a token of gratitude but also allows students to showcase their artistic abilities in a meaningful manner. Crafting a Chalkboard Card is both engaging and rewarding, resulting in a one-of-a-kind expression of appreciation that is certain to leave a lasting impression.
Materials Needed:
- Black cardstock or heavy paper
- White gel pen or chalk marker
- Colored chalk (optional)
- Scissors
- Glue
- Decorative elements such as ribbons or stickers (optional)
Step-by-Step Guide:
-
Card Base: Begin by selecting a piece of black cardstock or heavy paper as the base of the card. Folding the paper in half provides a sturdy and visually appealing canvas for the chalkboard design.
-
Chalkboard Design: Using a white gel pen or chalk marker, carefully create a chalkboard-inspired design on the front of the card. This can include a whimsical "Happy Teacher's Day" message, a drawing of a chalkboard, or a personalized message to the teacher. Encourage students to embrace the nostalgic charm of traditional chalkboard art while adding their own creative flair to the design.
-
Artistic Flourishes: For an extra touch of creativity, students can use colored chalk to add vibrant accents to the chalkboard design. This can include colorful borders, illustrations, or highlights that complement the overall aesthetic. The combination of white and colored chalk adds depth and visual interest to the card, making it truly stand out.
-
Personalized Message: Inside the card, students can craft a heartfelt and personalized message to the teacher, expressing their gratitude and admiration. This message serves as a thoughtful accompaniment to the visually striking chalkboard design, adding a personal touch to the card.
-
Optional Embellishments: For an extra touch of creativity, students can incorporate optional decorative elements such as ribbons, stickers, or other embellishments to further enhance the card's visual appeal. These additions can complement the chalkboard design and add a charming and personalized touch to the overall presentation.
Crafting a Chalkboard Card provides students with an opportunity to engage in a hands-on and creative activity while expressing their gratitude to their teachers. The combination of artistic expression and heartfelt words makes this homemade card a cherished token of appreciation. Moreover, the nostalgic and whimsical chalkboard design adds a unique and visually captivating element, making the card truly stand out.
The process of creating a Chalkboard Card not only fosters creativity but also encourages students to reflect on the impact of their teachers. By crafting a personalized and visually appealing card, students can convey their gratitude in a memorable way, honoring the dedication and hard work of their educators.
Apple Print Card
The Apple Print Card is a delightful and symbolic way to honor teachers on their special day. This creative and visually captivating homemade card not only serves as a token of gratitude but also allows students to showcase their artistic abilities in a meaningful manner. Crafting an Apple Print Card is both engaging and rewarding, resulting in a one-of-a-kind expression of appreciation that is certain to leave a lasting impression.
Materials Needed:
- Red and green washable paint
- White cardstock or heavy paper
- Paper plates
- Knife (to slice the apple)
- Optional: Glitter or decorative elements
Step-by-Step Guide:
-
Card Base: Begin by selecting a piece of white cardstock or heavy paper as the base of the card. Folding the paper in half provides a sturdy and visually appealing canvas for the apple print design.
-
Apple Printing: Pour red washable paint onto a paper plate, ensuring that the layer is thick enough to accommodate the apple printing. Slice an apple in half horizontally to reveal the natural star-shaped pattern inside. Dip the flat surface of the halved apple into the red paint, ensuring an even coating.
-
Creating the Print: Carefully press the painted apple onto the front of the card, applying gentle and even pressure to ensure a clear and vivid apple print. The natural star-shaped pattern of the apple creates a stunning and intricate design that symbolizes knowledge and growth.
-
Leaf Details: Using green washable paint, dip a fingertip or a small brush into the paint and add leaf details to the apple print. This step not only enhances the visual appeal of the card but also adds a touch of creativity to the design.
-
Optional Embellishments: For an extra touch of creativity, students can incorporate optional decorative elements such as glitter or other embellishments to further enhance the card's visual appeal. These additions can complement the apple print design and add a charming and personalized touch to the overall presentation.
-
Personalized Message: Inside the card, students can craft a heartfelt and personalized message to the teacher, expressing their gratitude and admiration. This message serves as a thoughtful accompaniment to the visually striking apple print design, adding a personal touch to the card.
Crafting an Apple Print Card provides students with an opportunity to engage in a hands-on and creative activity while expressing their gratitude to their teachers. The combination of artistic expression and heartfelt words makes this homemade card a cherished token of appreciation. Moreover, the symbolic apple print design adds a unique and visually captivating element, making the card truly stand out.
The process of creating an Apple Print Card not only fosters creativity but also encourages students to reflect on the impact of their teachers. By crafting a personalized and visually appealing card, students can convey their gratitude in a memorable way, honoring the dedication and hard work of their educators.

